SQL (Structured Query Language) is a must if you want to be a Data Analyst or a Data Scientist. I have worked with many online businesses in the last few years, from 5-person startups up to multinational companies with 5000+ employees and I haven’t seen a single company that didn’t use SQL for data analysis (and for many more things) in some way.
SQL is simple and easy to understand. Thus not just engineers, developers or data analysts/scientists can use it, but anyone who is willing to invest a few days into learning and practicing it.
I have created this SQL series to be the most practical and most hands-on SQL tutorial for aspiring Data Analysts and Data Scientists. It will start from the very beginning, so if you have never touched coding, programming, or SQL queries yet, that won’t be an issue!
Let’s go!

Note: as this is going to be a practical tutorial, I encourage you to do the coding part with me. If you do so, you will need a data server to practice. So I recommend through this article first: https://data36.com/data-coding-101-install-python-sql-r-bash/
SQL for data analysis? What is SQL? And why is it good?
What is SQL? SQL stands for Structured Query Language and it is used to communicate with relational databases.
But I like to describe it as Excel on steroids. Here’s the very same data set in Excel and in SQL:
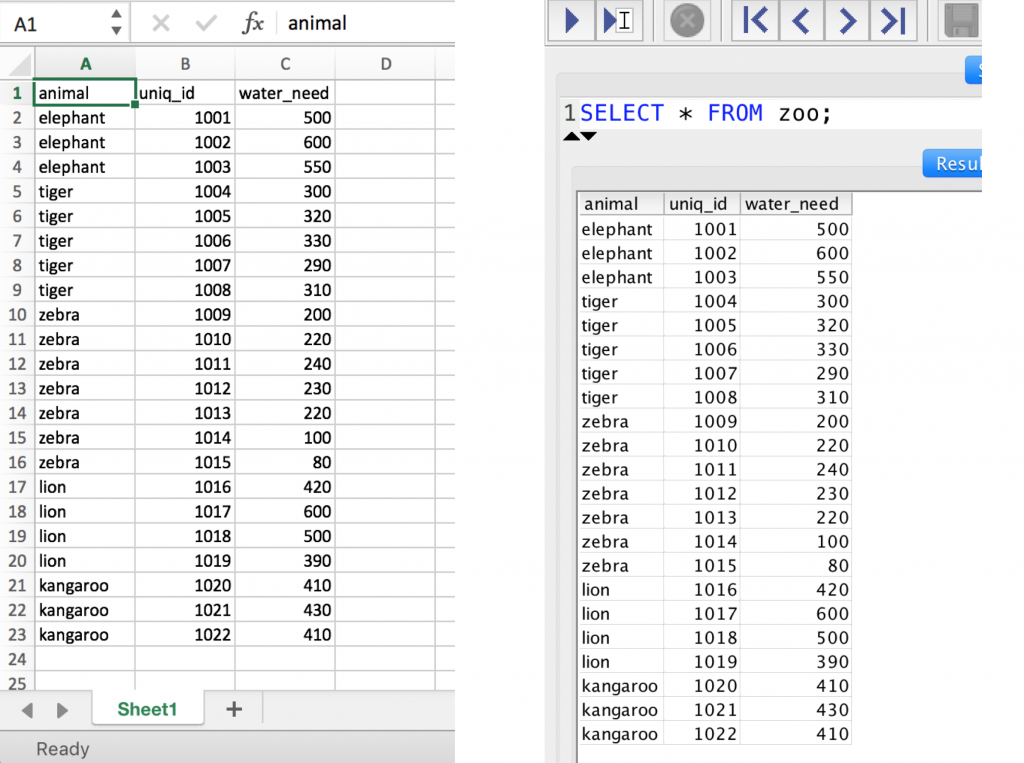
As you can see, SQL and Excel are quite similar. Both of them present data in a 2-dimensional table format with rows and columns. Both are very structured and very transparent.
However there are differences as well. There are 2 major things that you should know as a beginner in SQL:
- The first one is the performance. While Excel is great with smaller data sets, it becomes really slow and inefficient when you use more complex formulas, for example, on a file with 100k+ rows. In SQL even 10M+ rows can be processed fairly quickly. (For instance, in the SQL for Data Analysis article series we use a 7M+ row data set.)
- The second is how you access your data. Excel is primarily a Graphical User Interface (aka. GUI). You can scroll, type your formula, select your range with your cursor, etc. Very handy. In SQL, you don’t have this interface; you have to type SQL queries and commands instead. See the gifs below:
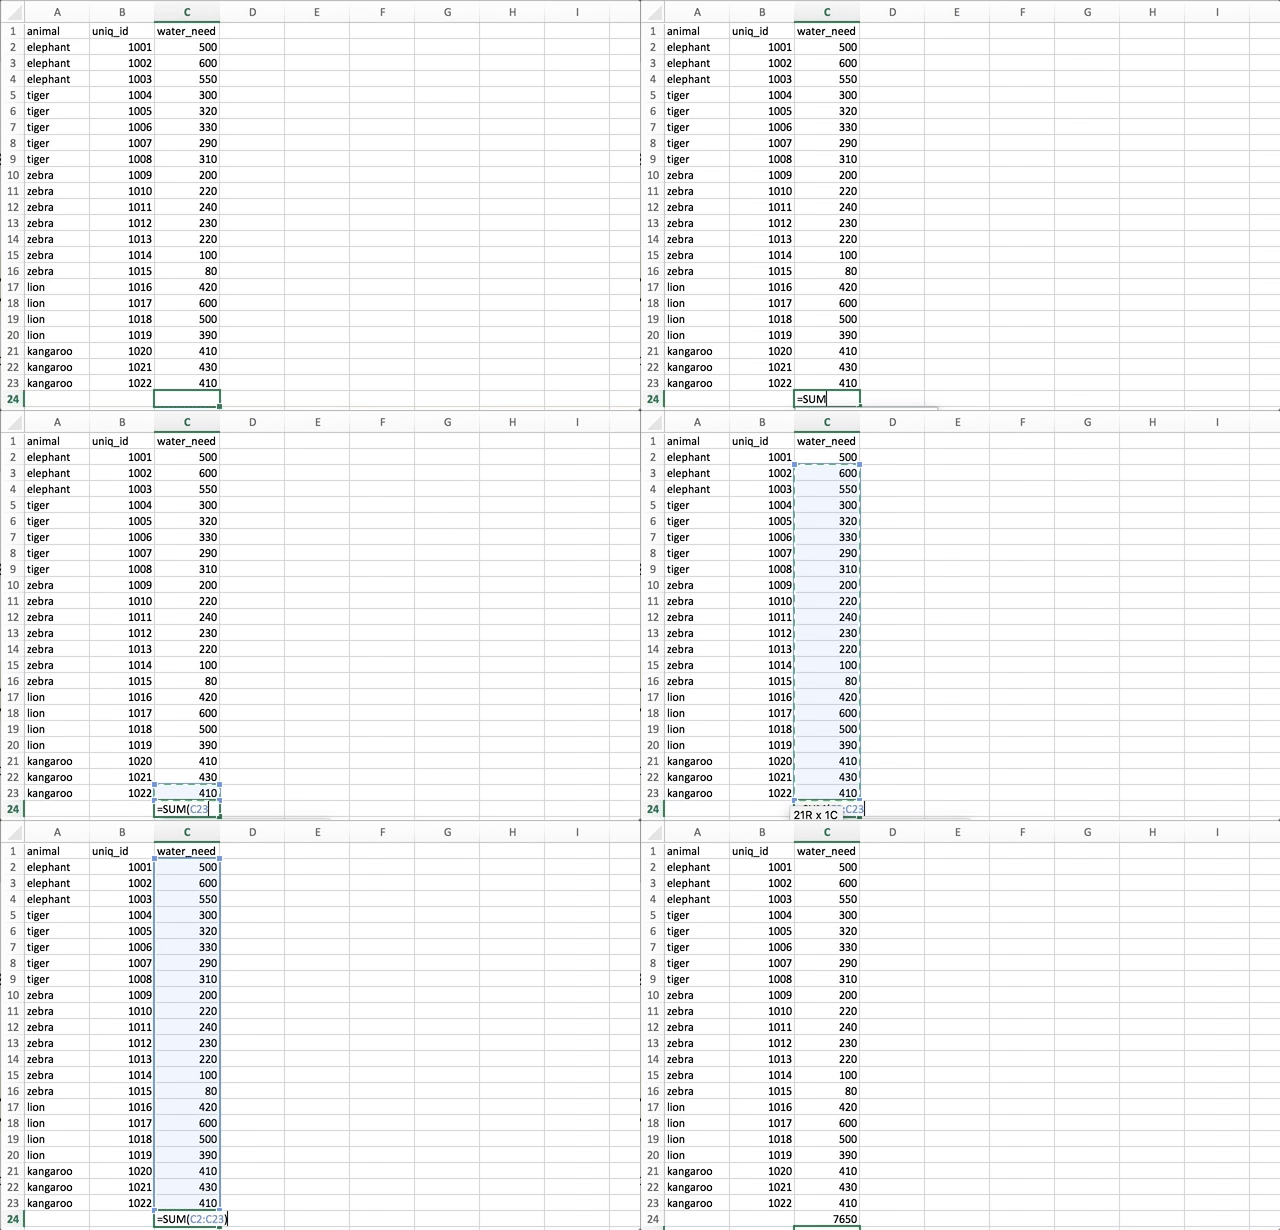
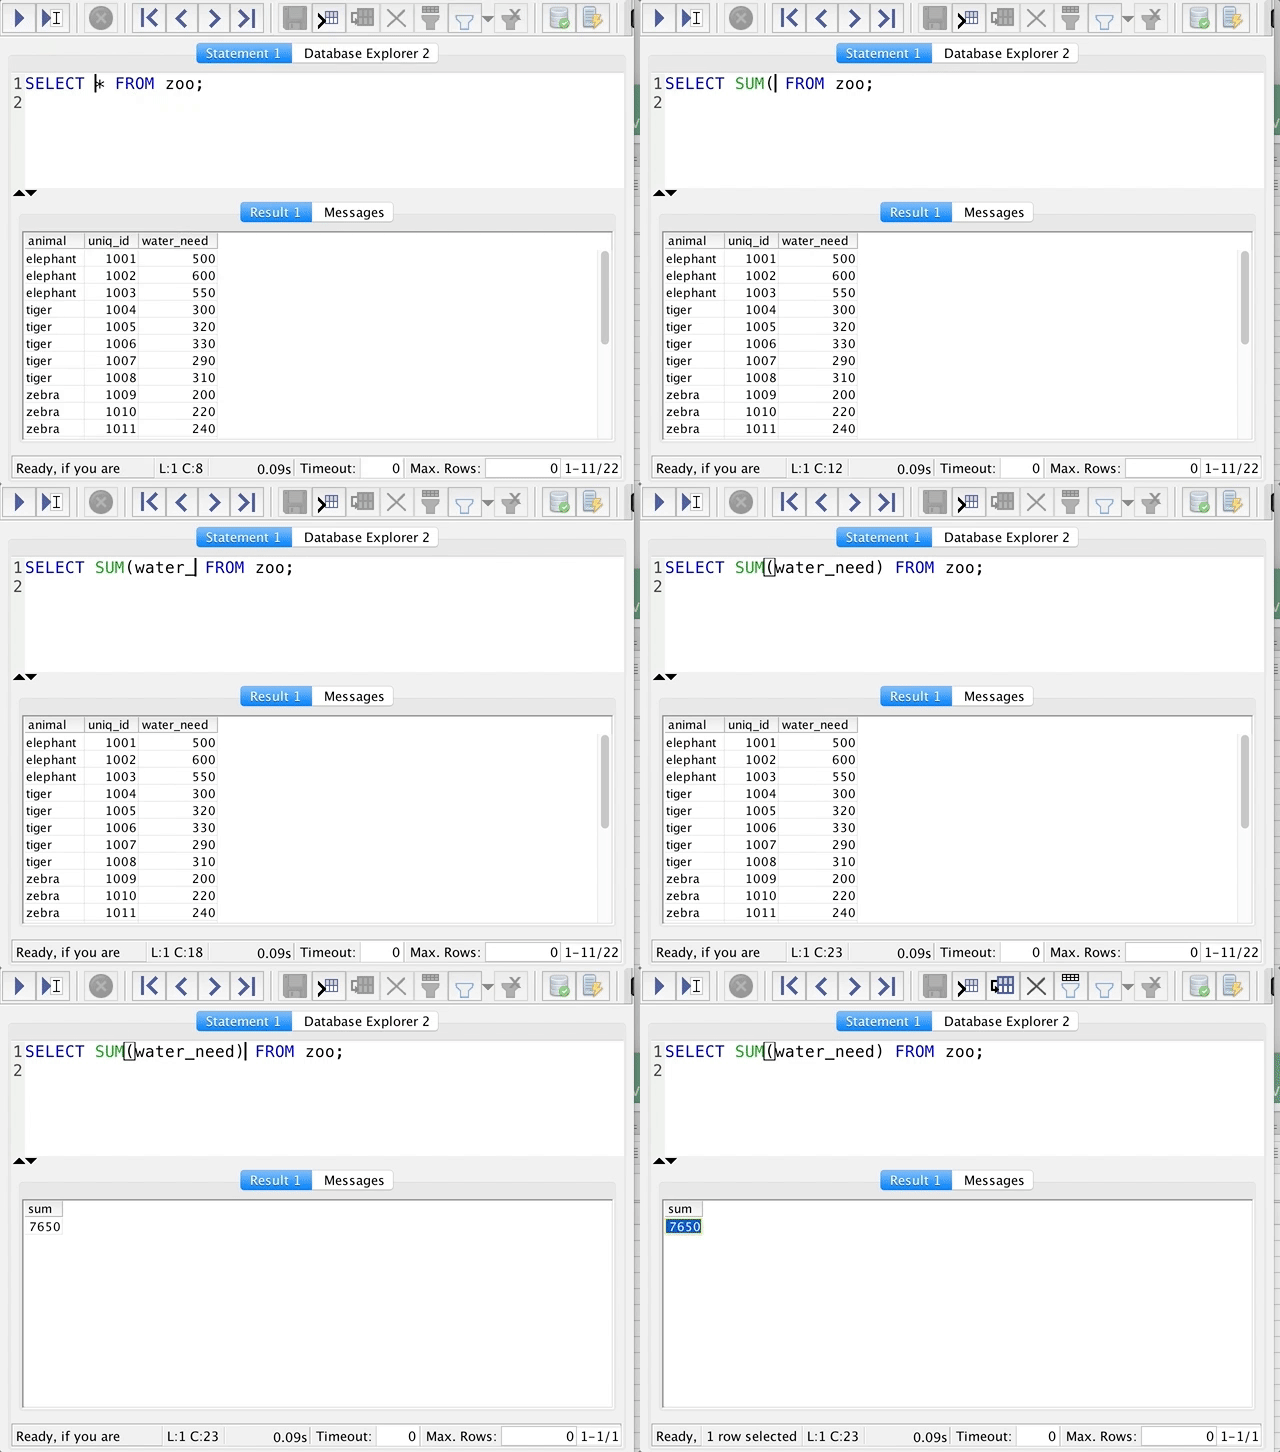
At first, coding can feel like a hassle. But believe me, once you’ve understood the basics of SQL, you will find it much clearer and more much easier than Excel. Here are just two practical advantages: joining tables is much easier in SQL than it is in Excel — and automating and reusing your code will become more convenient with SQL, too.
When you use SQL for data analysis, you will use it (most probably) for simple tasks: aggregating data, joining datasets, using simple statistical and mathematical methods. But you will be able to do these more efficiently and on much larger data sets than before.
What about Python, R and bash?
If you have done my bash or Python tutorials already, you might ask: is SQL better or worse than Python, R or bash?
The answer is… well, there is no categorical answer for this question!
Once you start to apply these languages on real life analytics projects, you will see that Python is good for some things and SQL is good for other things. The main differences will be syntax, “features” and performance… But I really don’t want to go into that topic right now, because:
a) I promised a practical tutorial and that topic is a bit more theoretical (even philosophical)
b) it’s a bit more advanced anyway.
c) at this level, you don’t have to worry about performance at all – and when you will, most probably a senior data scientist or a data engineer will help you out.
Note: Some big data frameworks (eg. Spark, Hive, etc.) also support SQL!
But now, let’s jump on the practical part!
How to Become a Data Scientist
(free 50-minute video course by Tomi Mester)
Just subscribe to the Data36 Newsletter here (it’s free)!
Thank you!
You have successfully joined our subscriber list.
STEP #0 – Install your own SQL environment to practice!
Note: if you have your own SQL environment already, you can skip further to STEP 2 – Get some data!
First, please go through this article. It’s a step by step tutorial about how to set up your own Data Server and install bash, Python, R and SQL on it.
Note: in my “SQL for Data Analysis” articles I’ll use postgreSQL! There are other types of SQL languages (another well-known open source one is mySQL). The good news is that all SQL languages are very similar – if you learn postgreSQL, it will be a matter of hours (or even minutes) to adapt to another one. I picked postgreSQL because it’s very popular (lots of the online businesses are using it) and it’s said to be the most advanced open source SQL language.
If you went through the above-linked article, please double-check that you have these 3 things:
- A data server with Terminal (or iTerm) access.
- PostgreSQL installed on your data server.
- Pgadmin4 (or preferably SQL Workbench) on your computer.
If something is missing, please read the article again: Install bash, Python, R and SQL!
Note: As an SQL query tool I prefer SQL Workbench over pgadmin4, but this is kind of question of taste. In my SQL for data analysis tutorials, I’ll use SQL Workbench (here’s a tutorial about how to install it on your computer), but feel free to use pgadmin4. It won’t make any difference!
STEP 1 – Login to your SQL database via the command line!
Great times! You will write your first SQL query in a minute! First access your SQL database from the command line. You have done this once; we will just repeat the same process:
- open Terminal (or iTerm).
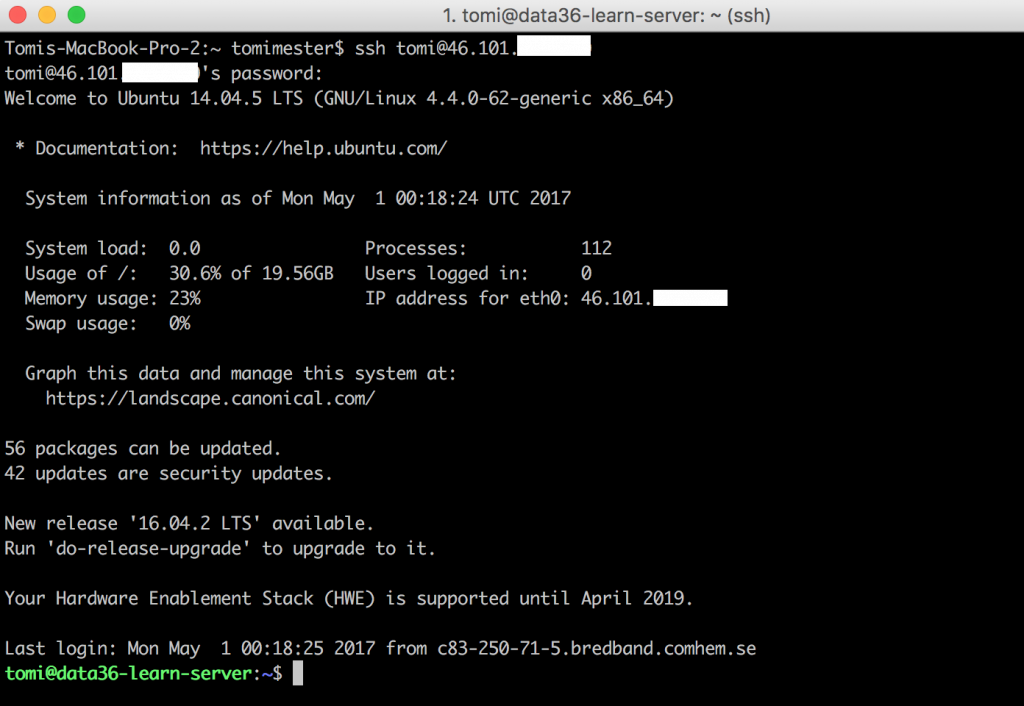
sshto your data server
In my case I type:ssh tomi@[my_ip_adress]- Once I’m logged into the server, I want to access my postgreSQL database. As I have already given access to my user, I just have to type this command.
psql -U tomi -d postgres–»psqlis the command itself and-Uspecify your username (in my casetomi), and-dspecify your database’s name (in my casepostgres– the same goes for you.) Your prompt should change to this:postgres=>And done! You have full access to your SQL database!
- As a test, type this:
\dtIt will list all your data tables. You have only one so far… But this will change soon!
Again! If something is missing or not working, please re-read this article: Install bash, Python, R and SQL!
Note: you will see sometimes that SQL databases are referred as “relational databases“. For our purpose “relational database” and “SQL database” will be pretty much the same.
STEP 2 – Get some data!
In this tutorial, we will use a really small data set, called zoo.
You can download it from here in raw .tsv format and you can just play around with it in Excel. Or in bash/command line, if you have already done the bash tutorials.
But let’s continue with SQL:
1) Create a table to load our data into. In another tutorial dedicated to the CREATE TABLE command, I explain exactly what’s going on here, but for now, don’t worry too much about it — you can simply copy-paste these few lines into your terminal:
CREATE TABLE zoo (
    animal varchar(10),
    uniq_id integer PRIMARY KEY,
    water_need integer
);

2) Double check if the table was created:\dt

Weee! We have our new data table: zoo!
3) Load the data!
Again: I explain what do you do when you insert data into an SQL table in another article — but now, don’t bother reading it, just copy-paste this SQL query:
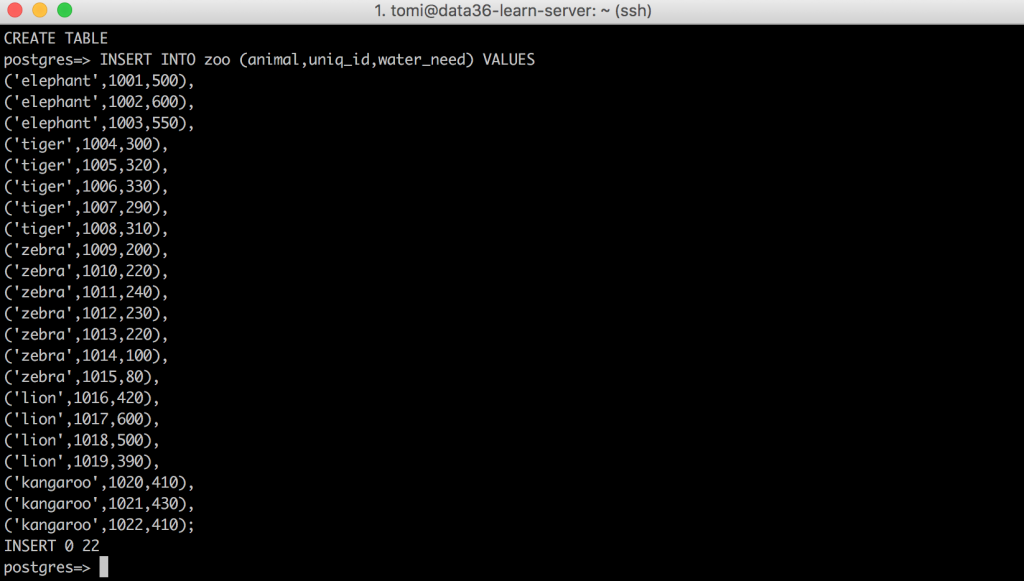
INSERT INTO zoo (animal,uniq_id,water_need) VALUES
    ('elephant',1001,500),
    ('elephant',1002,600),
    ('elephant',1003,550),
    ('tiger',1004,300),
    ('tiger',1005,320),
    ('tiger',1006,330),
    ('tiger',1007,290),
    ('tiger',1008,310),
    ('zebra',1009,200),
    ('zebra',1010,220),
    ('zebra',1011,240),
    ('zebra',1012,230),
    ('zebra',1013,220),
    ('zebra',1014,100),
    ('zebra',1015,80),
    ('lion',1016,420),
    ('lion',1017,600),
    ('lion',1018,500),
    ('lion',1019,390),
    ('kangaroo',1020,410),
    ('kangaroo',1021,430),
    ('kangaroo',1022,410);
If everything is fine, you should get this message returned to your screen:INSERT 0 22
The most important SQL statement: SELECT
It’s time to learn the most essential SQL statement. This is:
SELECT * FROM table_name;
You will use SELECT every time you want to read, filter, transform, aggregate or do anything with your data. 90% of the things I’ll show you in these tutorials will be modifications of this single query. For a start, let’s SELECT everything from our zoo data table.
SELECT * FROM zoo;
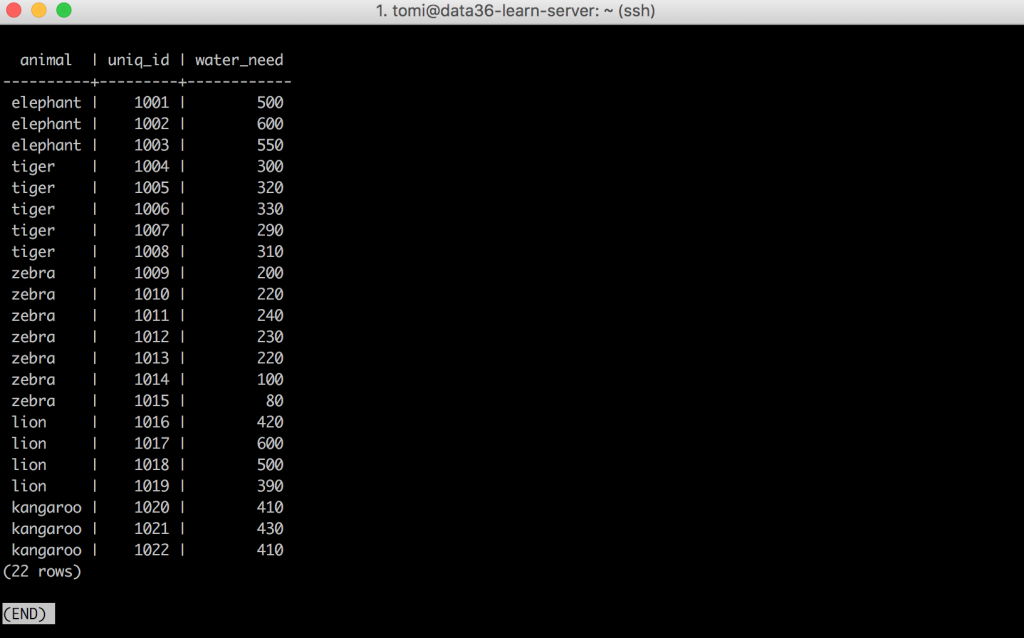
Terminal returned my full SQL table in a nice and readable format. (If you want to quit from this view, hit Q on your keyboard!)
Let’s break it down!
SELECT * FROM zoo;
Maybe it doesn’t even need an explanation (as the syntax itself is really close to English language) but just in case:
SELECTis the main statement, and it tells SQL that we want to read something from our data table.*usually refers to “everything” – in this case it means that we would like to select every column.FROMtells SQL that we are going to specify the table from which we want to retrieve data.zoois the name of the table. You can replace this with any other table name, if you have more tables.;–» This is really important! In SQL, every query should be closed by a semicolon. If you accidentally miss it, SQL will expect you to continue your query and won’t return anything on your screen.

You will use this syntax a lot from now on!
SELECT columns
You can replace the * character with actual column names. Try this query:
SELECT animal, water_need FROM zoo;
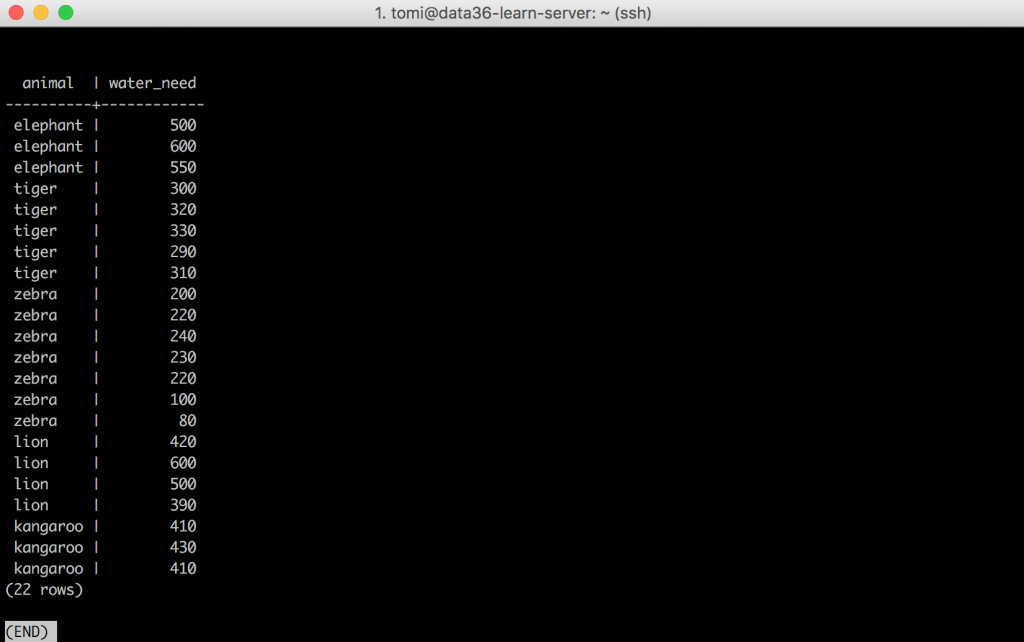
(Again, if you want to quit from this view, please hit Q on your keyboard.)
Exactly what you have expected: you got the columns animal and water_need on your screen, but not the uniq_id anymore.
This way you can SELECT any columns. You just have to specify the name of the columns separated with commas.
You can do something like this too:
SELECT animal, animal, animal FROM zoo;
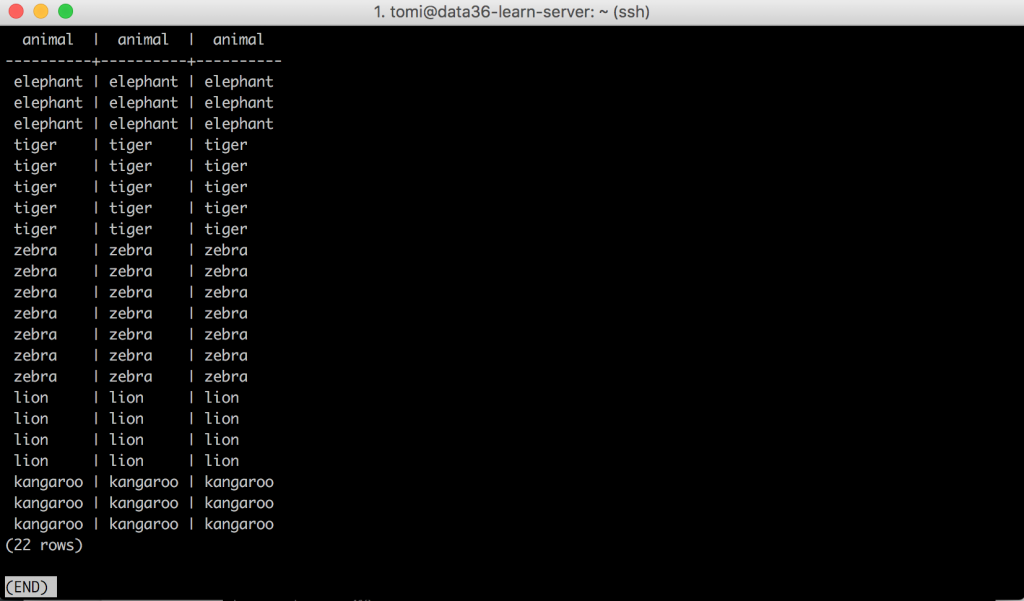
You would see the same column multiple times… But as it makes no sense, I’d recommend just simply not doing it. 🙂
The Junior Data Scientist's First Month
A 100% practical online course. A 6-week simulation of being a junior data scientist at a true-to-life startup.
“Solving real problems, getting real experience – just like in a real data science job.”
Show the first few lines of your data – LIMIT clause
Right now we are working with a data table of 22 rows. But in the next episode of this SQL for Data Analysis series we will use a 7M+ row data file to do more advanced analytics. That’s a big change and in that case it will be more than reasonable not to print all your data on your screen every time, but take a small sample of the first few lines instead.
To do this, use the LIMIT clause – which is a small extension on the top of your previously introduced base-query:
SELECT * FROM zoo LIMIT 10;
This will print the first 10 lines only. (Remember how was it done in bash? It was the head -10 command.)
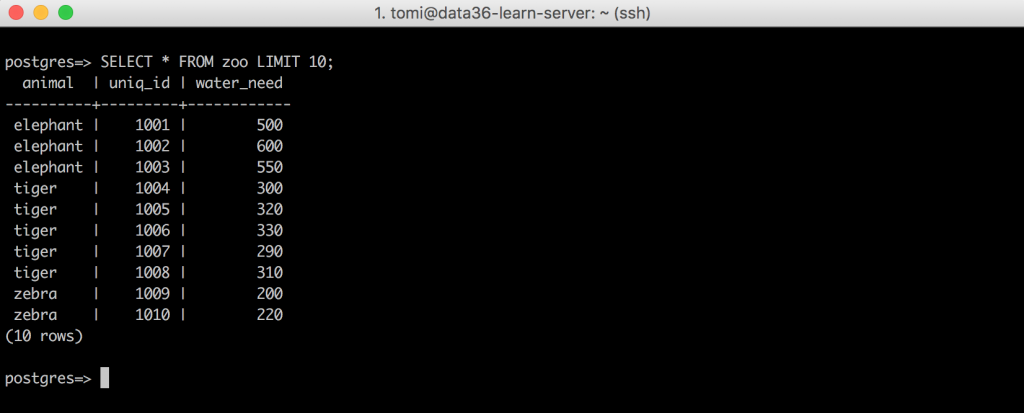
Of course you can decide how many lines you want to print and specify that right after LIMIT!
Filter specific rows – WHERE clause
We have selected the first few rows. It’s fine… But it’s even more useful, if you can filter for specific rows based on values in them. It can be done with the WHERE clause. Eg.:
SELECT * FROM zoo WHERE animal = 'elephant';

Let’s break this down:
SELECT * FROM zoo–» this is the “base-query”WHERE–» this tells SQL that you want to filter for a given valueanimal = 'elephant'–»animalis the name of the column where you are looking for the given value. Andelephantis the value itself. In SQL, you have to add the column where you are looking for your value.;–» Never forget the semicolon!
In the very next episode of the SQL for Data Analysis series, I’ll go into details on how to get the most out of WHERE! For now it’s enough that you know it’s a filter to retrieve rows containing specific values.
Test yourself #1
This is an introductory article, so this first assignment will be a pretty easy one as well:
Select the first 3 zebras from the zoo table!
The solution will be more or less the summary of this article!
.
.
.
Ready?
Here’s my solution:
SELECT * FROM zoo WHERE animal = 'zebra' LIMIT 3;

SQL is easy, right?
And one more thing: the syntax
Later on, I’ll show you some best practices on how to keep your SQL queries clean and efficient, but in this first article let me emphasize 2 things only:
- All your queries should end with a semicolon (
;). If you accidentally miss it, SQL will expect you to continue your query and won’t return anything on your screen. Eg.postgres=> SELECT * FROM zoopostgres->
Not so good… This is better:postgres=> SELECT * FROM zoo; - SQL is not case-sensitive when it comes to the SQL keywords (
SELECT,WHERE,LIMIT, etc…). Eg.SELECT * FROM zoo;
Works just as much as:select * from zoo;
The case-sensitivity of table names, column names and values are the question of your settings. In our current setup (with postgreSQL) the table names and column names are not case sensitive, either, but the field values are. Eg.SELECT * FROM zoo WHERE animal = 'elephant';–» WORKSSELECT * FROM ZOO WHERE ANIMAL = 'elephant';–» WORKSSELECT * FROM ZOO WHERE ANIMAL = 'ELEPHANT';–» DOES NOT WORK
Note that conventionally most people use SQL Keywords as caps (SELECT, WHERE, LIMIT, etc…). It helps a lot with reading your code. But more about this later.
Conclusion
Quite a nice first step to learn and use SQL for data analysis! Congrats! Now you can write your first very basic queries…
But this is just the beginning! Let’s continue with the next episode and learn how you can use the WHERE clause to filter stuff from your data sets as a pro.
- If you want to learn more about how to become a data scientist, take my 50-minute video course: How to Become a Data Scientist. (It’s free!)
- Also check out my 6-week online course: The Junior Data Scientist’s First Month video course.
Cheers,
Tomi Mester
Cheers,
Tomi Mester

 And done! You have full access to your SQL database!
