
In my previous SQL for data analysis tutorial, I briefly mentioned that I prefer SQL Workbench over pgadmin4 for SQL querying. Today I will show you how you can install it too! The setup process is more or less the same on Mac, Windows and Linux, but I’ll highlight the slight differences in my article – and you can always select the appropriate solutions for yourself.
STEP 1: Download and install Java 8+ on your computer!
SQL Workbench works with Java8+, so until you have this package, you won’t be able to run it! Java will be useful anyway, so simply download and install it from here:
https://java.com/en/download
It is fully free – provided by Oracle.
STEP 2: Download SQL Workbench!
It’s free too and you can get it here:
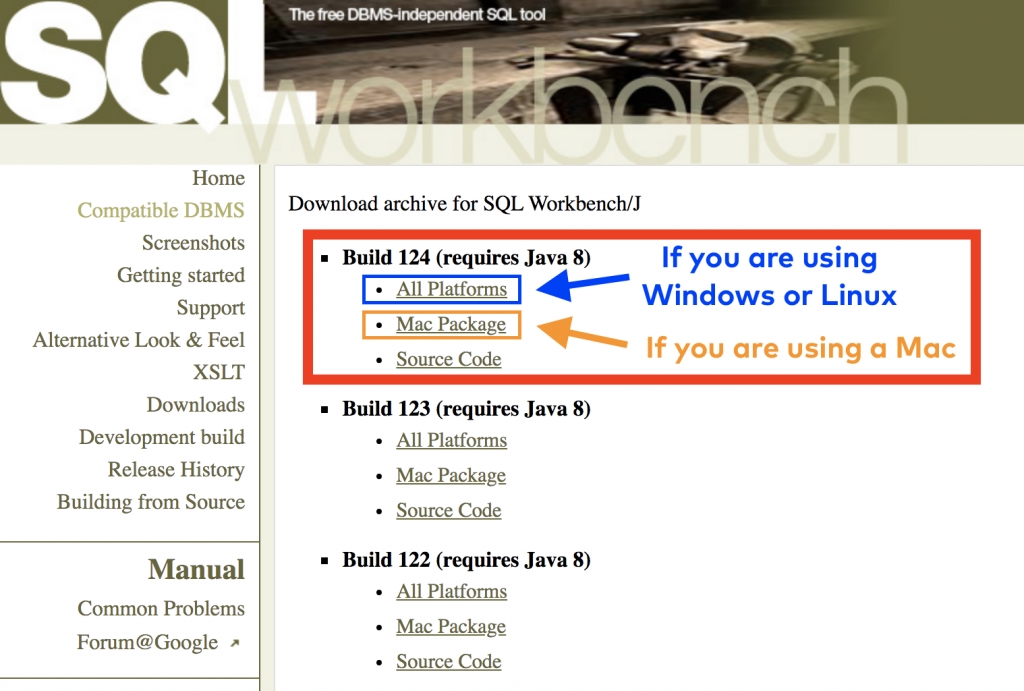
Here, you’ll see all the previously released SQL Workbench versions.
When I write this article, Build 124 is on the top. Whether it’s on the top for you as well or not, please go and find this exact version: Build 124.
And make sure you are downloading the right version for your operating system:
UPDATE! As of 2023-02-06, in some countries the above linked website doesn’t work. I don’t know why but just in case, as a temporary solution, I’ve uploaded the installation files to a Google Drive folder, too. You can find them here: SQL Workbench backup files.
STEP 3: Open SQL Workbench!
Once you have downloaded your file, unzip it! You don’t have to install anything, just run the SQL Workbench application. If you have trouble opening it:
- On Windows: right click on SQLWorkbench.exe –» Run as administrator
- On Mac: right click on SQLWorkbenchJ –» Open
STEP 4: Download the postgreSQL plugin!
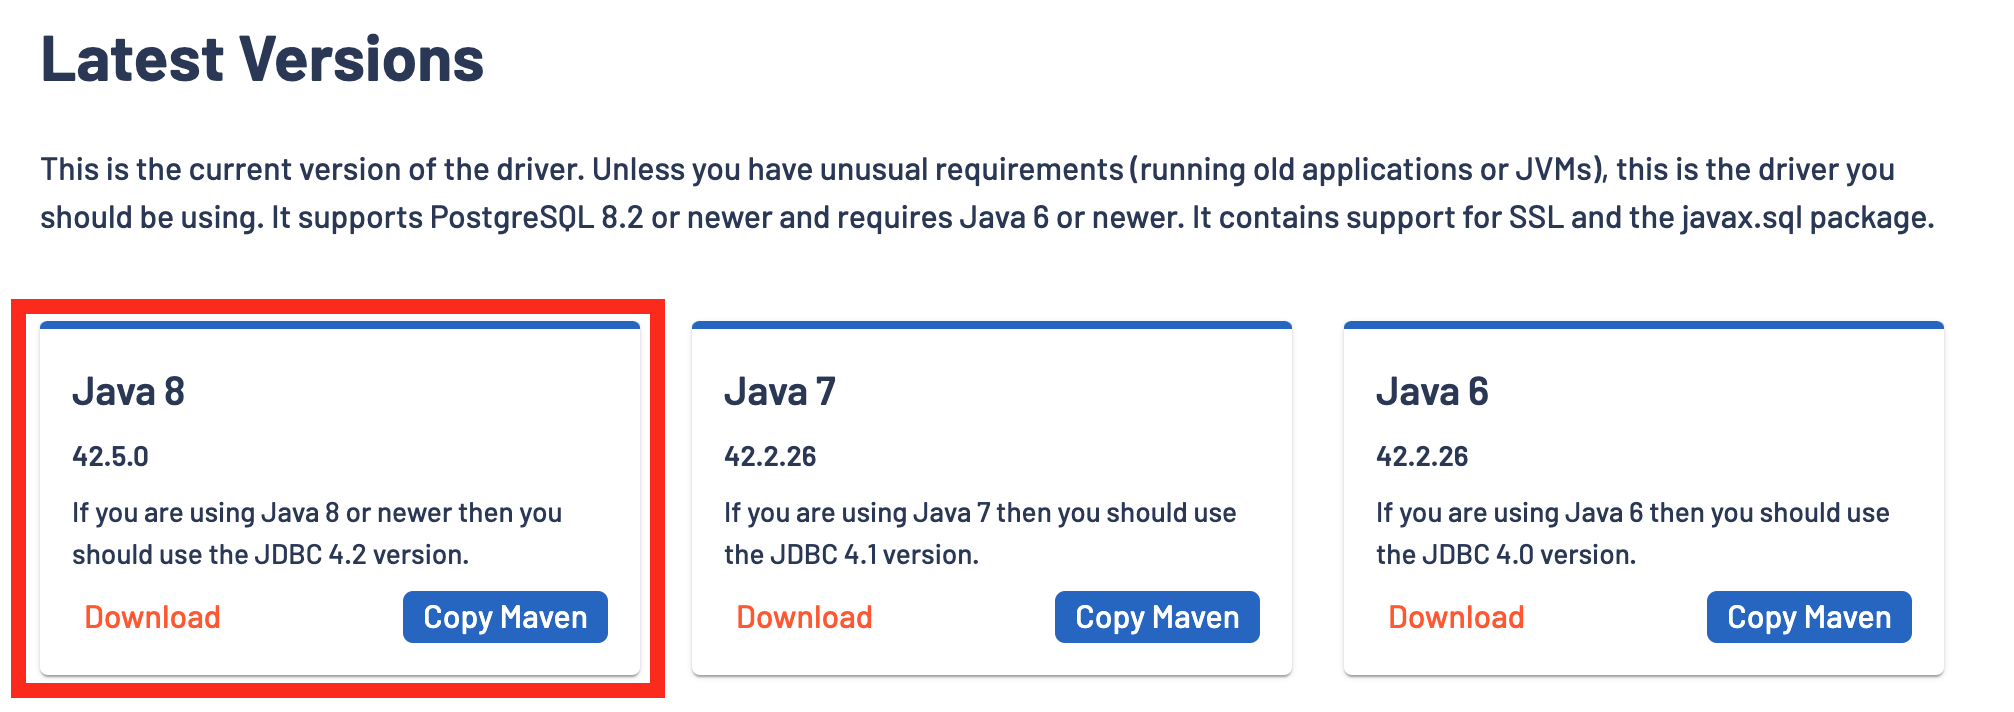
Unfortunately you have to download a postgreSQL plugin too!
Link: https://jdbc.postgresql.org/download/#latest-versions
Read the instructions and download the appropriate version (in our case, this is going to be the one that is compatible with Java8+). Don’t worry about too much about the exact version number — but just in case when I’m updating this article (January, 2024), the right file is: PostgreSQL JDBC 4.2 Driver, Java 8, 42.7.1 — if a new one comes out in the mean time you can always go with the latest version.
Important! Put this file in a folder where it is safe and where you won’t accidentally move or remove it.
STEP 5: Connect to your server!
Note: if you don’t have your own data server to practice yet, set one up here: Install Python, R, SQL and bash!
When you run your SQL Workbench application, the first window will be the “Connect window.” If not, you can still access it from File –» Connect Window.
It requires a few pieces of information to make the connection:
Name: You have to name your connection, which can be anything. (I’ve typed in: “My first postgreSQL connection”)
Driver: Select PostgreSQL! You will get an error message. Something like this:
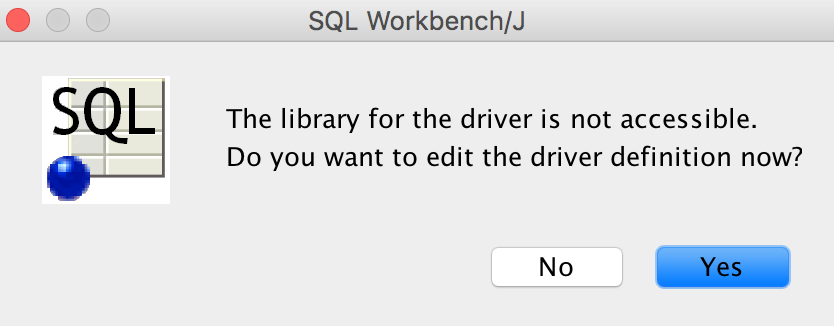
Click YES!
As you can see, SQL Workbench can’t find the postgreSQL driver by itself… Let’s help it out and click the little Folder icon.

Go and find the driver that you just downloaded during STEP 4. Open it!
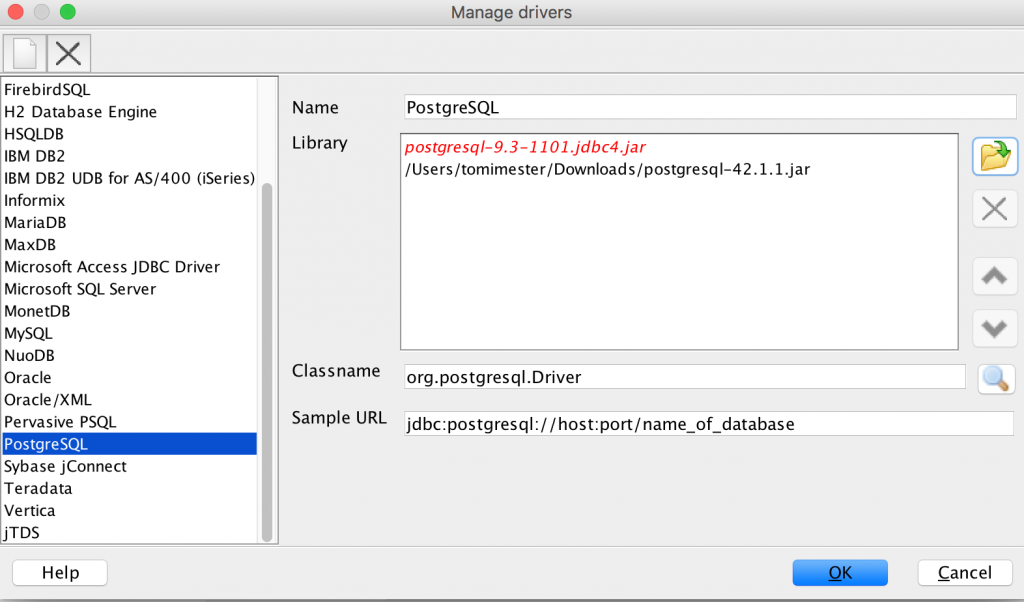
If you can see it on the “Library list” (shown in the above picture), click OK and your driver will be set!
URL: The URL has 4 parts.

- The
jdbc:postgresql://is a constant in our case. You don’t have to change it. - The next part (red) will be the IP address of your server. Type your server’s IP address (the format should be something like:
46.101.100.000) - The next step (green) is the port number. If you followed my tutorials so far, this is going to be
5432for you as well! - Finally provide the name of the database that you want to access (it can be anything that has been created before… If you followed my tutorials so far, it will be
postgres!)
Note: usually when you get access to a database, you get this information (IP address, port, database name) from the admin of the database.
Username: This should be the username that you set up when you installed your data server. (e.g. for me it’s “dataguy” or “tomi”)
Password: Your previously set password.
If you did everything properly, you should have something like this on your screen:
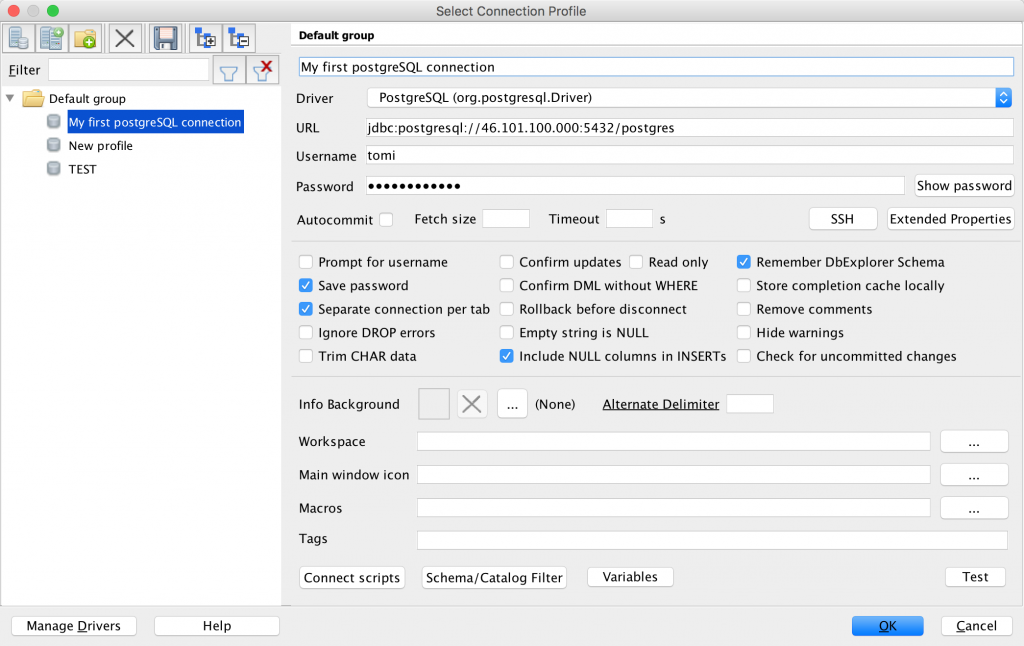
Click OK and the connection will be established!
Congrats! You are in!
Note: It’s worth saving your connection details so you don’t have to type them again!
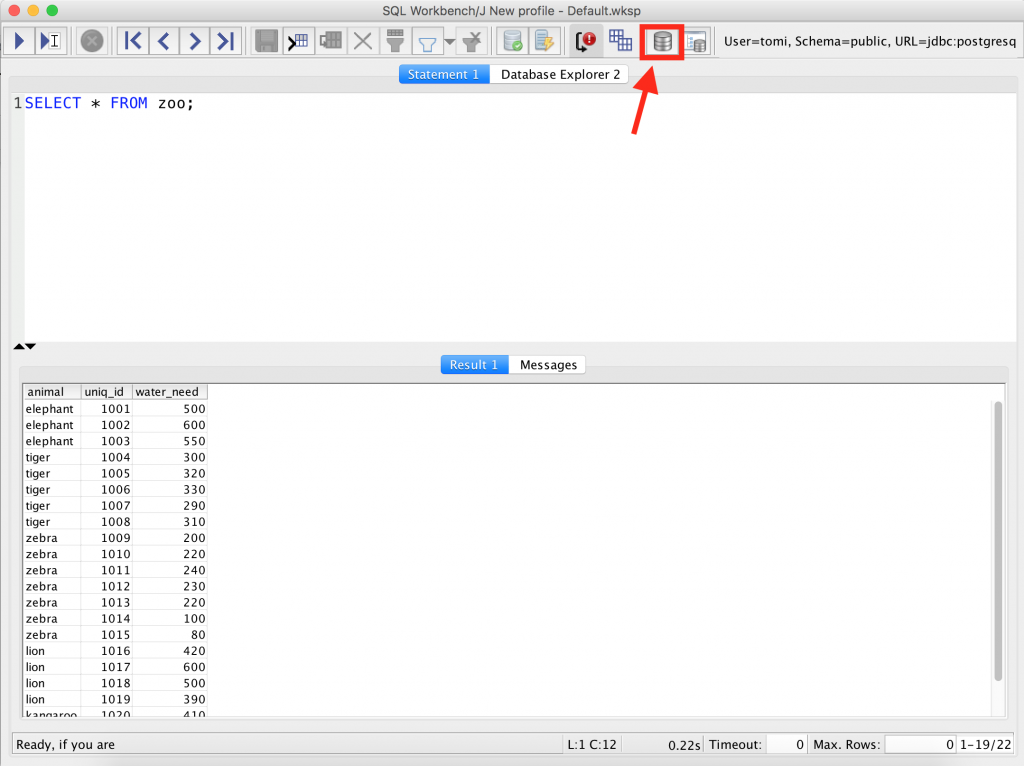
STEP 6: Run a test query!
As a last step, just run some sample queries to test out your new SQL query tool!
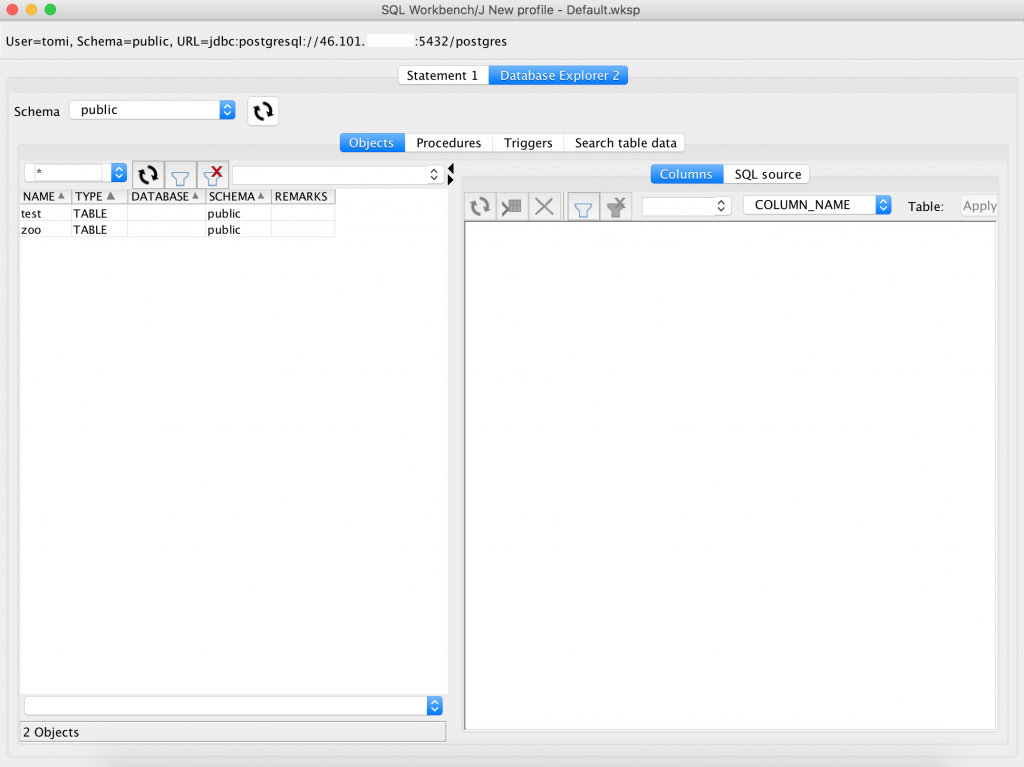
You can try the classy SELECT * FROM zoo; or you can go ahead and explore your data tables via the Database Explorer feature:
Conclusion
Aaand… That’s it for today! You have a cool free SQL query tool, SQL Workbench. From now on you can use either this or pgadmin4 to complete my SQL for data analysis tutorials!
- If you want to learn more about how to become a data scientist, take my 50-minute video course: How to Become a Data Scientist. (It’s free!)
- Also check out my 6-week online course: The Junior Data Scientist’s First Month video course.
Cheers,
Tomi Mester
Cheers,
Tomi Mester