
This is the ultimate step by step guide to installing Python, SQL and Bash and starting to learn coding for data science. It takes no more than 60 minutes and it’s 100% understandable for non-developers, too!
If you want to be a data scientist, a data analyst or just simply want to analyze the data of your business, sooner or later you will have to learn coding.
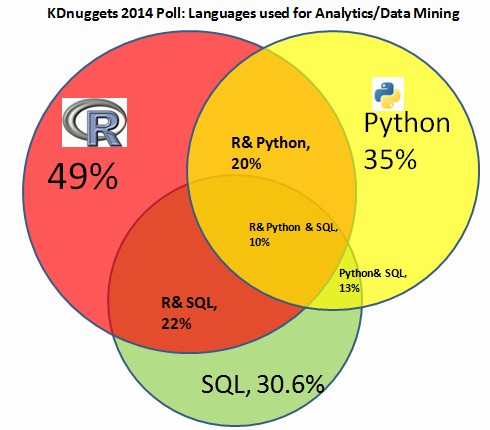
There are 4 important languages that you should know:
- SQL
- Python
- R
- Bash (sometimes referred to as “the command line”)
Here, on the Data36 blog, I provide many articles about coding for data science. However, as a foundation of every further conversation on this topic, you need to have Python, SQL and bash on your computer. Once you have them set up, you will be able to practice by yourself (and later build your own data projects too), as well as follow, practice and learn via my tutorial articles and videos.
In this article I’ll take you through getting these data tools step by step. At the end of the article you will have your own fully functioning data infrastructure with:
- bash (and mcedit),
- postgreSQL (and pgAdmin4),
- Python 3 (and Jupyter) and
Good news:
- I will show you the exact same tools that are used in real life data science projects.
- All these tools are completely free!
Yes, the funny thing is that most of the super-scientific stuff that you can read about in different data science articles are made using open-source data tools. How cool is that?
Anyway: first things first – let’s go and install Python, SQL and bash on your computer!
Note 1: The article was last updated on 20 August 2025.
Note 2: This article is more enjoyable if you do the steps and the coding part with me. If you are reading this on your mobile, I suggest saving the article for later (e.g. send it to yourself in e-mail) and coming back here when you have ~60 minutes and are on your Desktop computer or notebook.
Note 3: To have your data infrastructure correctly set up, you simply need to follow my instructions down here step by step — most of the time just copy-paste my code. So don’t be afraid to work on Terminal and writing code. It’s easy, even if you are not a programmer or data scientist (yet). The article is long, though, because I tried to explain each step as much as I could.
The Operating System
I use all my data tools (Python, SQL, Jupyter, etc.) on Ubuntu – which is a Linux operating system – and I suggest you do the same. My personal computer is a Mac, but you can have a PC too. In this case it doesn’t really matter, because we won’t install Ubuntu on our computer, but access it via the internet.
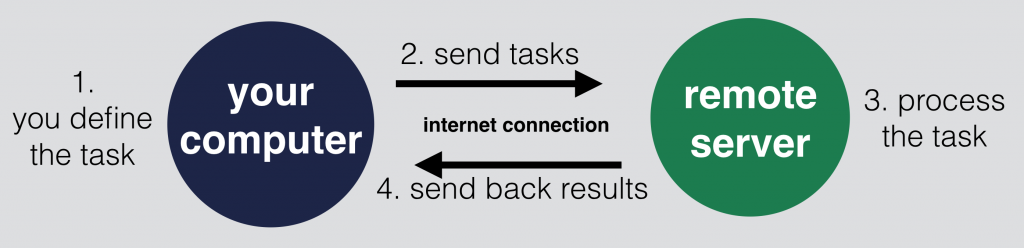
What we will do here is to connect to a remote server – type commands and make the remote server do the data analyses instead of our local computer.
(Note that you can set up Ubuntu on your personal/work computer too, if you really want to. But this is something we usually don’t do in real life, because with that solution we would limit our data processes to our computer’s capacity. Also we would lose some cool features.)
If you use a remote server for data analysis, you will be able to:
- Access your data infrastructure from any computer with a login-name and a password (even if you lose or break your personal notebook). Don’t worry, nobody else will able to access your data on your remote server – it is completely private.
- Automate your data scripts (e.g. make them run every 3 hours, even if you turn off your notebook).
- Scale your computing power. You won’t be limited to your own computer’s capacity. Renting a few more processors or more memory is just one click away if you are using a remote server.
- Use Ubuntu without installing it on your computer.
The only downside of going with a remote server is that it costs money. Fortunately these prices are very low (starting at $6 per month).
I’ve been creating all my coding for data science tutorials (videos and articles) using the exact same data stack that I’ll describe in this article. So if you want to follow me, it will be much easier for you if you go through this article step by step and set up everything like I do. To make everything work properly, please make sure that you don’t miss any of the steps and you do them in the same order as it’s written here! The most important parts of course are the code snippets. All the snippets are marked:
like this
or
like this
Step 1: Get your remote server!
The next step is to find a hosting service to create your first remote server. I used many services and so far I’ve found DigitalOcean to be the best. You can rent here a server for $6/month (this will be perfect for us for now).
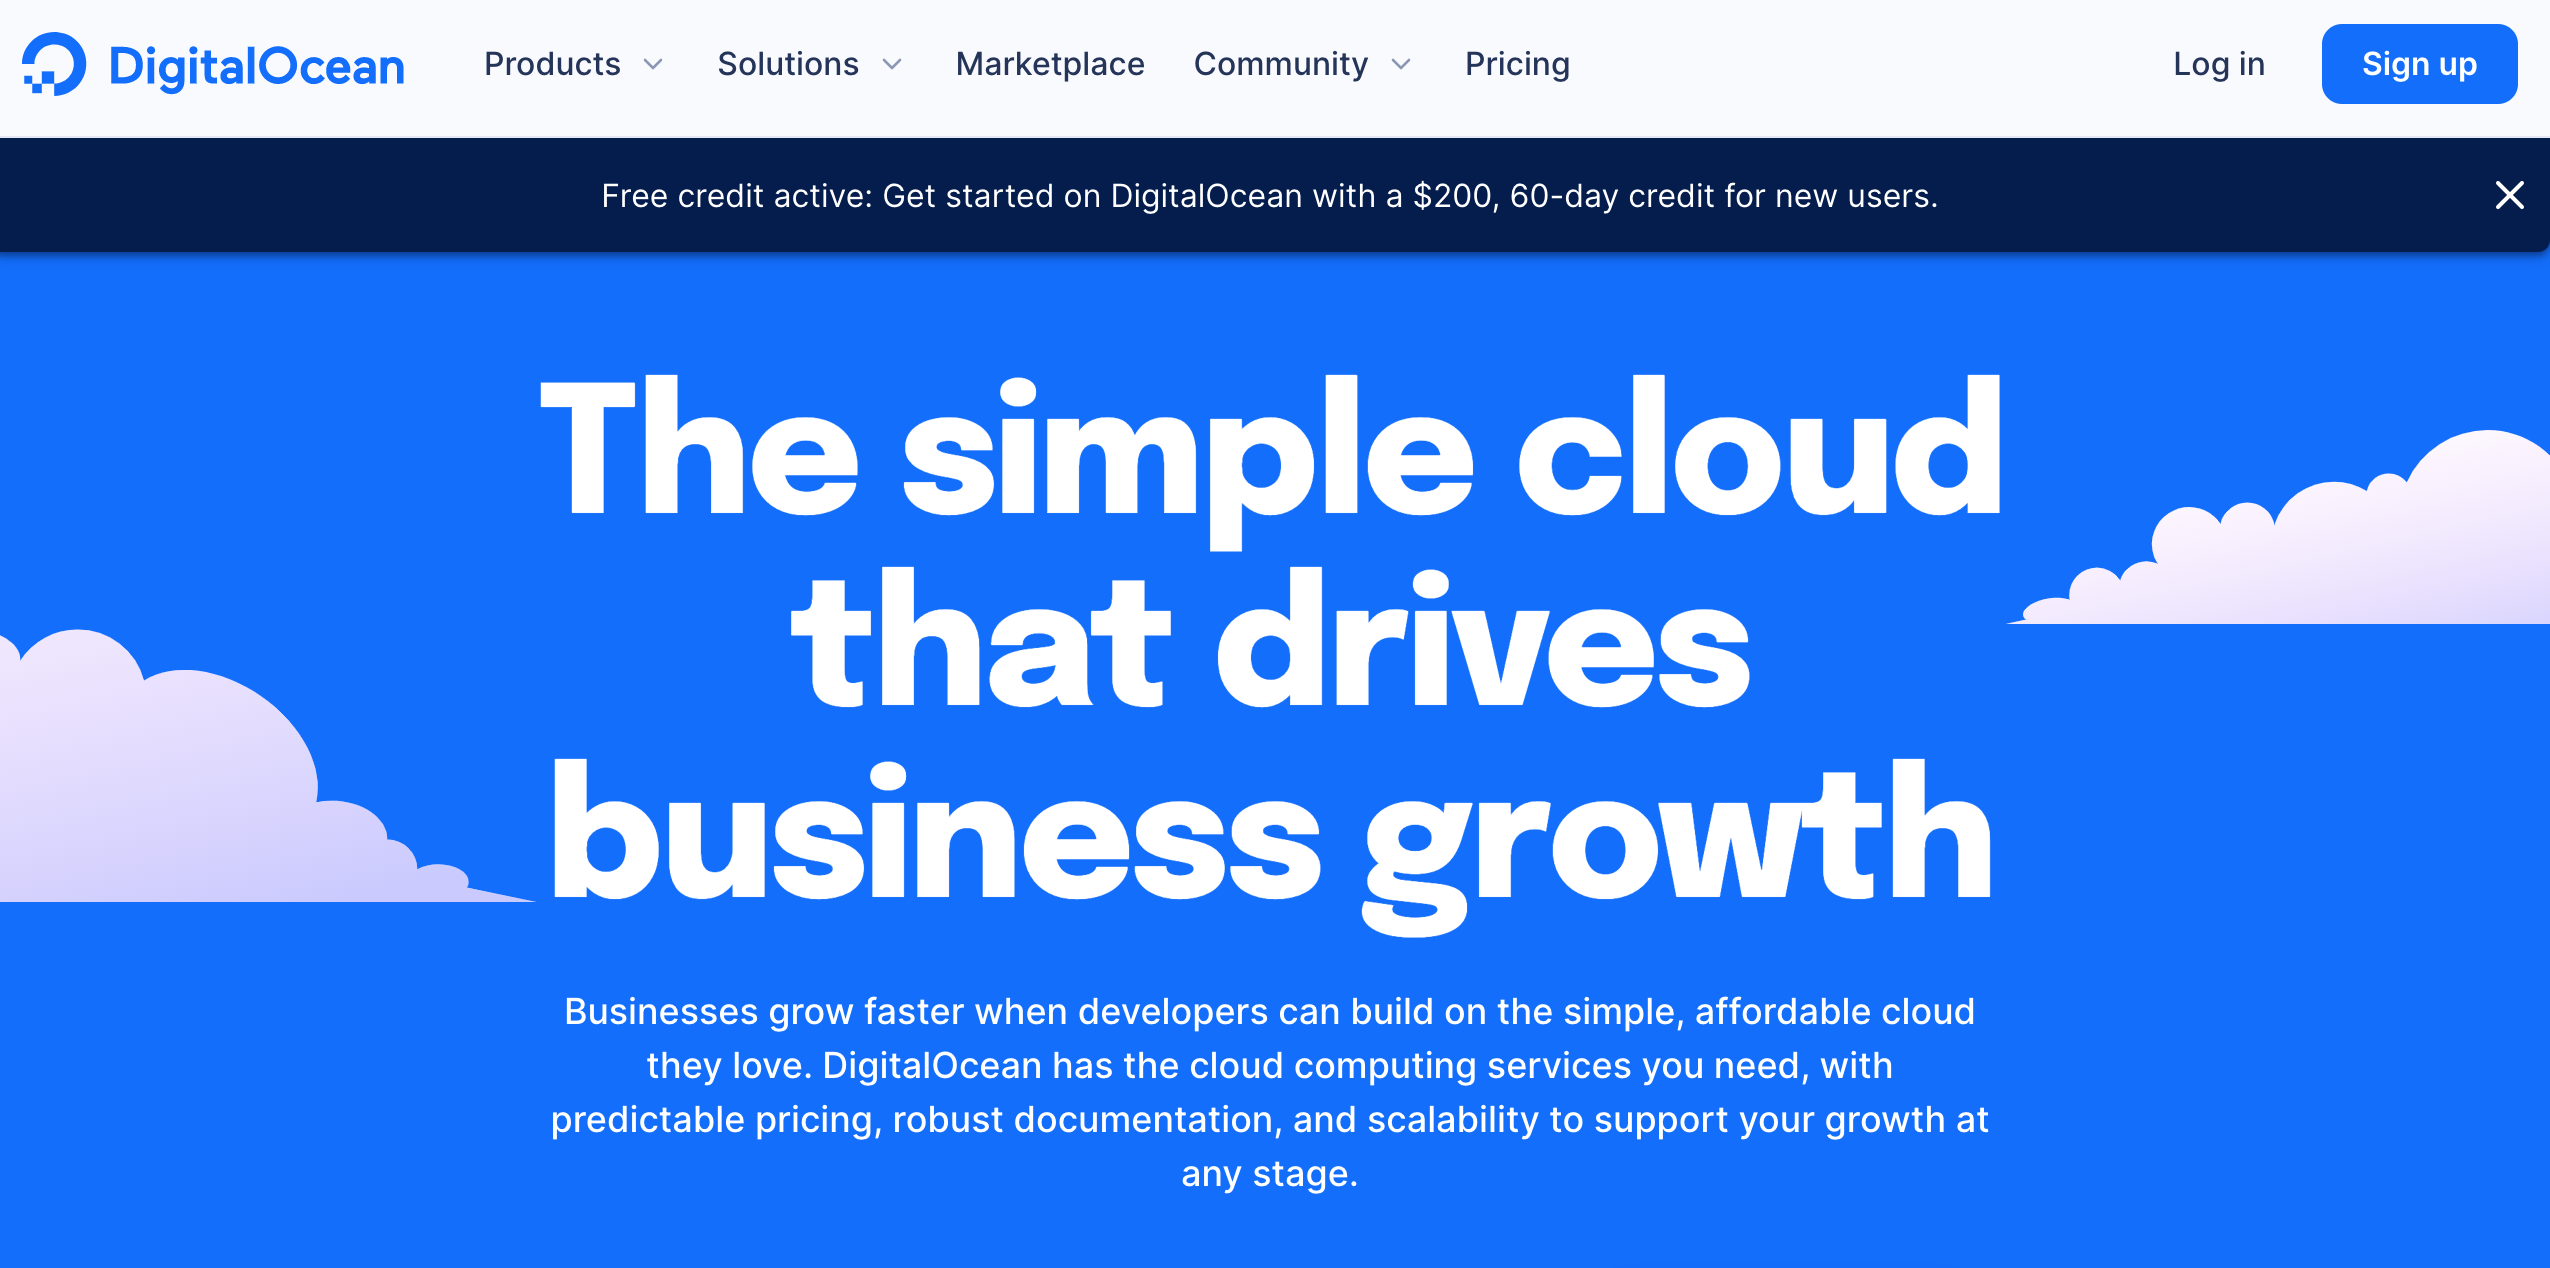
First, go to their website and create an account: DigitalOcean.com
Disclaimer: the link above is a special invitation link – if you use that, you’ll get $200 free credit for 60 days (and I’ll get $25 free credit). If you don’t want to use my link, you can simply click here instead. Note that in this case you won’t get the $200 credit.
You will land here:
Click SIGN UP in the top right corner and register with your email address. You will get a confirmation email in your inbox. Confirm and you will see a screen where you can add your credit/debit card details or use PayPal. (For security reasons I always use PayPal.)
If you are done with that, you are just one step away from creating your first remote server.
You will see the “Droplets” screen. Click “CREATE” (big green button, top right corner), and from the dropdown choose “DROPLET”.
And you will end up here:
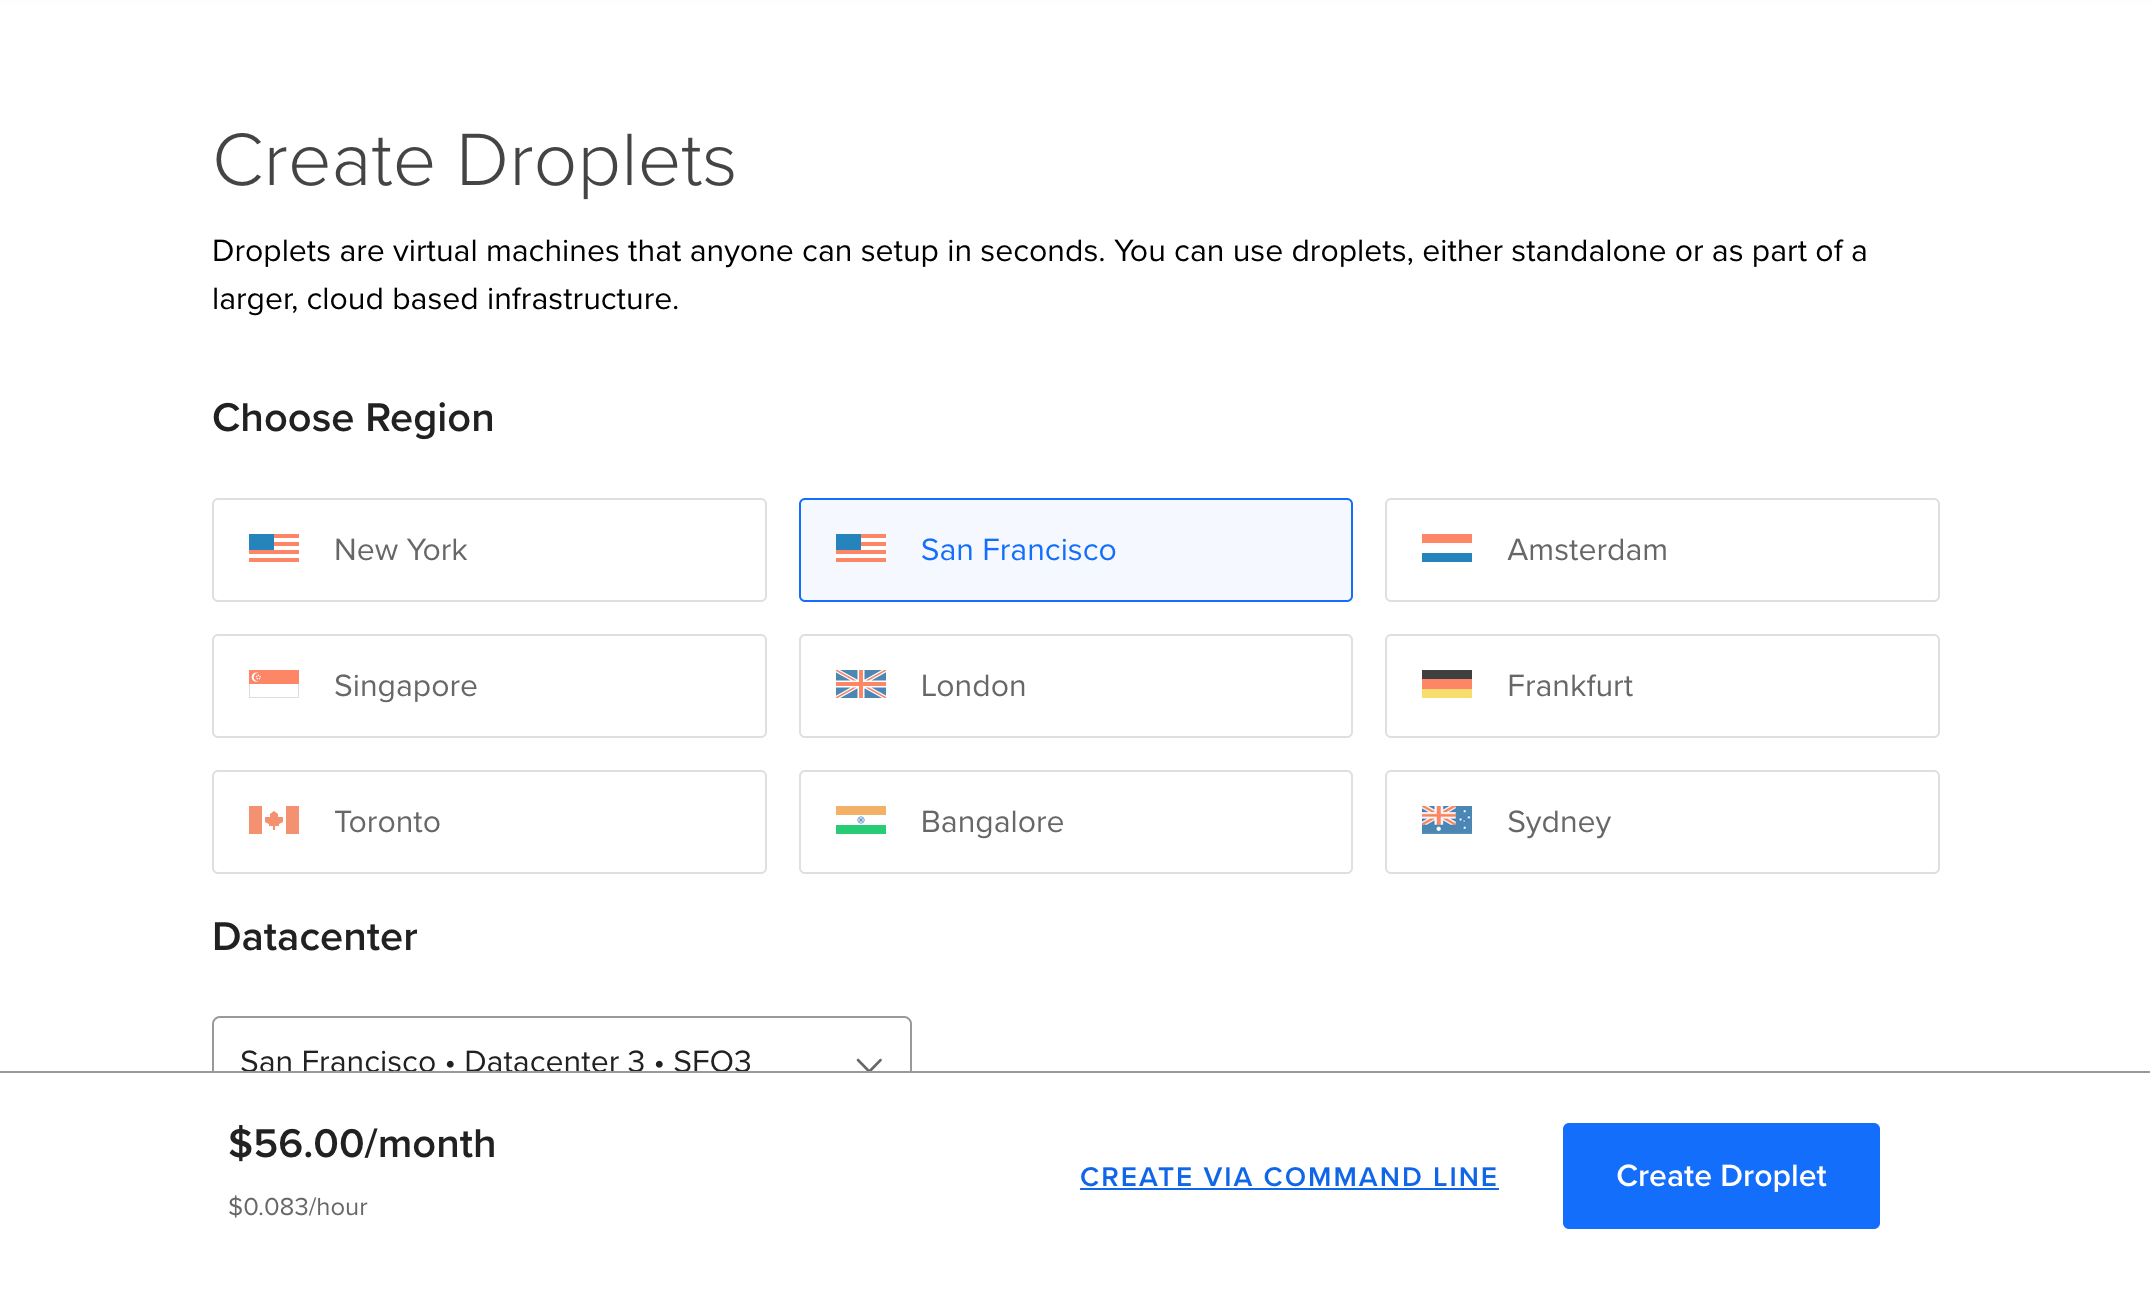
Note: If you see the $56/month text at the bottom as me: don’t worry about it! With my settings, your server cost only $6/month (and if you have used my coupon code, the first two months will be actually free.) Also, don’t get intimidated if the design of your droplet creation page is slightly different than mine. DigitalOcean changes and optimizes it’s UX every now and then.
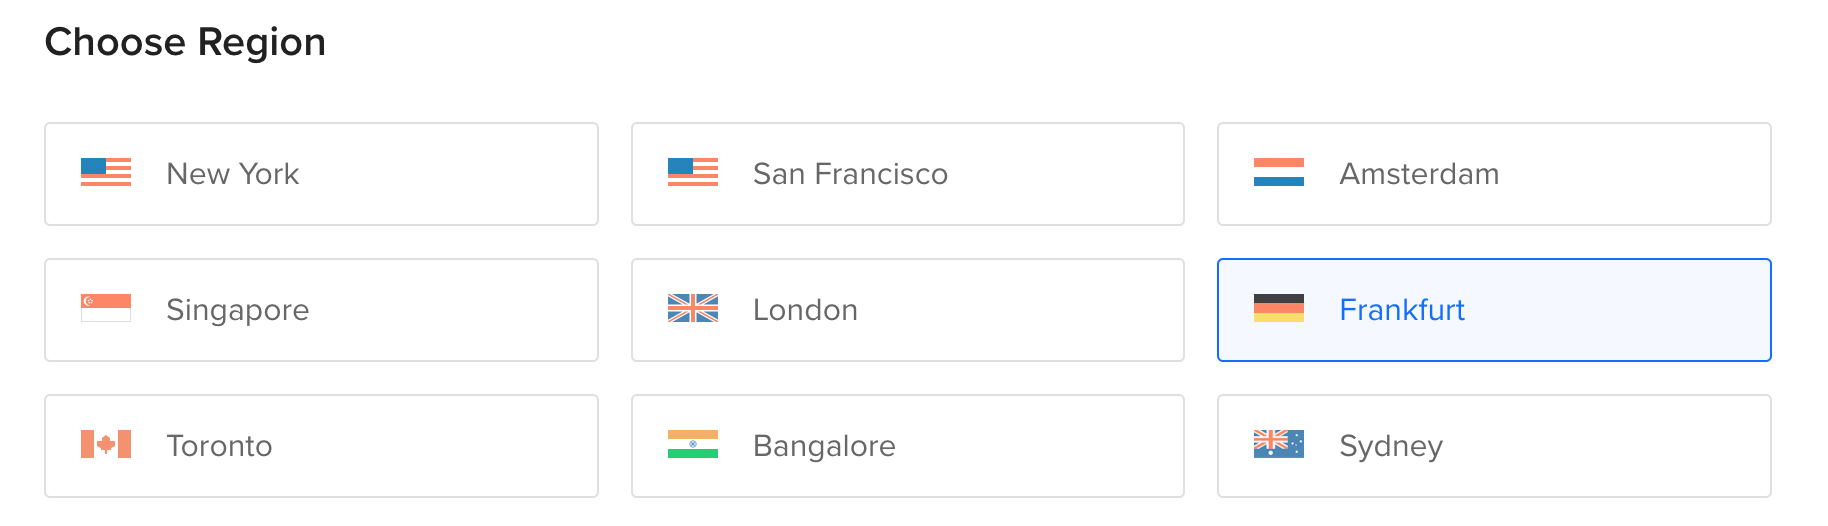
With the settings, make sure you follow these instructions:
- “Choose Region:” Choose the one that is the closest to you. E.g. if you are in San Diego, choose San Francisco and if you are in India, choose Bangalore. I’ll choose Frankfurt as I’m in Stockholm at the moment.
- “Datacenter:” This will show a datacenter in the region you selected. You can just stick to what comes up by default. For me it was “Datacenter 1 FRA 1”.

- “Choose an image:” OS >> UBUNTU >> 24.04 (LTS) x64
This one is really-really important. Please make sure, you choose 24.04 (LTS) x64 as most of my tutorials will be compatible with these operating system!

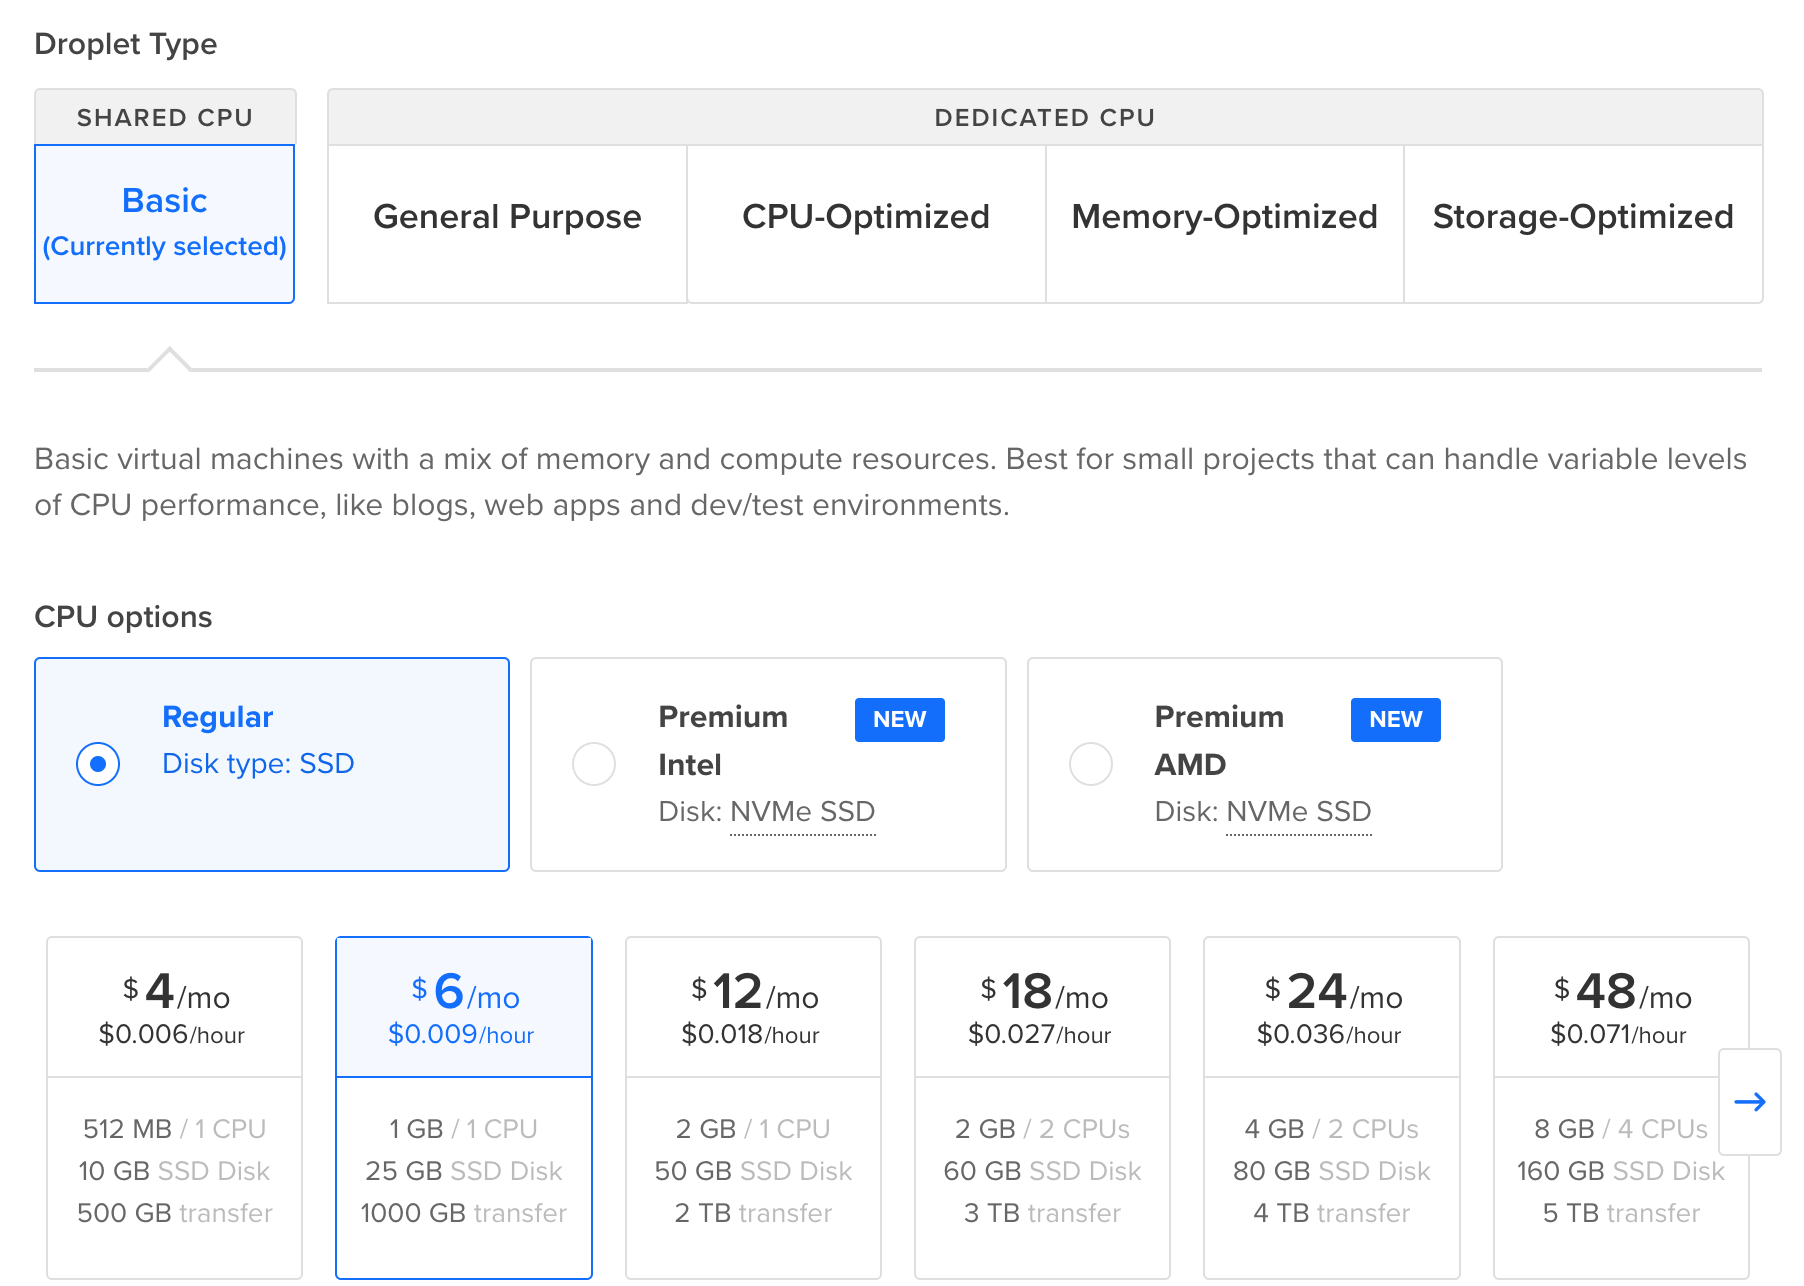
- “Choose Size:” BASIC >> REGULAR >> $6/month
DigitalOcean was “kind” enough to pre-select a $56/month plan but you won’t need that. Switch to the $6/month solution, it will be more than enough for now. If needed, you will be able to scale it up in the future. As you can see you’ll pay on hourly basis. This means that if you are using the server for 4 hours only, then delete it, you will pay $0.036. This is a very good deal.
- “Additional Storage:” You don’t need this.
- “Backups:” You don’t need this. (I use it in real life projects, you can also turn it on, but know that if you do so, this will cost an extra 10-20%.)
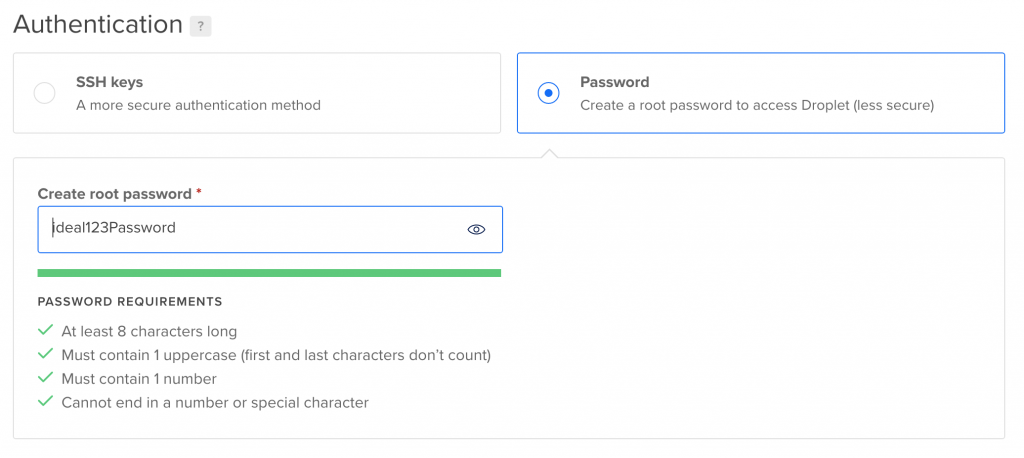
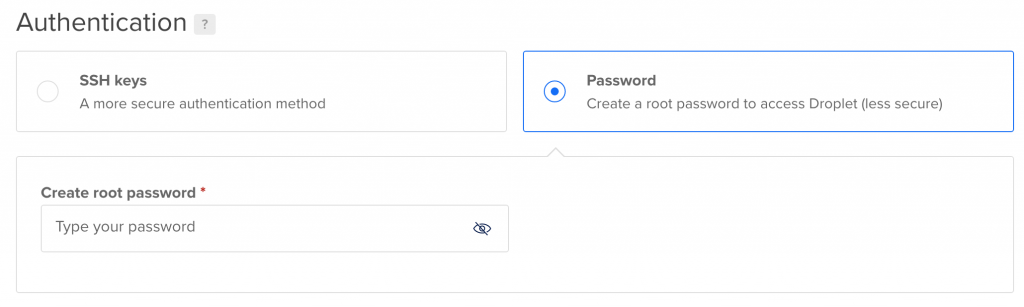
- “Choose Authentication Method:” Select “Password”.
Here, you’ll have to create your own root password. You’ll see something like this: The password requirement is pretty strict… Make sure you choose something that’s: At least 8 characters long — contains 1 uppercase (first and last characters don’t count) — contains 1 number — doesn’t end in a number or special character — as I said pretty strict.
 Also, make sure you remember this password because you’ll need it soon!
 - “We recommend these options:” You can skip all additional options for now.
- “Finalize Details:”
“Quantity:” 1 Droplet
“Hostname:” You can use anything. I chose “data36-learn-data-science”
- “Tags:” You don’t need this.
- “Project:” You don’t need this, either. (Go with the default.)
- Click “Create Droplet” on the footer bar. Where you’ll see something like this:

 Also, make sure you remember this password because you’ll need it soon!
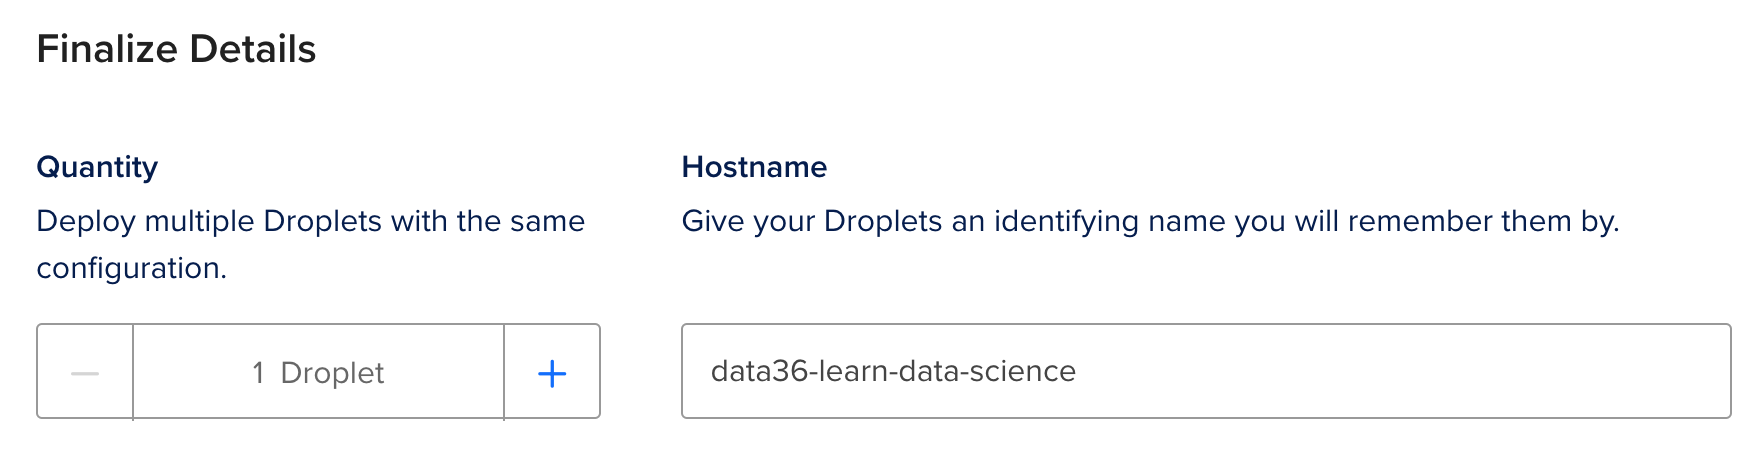

Then you’ll see a bar loading while your server/droplet is being created:

Your server will be ready in ~60 secs…
And done.
CONGRATS! You have your first remote server, where you can install Python, R, SQL and bash and then practice coding for data science.
(Note: you can destroy this server at any time by clicking “Destroy.”)
Step 2: Access your remote server!
It’s time to login to your freshly created remote data server.
You’ll need 2 pieces of important information for the login process.
- The IP address of your droplet and
- your root password.
The IP address can be found on the DigitalOcean website, where you have created your droplet. It’s right here:

Find yours on your DigitalOcean Droplets tab.
You’ll also need your root password… This is the one that you created when you have created your droplet.
Depending on which operating system you use on your computer, you can access your server in different ways.
For Mac/Linux Users:
Open Terminal (on Mac I suggest downloading iTerm2 and using that instead of Terminal).
Type:
ssh [Username]@[IP Address]
- the
[Username]isroot [IP Address]is the IP Address from the DigitalOcean droplet tab I showed you above.
In my case I will type:
ssh root@46.101.128.25
Hit enter and you are in…
(The next paragraph is important for Windows users only. You can skip it and scroll down to “Both Windows/Mac”!)
For Windows Users:
First download and install a program called PuTTy from here.
If you open Putty, you need to add the details (from the email) on this window:
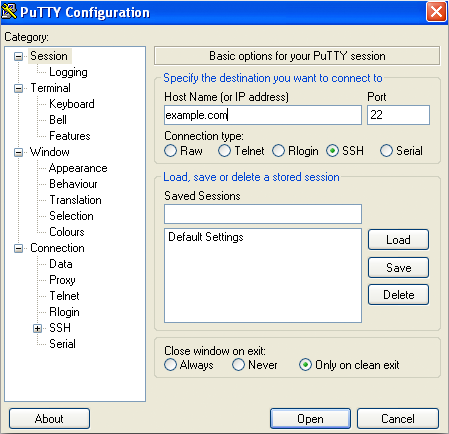
- Host Name (or IP address): the IP Address from the DigitalOcean droplet tab I showed you above (eg.
46.101.128.25in my case) - Port:
22 - Connection type:
SSH
Click “Open” and you are in. It will ask for your:
- username (“login as:”). Type:
root
(putting it simply, root is some sort of master user for your data server)
Hit Enter…
Both Windows/Mac (oh and Linux of course):
Nice, you ssh-d (logged in) into your remote Ubuntu server. From this point, when you are on the terminal window, until you are disconnected to your remote server, you are going to be using Ubuntu 20.04. It also means that any changes you make here won’t affect your personal computer!
Let’s finalize things before we start setting up your data infrastructure!
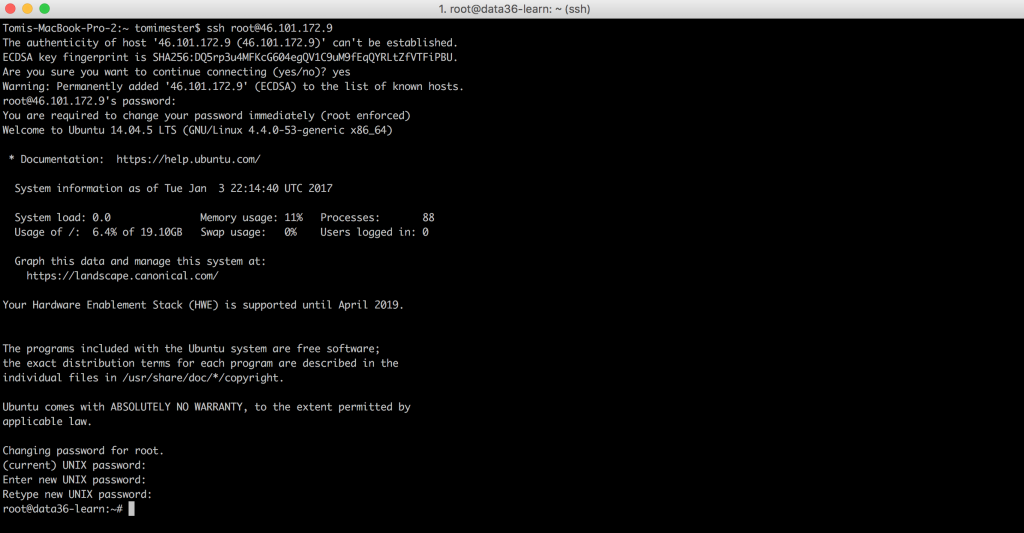
If everything’s correct, the server asks some questions like:Are you sure you want to continue connecting (yes/no)?
Type yes, hit enter.
Then it will ask for your password. Type the one that you provided when you have created your droplet, like 2 minutes ago… (Remember that I said that you’d need it soon?)
IMPORTANT! If this is your first time on the command line, you might find it weird that the stars (*) don’t appear on the screen when you type your password, but this is how it is on Ubuntu. Even if you don’t see any characters typed in – don’t worry – it’s typed in!
And done! You can start to install the data tools!
(Note: if you have so far used only graphical user interfaces (e.g. SPSS, Excel, Rapidminer, etc.), I know, this command line thingy could be intimidating. But believe me, once you’ve played around for 30 mins on this interface, you will find it fun! ;-))
Step 3: Install Bash!
Or wait… Great news! Bash is already set up, since it’s the built-in language of Ubuntu 20.04. (Again: sometimes it’s referred as “the command line.”)
I’ll get back to bash/command line in the next data coding tutorial articles and videos, but for now it’s enough if you know that you really need to care about learning this language because:
- You will use bash for every basic server operation – like moving files between folders, creating/deleting files, installing new programs (eg. Python or SQL, too), giving permissions to users, etc.
- It’s great for creating automations.
- It can be used as the “glue” between other data languages. (eg. moving something from SQL to Python, then from Python to R.)
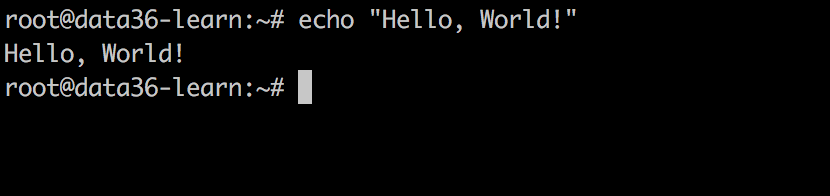
For now, execute your first command: the “Hello, World!”
echo 'Hello, World!'
You will have Hello, World! printed on your screen.
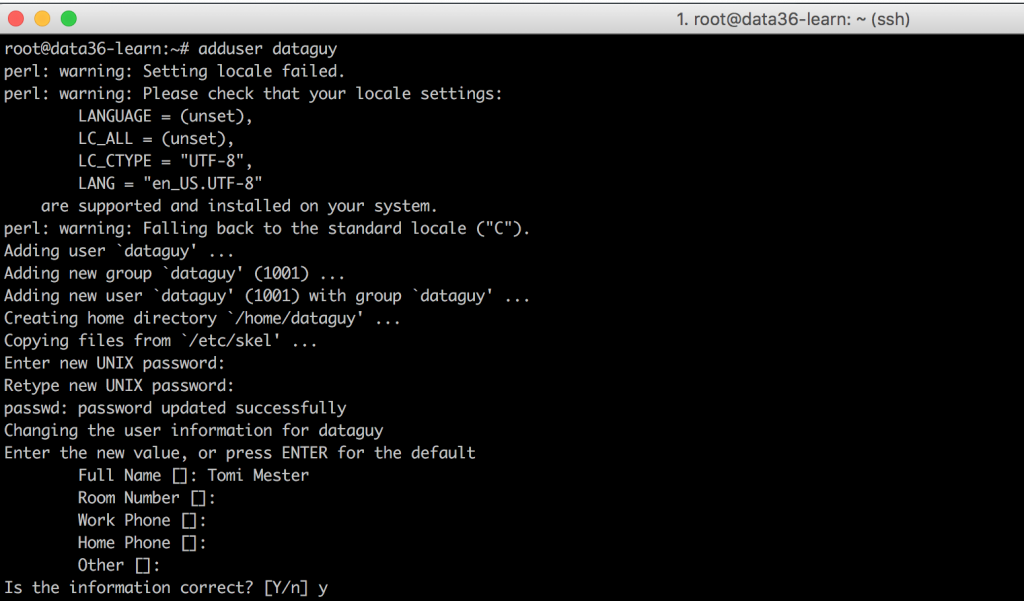
Don’t ask why we did that. This is a nice habit of programmers, so we did it too, but let’s move forward quickly and execute our second, more important command. We are going to create a new user:
adduser [newusername]
You can type anything for the [newusername] part. Whatever you put there, that will by your username. (But watch out, capital letters are usually now allowed, so please stick to lowercase letters.) I’ll type dataguy. Like this:
adduser dataguy
If you hit enter, you will have some text on your terminal screen, then you need to add a new password for this user, some more text, then the name (your name preferably) and you can leave the rest empty.
You have just created a new user! Great!
This was needed for further steps: so far your username was root – and by default root user is not allowed to do a few important installation steps that we want to do.
Let’s execute one more command to give the right privileges to your new user:
usermod -aG sudo dataguy
(Obviously: don’t forget to replace dataguy with your new username)
From now on, we won’t use root user, we will use the new user you’ve created. So let’s logout from root user:
exit
This command will close the connection between your computer and your remote server. Log back in with your new username! Do everything as described in Step 2 above, but change root to your new username (in my case dataguy) and to your new password. As I’m on Mac I’ll type this – for instance:
ssh dataguy@46.101.128.25
Now you are logged in as a normal user.
And you can continue by setting up Python3.
Step 4: Install Python and Jupyter!
Note: When I say “install Python” I mean Python 3. (When I first published this tutorial, a few people still used Python 2 — but the industry standard is Python 3 and in 2023 pretty much everybody uses that version. Hence nobody says Python 3 any more, just “Python.”
More great news! Python is already installed on Ubuntu 20.04 too! You can try the Python-way of “Hello, World!” very easily. Type into the command line:
python3
This will start Python. (While you are on Python, you can’t use Bash codes.)
Now type:
print('Hello, World!')
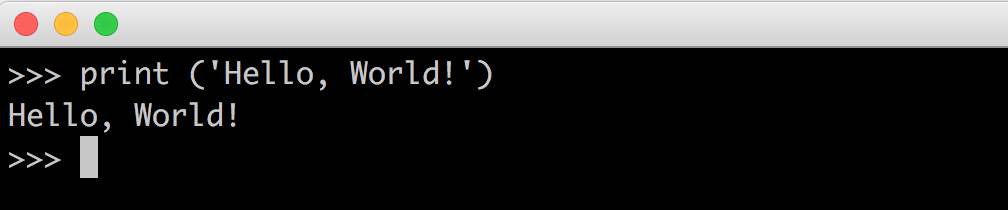
Notice that you get the same effect as it was with the echo command on bash. print and echo are pretty much the same, but print will work on Python and echo will work on Bash.
Anyway. Type:
exit()
This will stop Python and you will be back to Bash.
To use Python more efficiently in the future, you’ll need to install some add-ons.
The easiest way to install things in the command line is using the apt-get application’s install feature. You only have to type apt-get install, then the name of the add-on that you want to install. If the add-on exists, apt-get will find and install it. Unfortunately the version of apt-get on your server is not the most recent one, so as a first step, update it with this command:
sudo apt-get update
(Note: sudo is an additional keyword before your apt-get command that lets bash know that your user has the privileges to do installations.)
The command line will ask for your password! Remember: it is not necessarily the same as it was for your root user, but the one you set when you created the new user! Anytime it asks for your password, just type that one.
Now that you have the latest version of apt-get, give it a try and type:
sudo apt-get install mc
(If it asks whether to continue, just say yes.)
mc – that you have just installed – is a text editor for coding. We will use it soon.
Next 2 steps (one by one):
sudo apt-get -y install python3-pip
sudo apt-get -y install python3-dev
Again if it asks for your password, type it – if it’s asks if continue, say yes.
These two latest commands installed pip and python-dev on your server, which will help you to download Python-specific packages.
Then type:
sudo apt install python3-pip
This command upgraded pip to the latest version.
Install Jupyter!
Let’s install Jupyter:
sudo apt install jupyter-core
And then an extension for it called “Jupyter Notebook”:
sudo apt install python3-notebook
You have installed one of the coolest Python packages: Jupyter. This is a tool that helps you to create easy-to-use notebooks from your Python code. Why is it so awesome? In my Python for Data Science tutorial articles and videos I tell more about it, but for now, let’s just configure and try it:
jupyter notebook --generate-config
This will create a config file for Jupyter on your server.
The next step is to run this command:
echo "c.NotebookApp.ip = '*'" >> /home/[your_username]/.jupyter/jupyter_notebook_config.py
Note: this is one line of code! Only your browser breaks it into more lines! And of course, the [your_username] part should be replaced by the actual bash username that you’ve created earlier, for me it was dataguy. (You should add your username without the brackets — so without the [ and the ]!)
And then this command:
echo "c.NotebookApp.allow_remote_access = True" >> /home/[your_username]/.jupyter/jupyter_notebook_config.py
Note: this is one line of code! Only your browser breaks it into more lines! And of course, the [your_username] part should be replaced by the actual bash username that you’ve created earlier, for me it was dataguy. (You should add your username without the brackets — so without the [ and the ]!)
These two command above will add two lines to the freshly created config file that will make you able to use your Jupyter notebook from a browser window (like Chrome or Firefox).
Now you can go ahead and try Jupyter out by typing:
jupyter notebook --browser any
This command will start to run the Jupyter application on your remote server. While it’s running in Terminal, you should just open a browser and type this in the address bar:
[IP Address of your remote server from the email]:8888
So in my case I’ll type this to my Google Chrome’s address bar:46.101.128.25:8888.
UPDATE-2024-09-13: Due to recent updates in Google Chrome, Jupyter notebooks may not load properly. If you experience this issue, try using another browser (Firefox, Safari, etc.).
Well, it’s not a website but it looks like one. In reality, it just connects me to the interface of my Jupyter notebook that runs on my server.
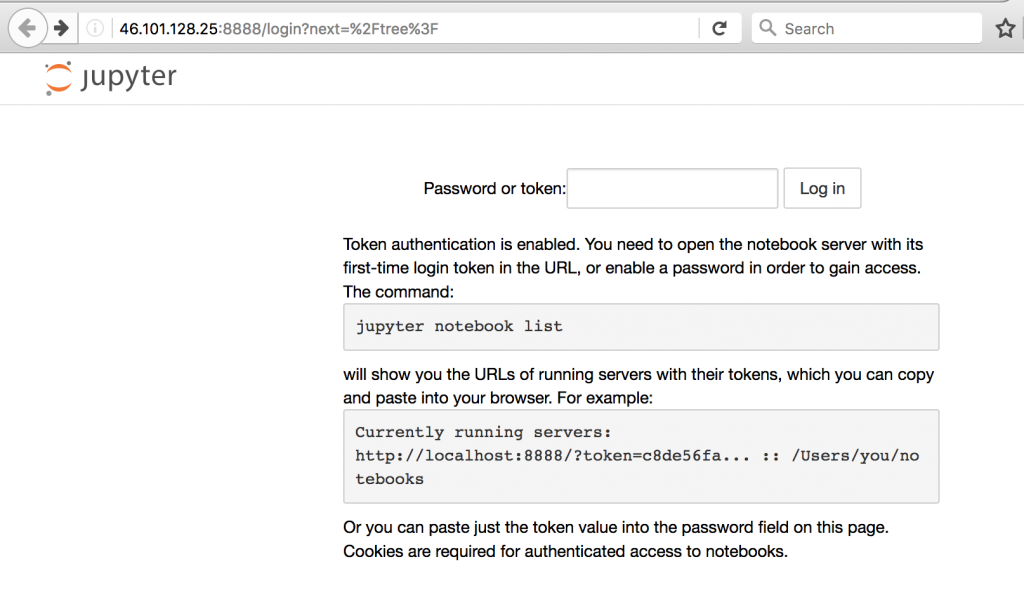
On this screen you need to type a password or a token first. As we haven’t generated any password (yet), you need to use the token, which you can easily find if you go back to your terminal window. Here:

Note: The /?token= part should not be copied — only that part is needed that I annotated with green above.
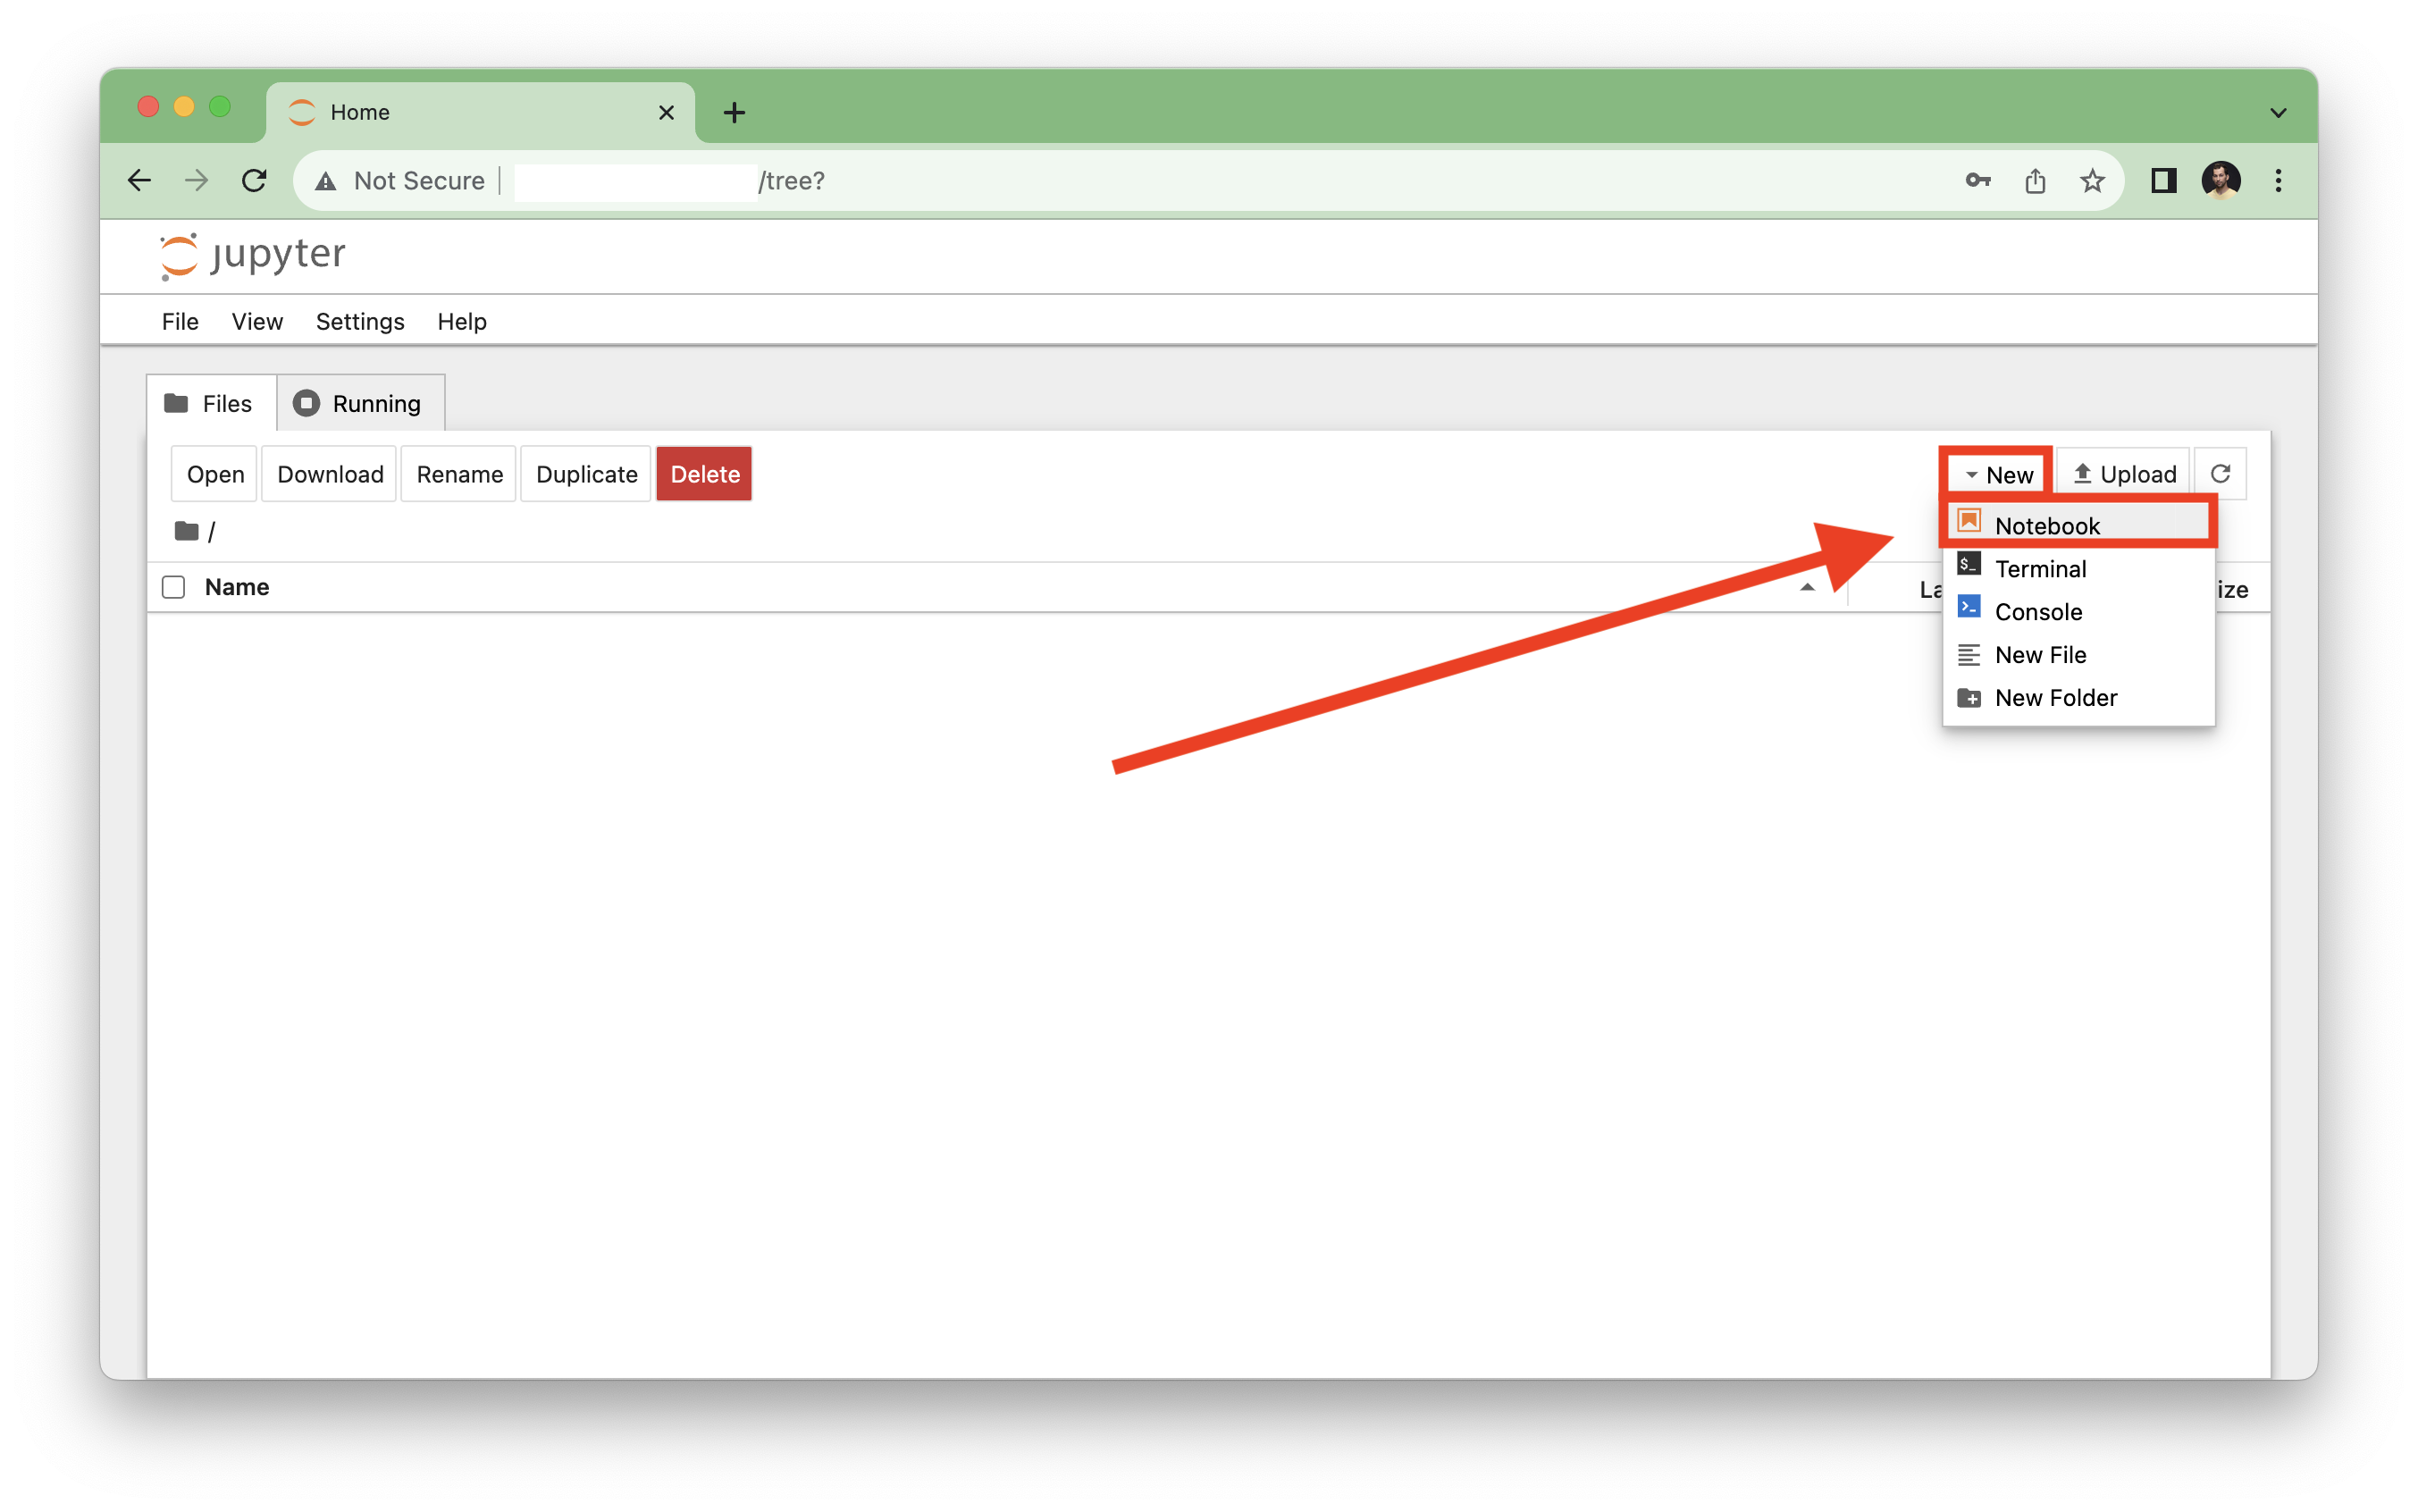
If you manage to copy-paste your token, you will be logged into your Jupyter. And you can create your first Jupyter Notebook on top right corner: “New” –» “Notebook”
When it’s done, you’ll land in your Jupyter Notebook, where you can finally execute Python code snippets in the cells. You can try again printing the “Hello, World!” string. Once you have typed it, you can execute this command by hitting SHIFT+ENTER.
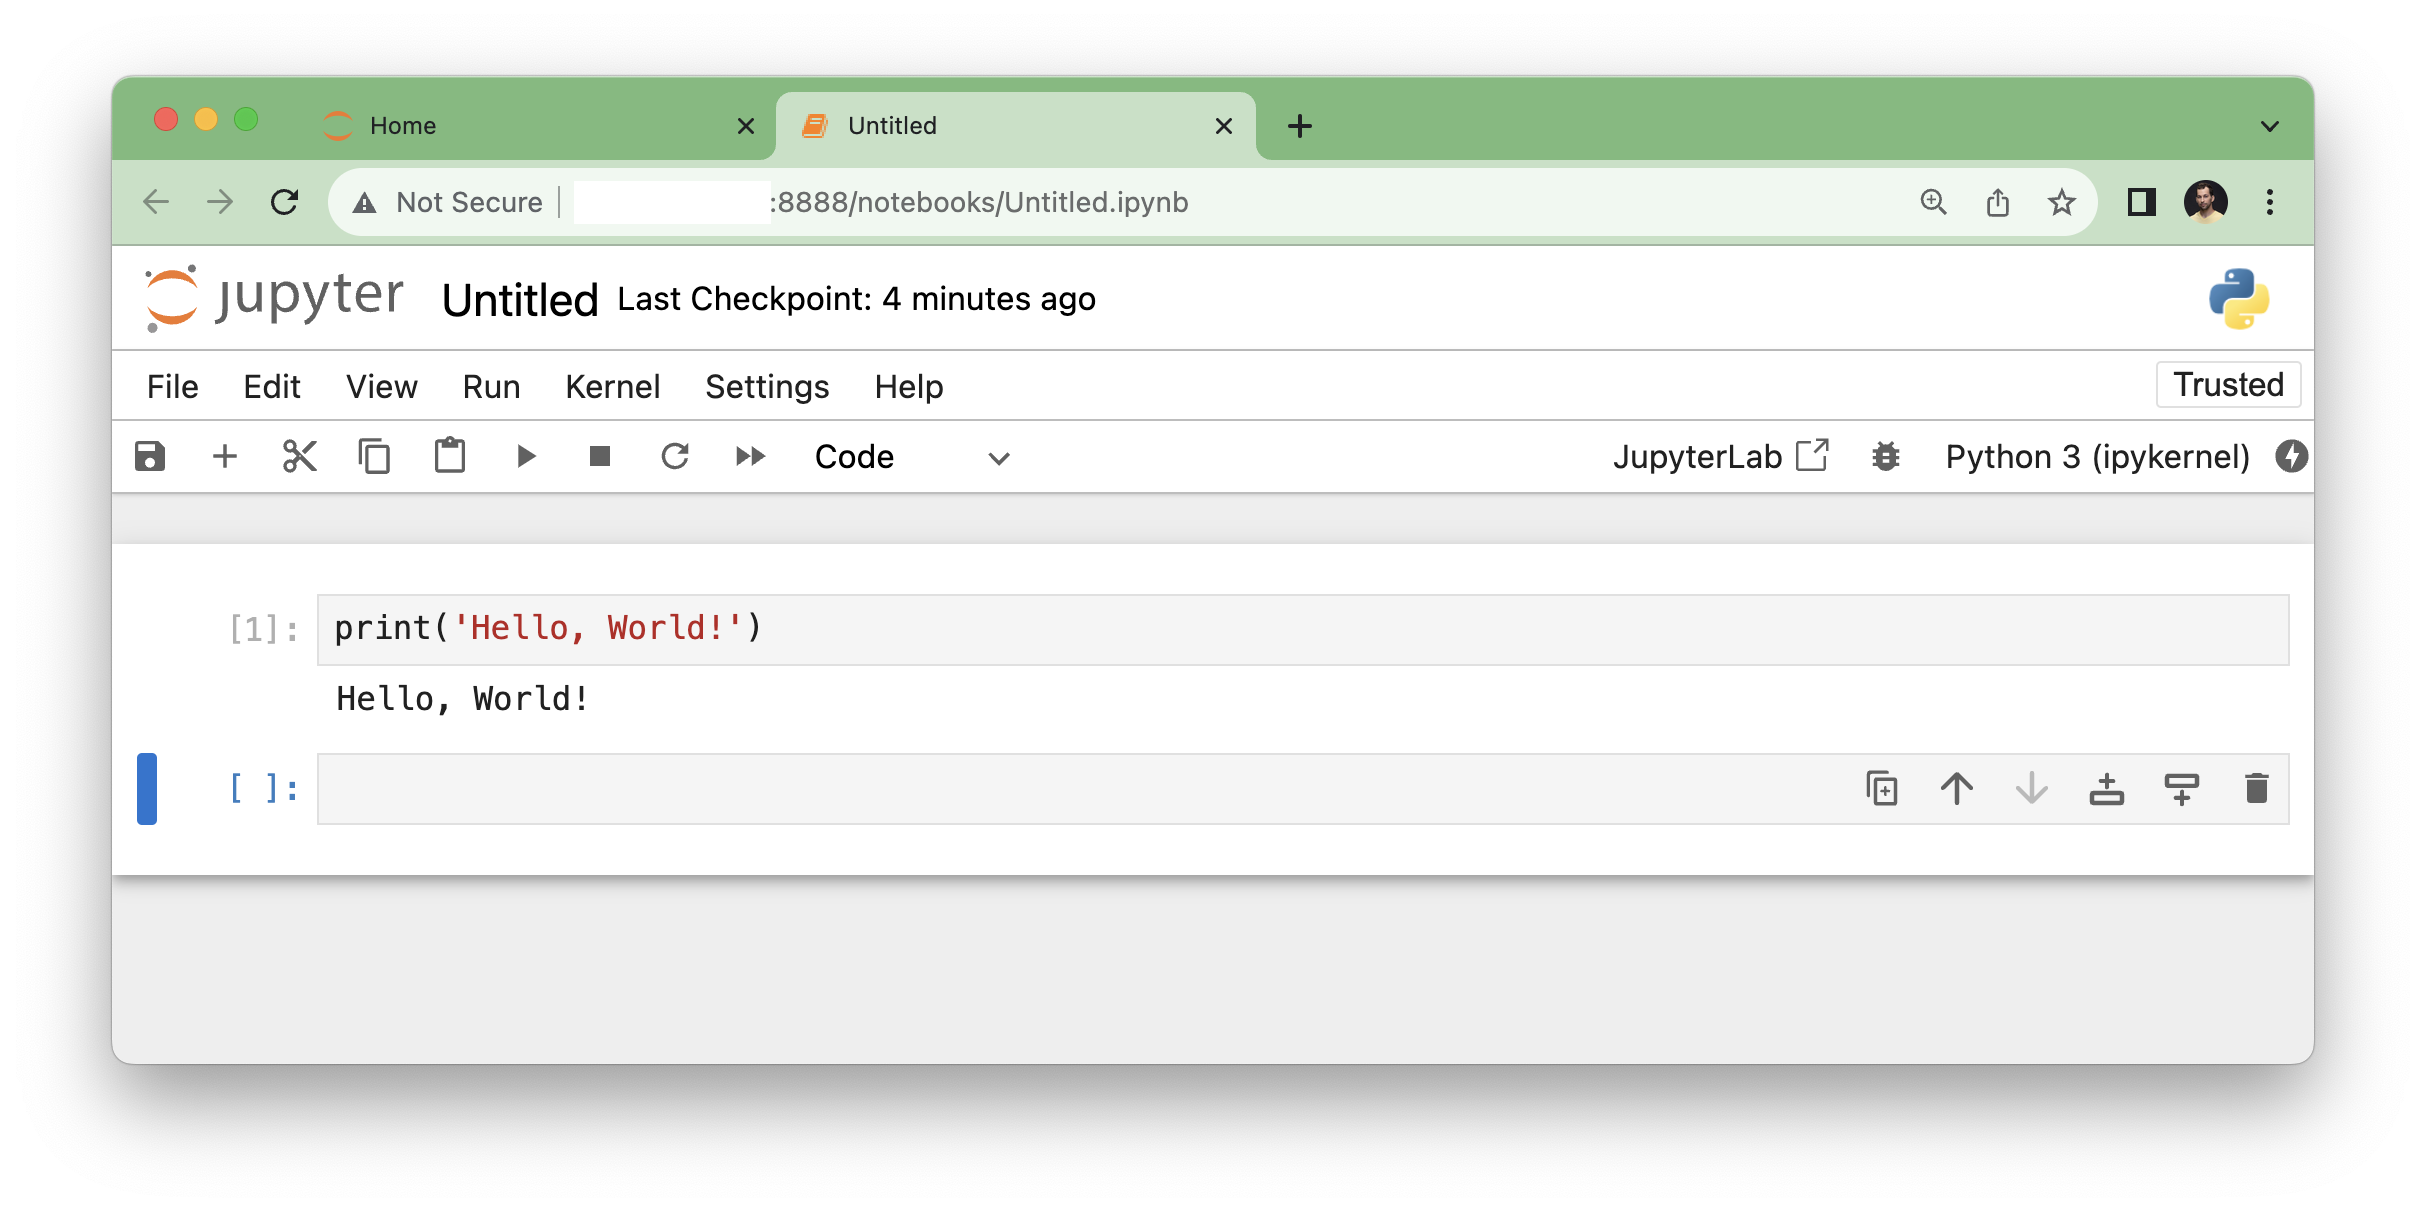
And done! You have installed Python 3 and Jupyter Notebook — and you can come back and use them any time. Nice job!
Note 1: when you are done, don’t forget to shut down Jupyter in your Terminal window by hitting CTRL+C. If you want to use Jupyter again in the future do the same as above: type jupyter notebook --browser any in the Terminal, open a browser and type your server’s IP-address + :8888 and so on…
Note 2: this setup is not the most secure version of using Jupyter, so I’d suggest not using any confidential data for now. (In another article, I’ll cover the security settings.)
Step 5: Install SQL and pgadmin4!
To continue with installing SQL, you should be back to Bash and the command line. You will know for sure, if you check the beginning of the line in your Terminal window (which is called the prompt, by the way). If you are on bash, it will look something like this (not necessarily green, it can be white or gray as well):

If you are not, just double-check that you haven’t missed anything above… Or just hit CTRL+C several times (that’s the hotkey to skip every running process on your terminal screen).
(If somehow accidentally you are still in Python, you will see >>> at the beginning of the line. If so, hit CTRL + D.)
When you are back to Bash, you can set up postgreSQL fairly quickly using a similar apt-get command as before:
sudo apt-get install postgresql postgresql-contrib
(If it asks for your password, type it – if it asks whether to continue, say yes!)
Done! You have postgreSQL just like that. Let’s try to access it!
When you installed SQL, it automatically generated one more user on your server called postgres. This new user is an SQL superuser. And right now this is the only user who can access your freshly created SQL database. The good thing is that you can sign in to this superuser’s account with this command:
sudo -i -u postgres
Notice the small change on the prompt in the command line:

The superuser will be able to access SQL with this simple command (type it):
psql
You are in! You can run SQL commands and queries!
First thing first, let’s generate a new user, so you can access your database in the future with your normal user too (which is the preferred way).
CREATE USER [your_user_name] WITH PASSWORD '[your_preferred_password]';
It’s really important that you replace [your_user_name] with the very same new user name that you’ve used in bash. So in my case it will be:
CREATE USER dataguy WITH PASSWORD 'a_password_that_I_wont_put_into_this_article';
Since you are here, I recommend running one more command (you won’t need it now but it’ll become handy when you start with my SQL tutorial articles):
ALTER USER [your_user_name] WITH SUPERUSER;
Obviously, change [your_user_name] again with your user name.
For me it was:
ALTER USER dataguy WITH SUPERUSER;
This line will give your user SQL super user privileges – which will become handy when creating new SQL tables, etc. Don’t worry about it too much yet. It’s good that we have done it though.
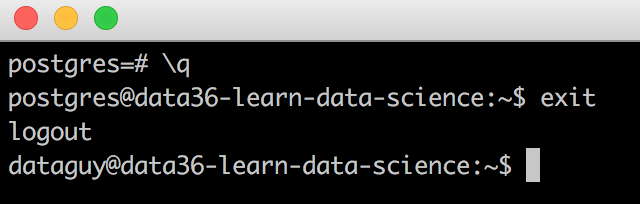
Anyways, done! You can exit from postgreSQL and go back to bash! Type:
\q
(this is the exit command in postgres.)
Then you have to log out from the superuser as well and go back to your normal user! Type:
exit
Now, let’s login with your normal user to your SQL database with this command:
psql -U dataguy -d postgres
Great! You are back to SQL again! Let’s try it out and run these few SQL commands and queries:
CREATE TABLE test(column1 TEXT, column2 INT);
INSERT INTO test VALUES ('Hello', 111);
INSERT INTO test VALUES ('World', 222);
SELECT * FROM test;
The first line creates a new table called test. The 2nd and the 3rd load some test data in it. The 4th prints all the values to the screen from the test table!
You can learn about SQL from my SQL for Data Analysis tutorial series!
Exit from postgreSQL again:
\q
Install pgadmin4!
It’s time to install pgadmin! This is a desktop application for postgreSQL that you can use to access your SQL database from your personal computer (without connecting to your remote server in terminal) and write queries much more easily and efficiently. You will find this little SQL manager tool very useful when you start writing complex queries.
As a first step, make your remote server ready to connect by typing these 5 lines of code (copy-paste it one by one):
sudo -i -u root
echo "listen_addresses = '*'" >> /etc/postgresql/*/main/postgresql.conf
(Note: this is one line of code! Only your browser breaks it into 2 lines!)
echo 'host all all 0.0.0.0/0 md5' >> /etc/postgresql/*/main/pg_hba.conf
(Note: this is one line of code! Only your browser breaks it into 2 lines!)
sudo /etc/init.d/postgresql restart
exit
What you are doing here is logging in to the root user and making some modifications in the config files of postgreSQL. (Remember: as you are on your remote server, the changes you make won’t affect your personal computer!)
Then download pgadmin4 from here: pgadmin4.
Select your OS, then download, install and run it!
Once you are done, you will see something like this screen:
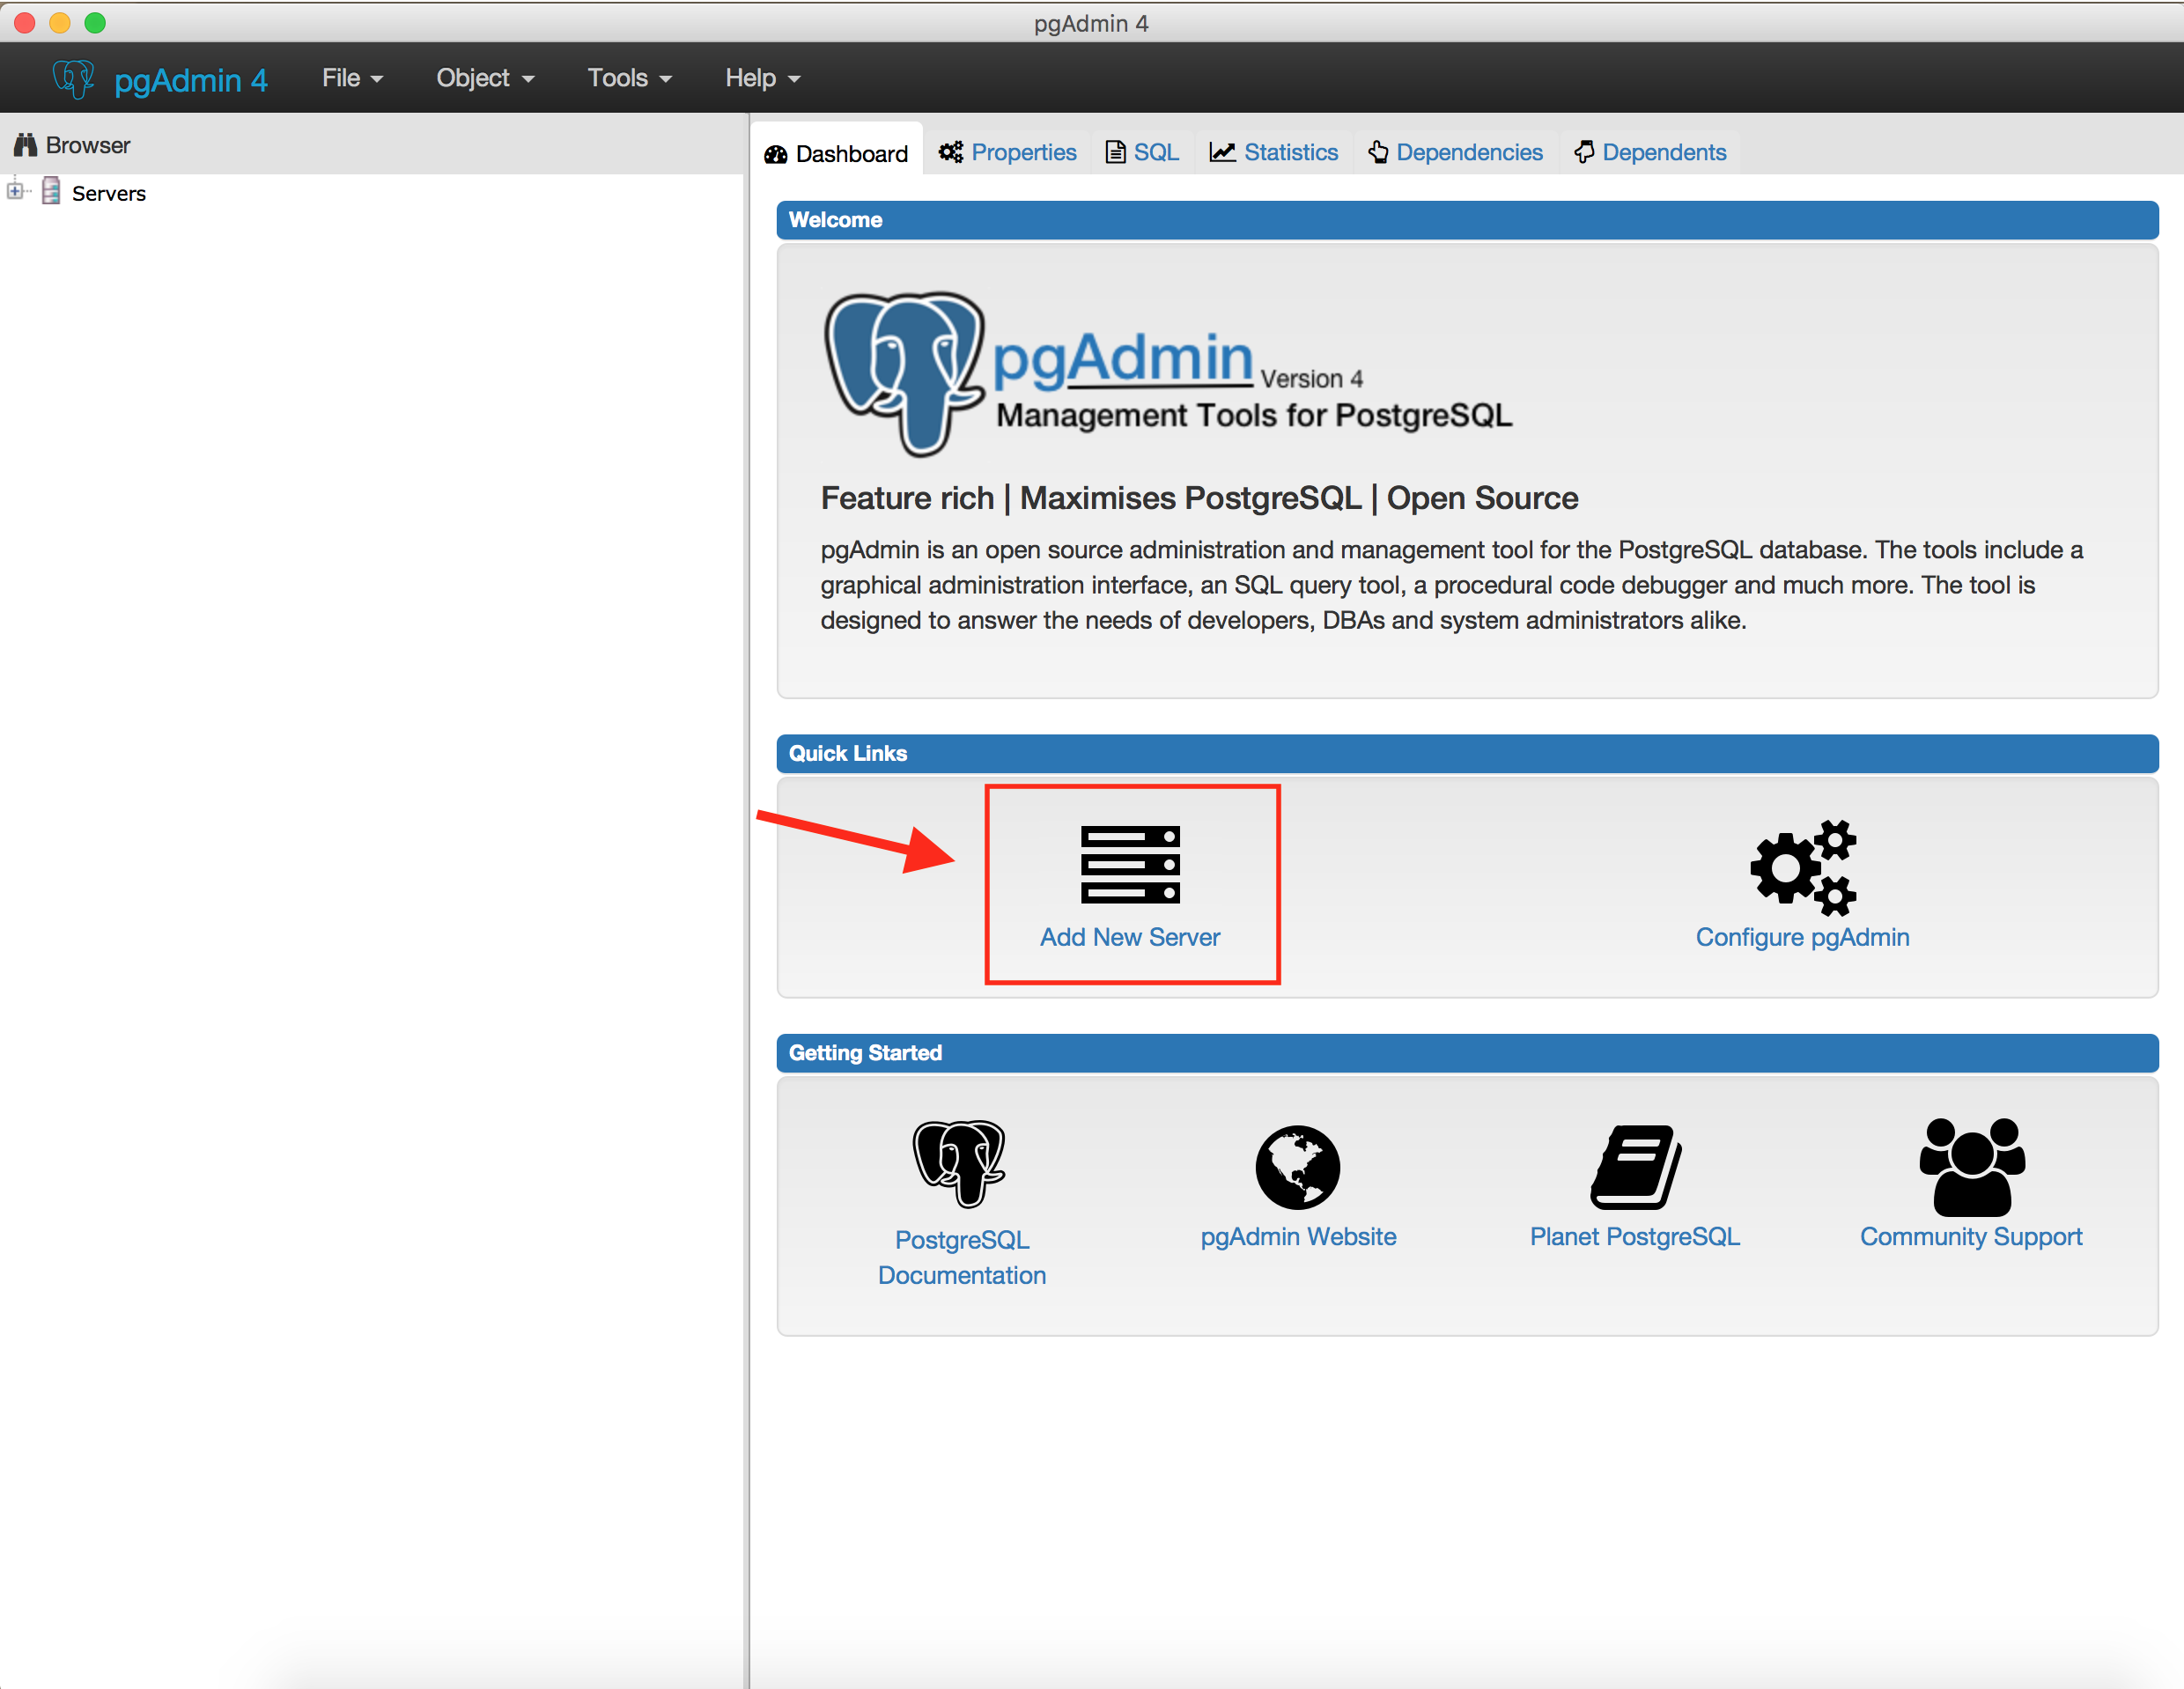
Click the Add New Server Icon!
This window will pop right up:
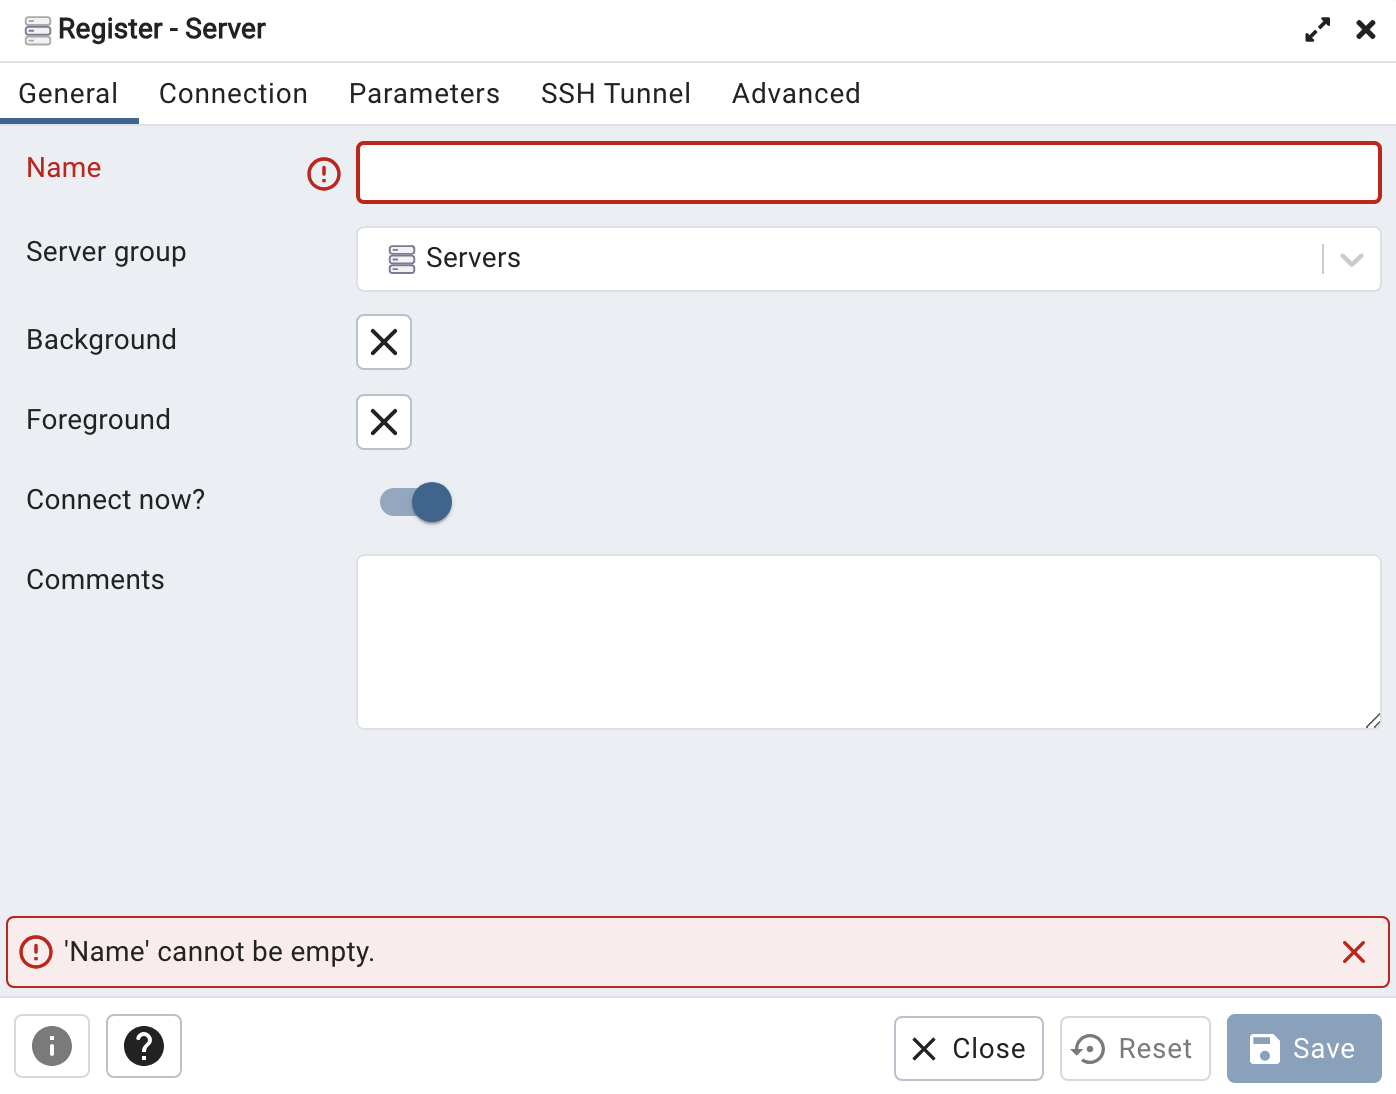
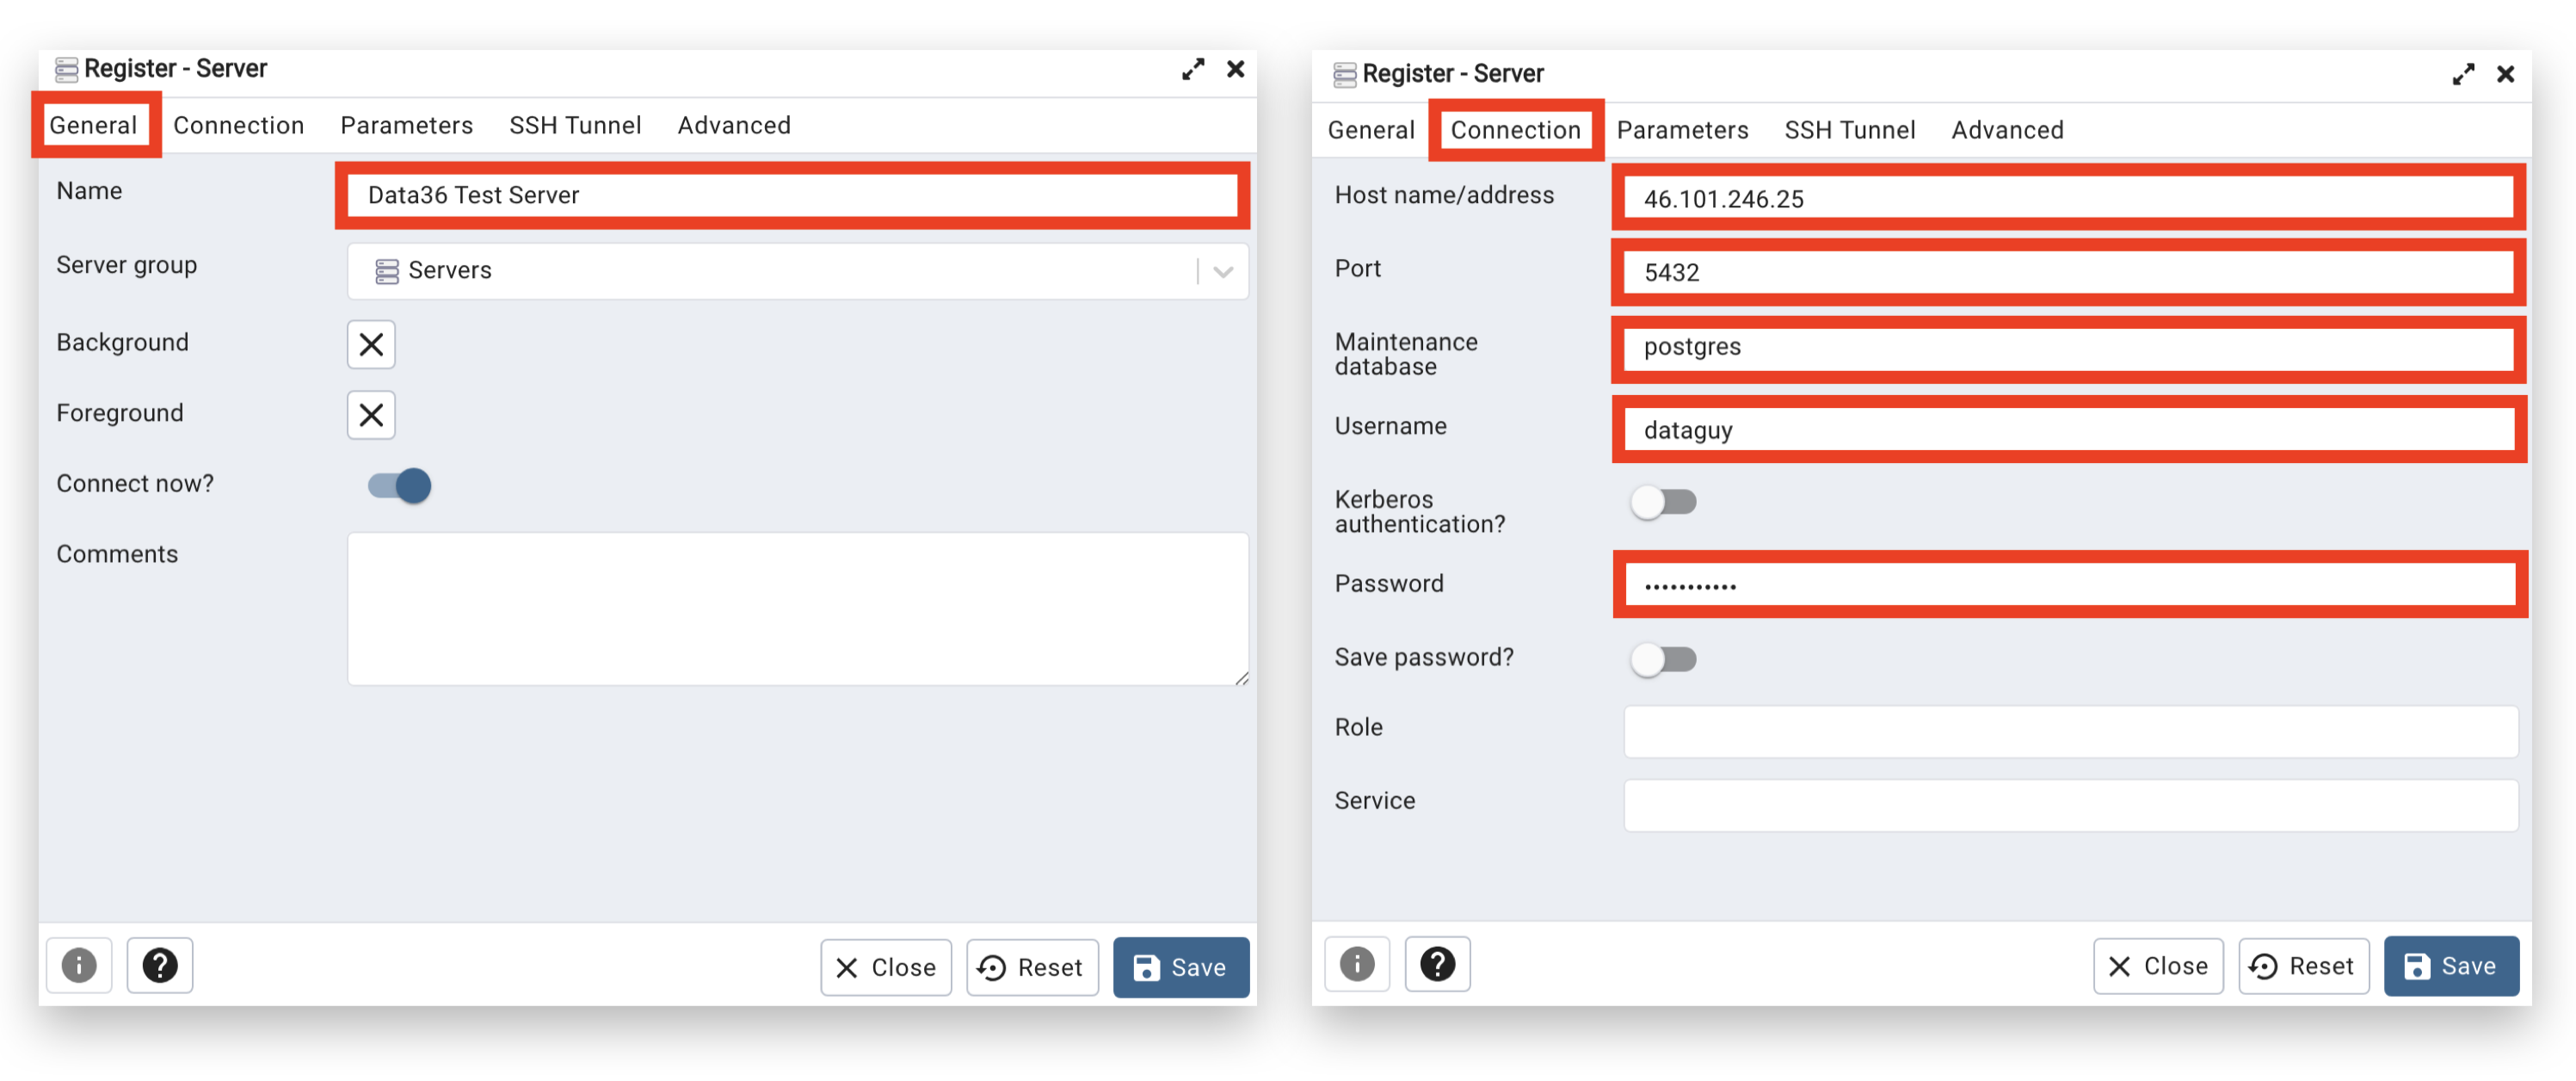
Fill it in focusing on these two tabs:
“GENERAL:”
- “Name:” anything you want (eg. “Data36 Test Server“)
“CONNECTION:”
- “Host name/address:” your remote server’s IP Address (in my case: 46.101.128.25)
- “Port:” 5432
- “Maintenance database:” postgres
- “Username:” [your_user_name]
- “Password:” your recently generated SQL password for your user
For your convenience, here are the screenshots of the two tabs filled in:
Click save and BOOM! You are connected to your database!
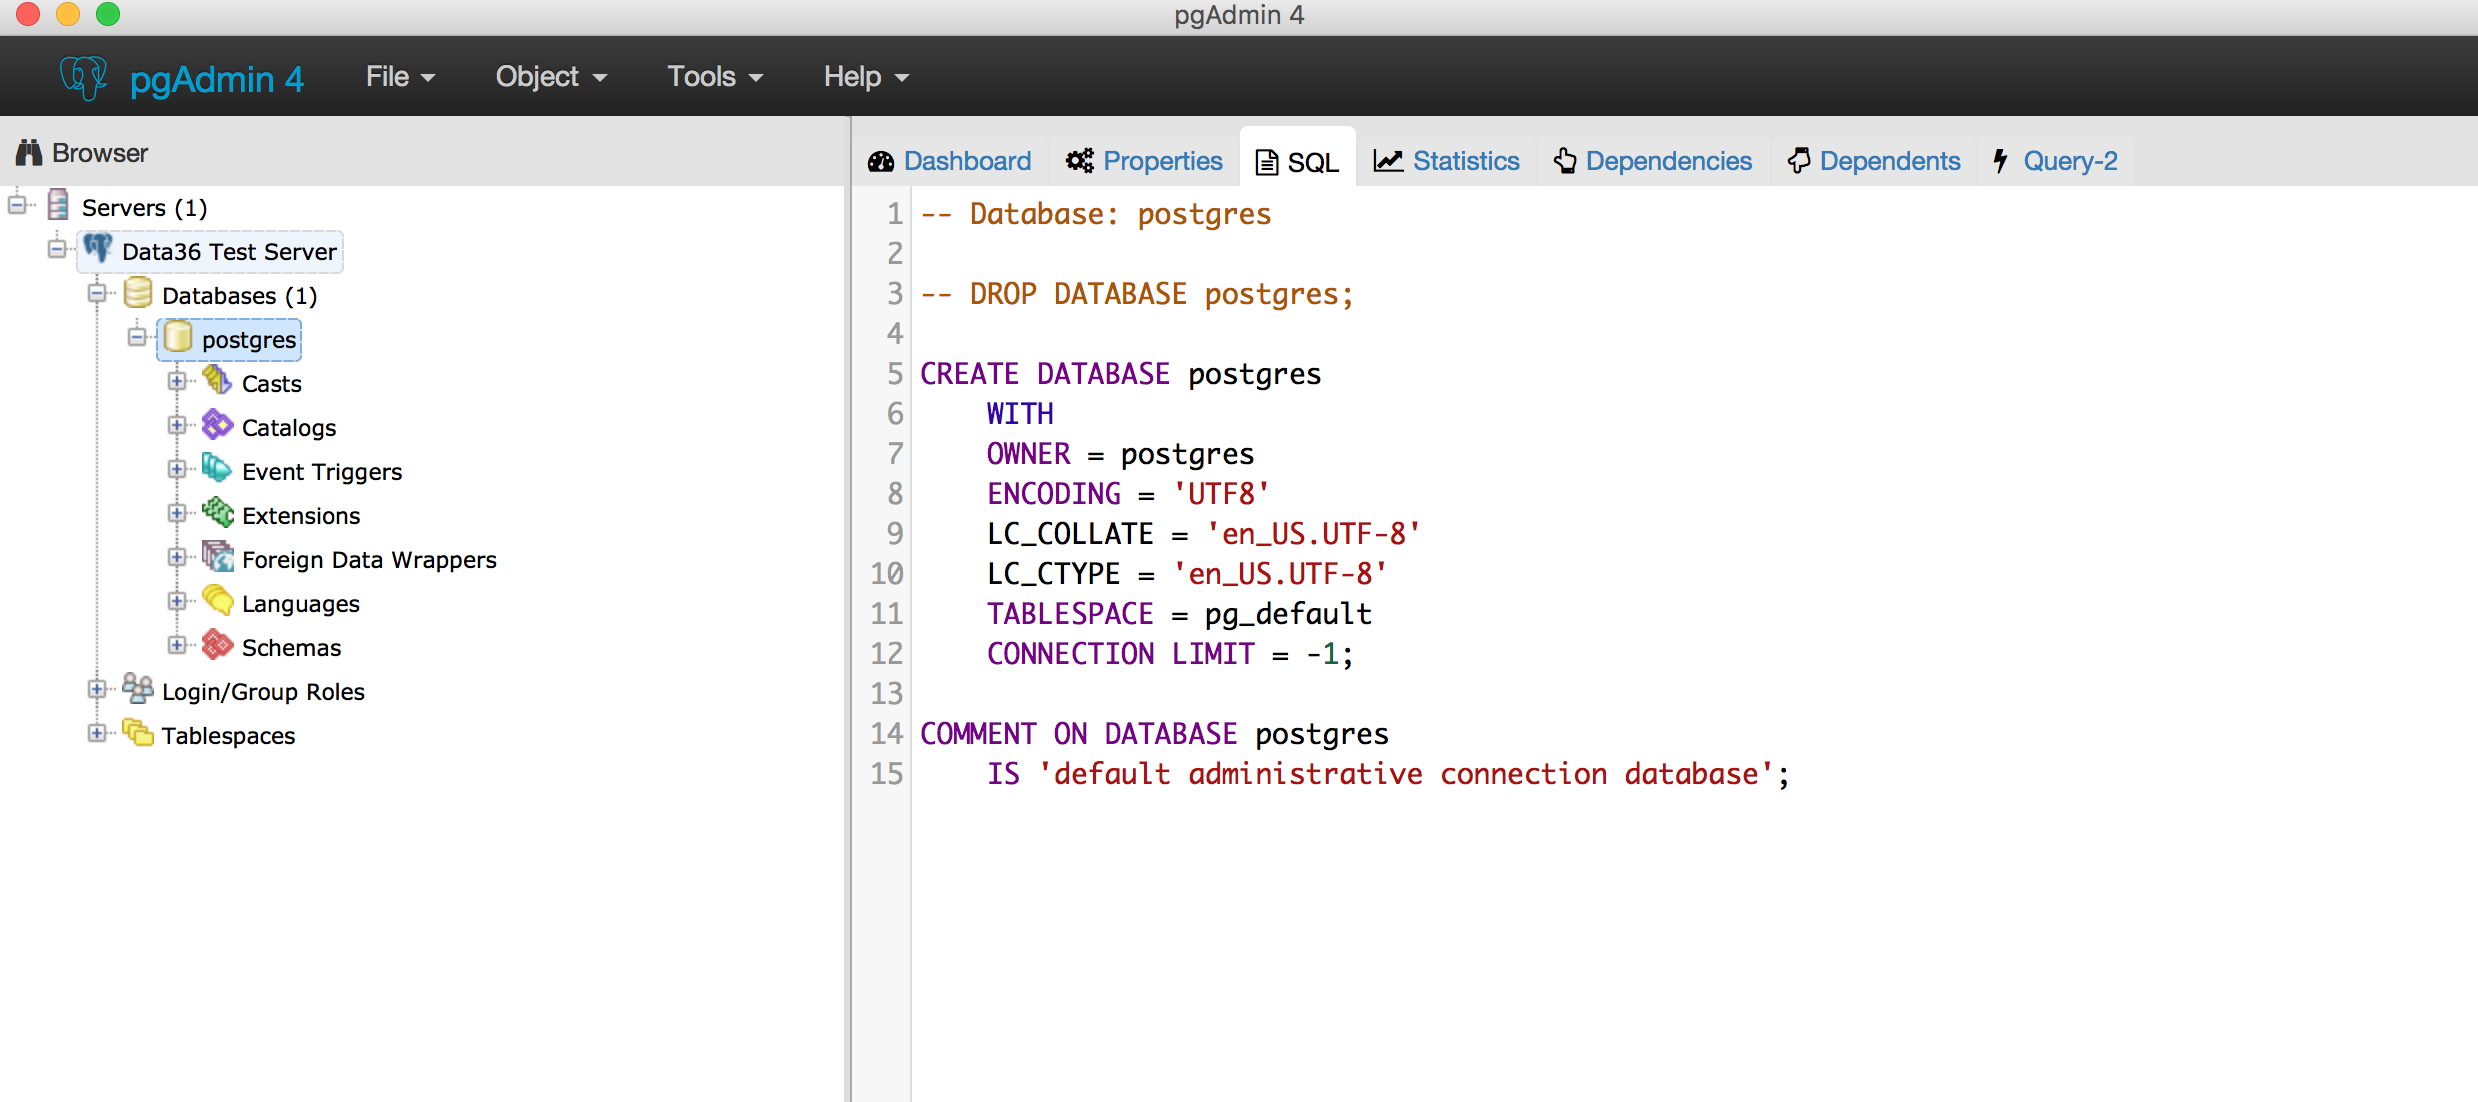
At first sight, it’s not really straightforward, but you can discover the different folders on the left side. If you right click on the name of the server (on my screenshot: “Data36 Test Server”), you can disconnect from your server. And you can connect the same way, when you want to get back.
Also if you left click on one of your databases (on my screenshot: “postgres”), then you select on the top menu “Tools” –» “Query tool,” you will be able to run SQL queries (execute with the little Play ▶︎ Icon):
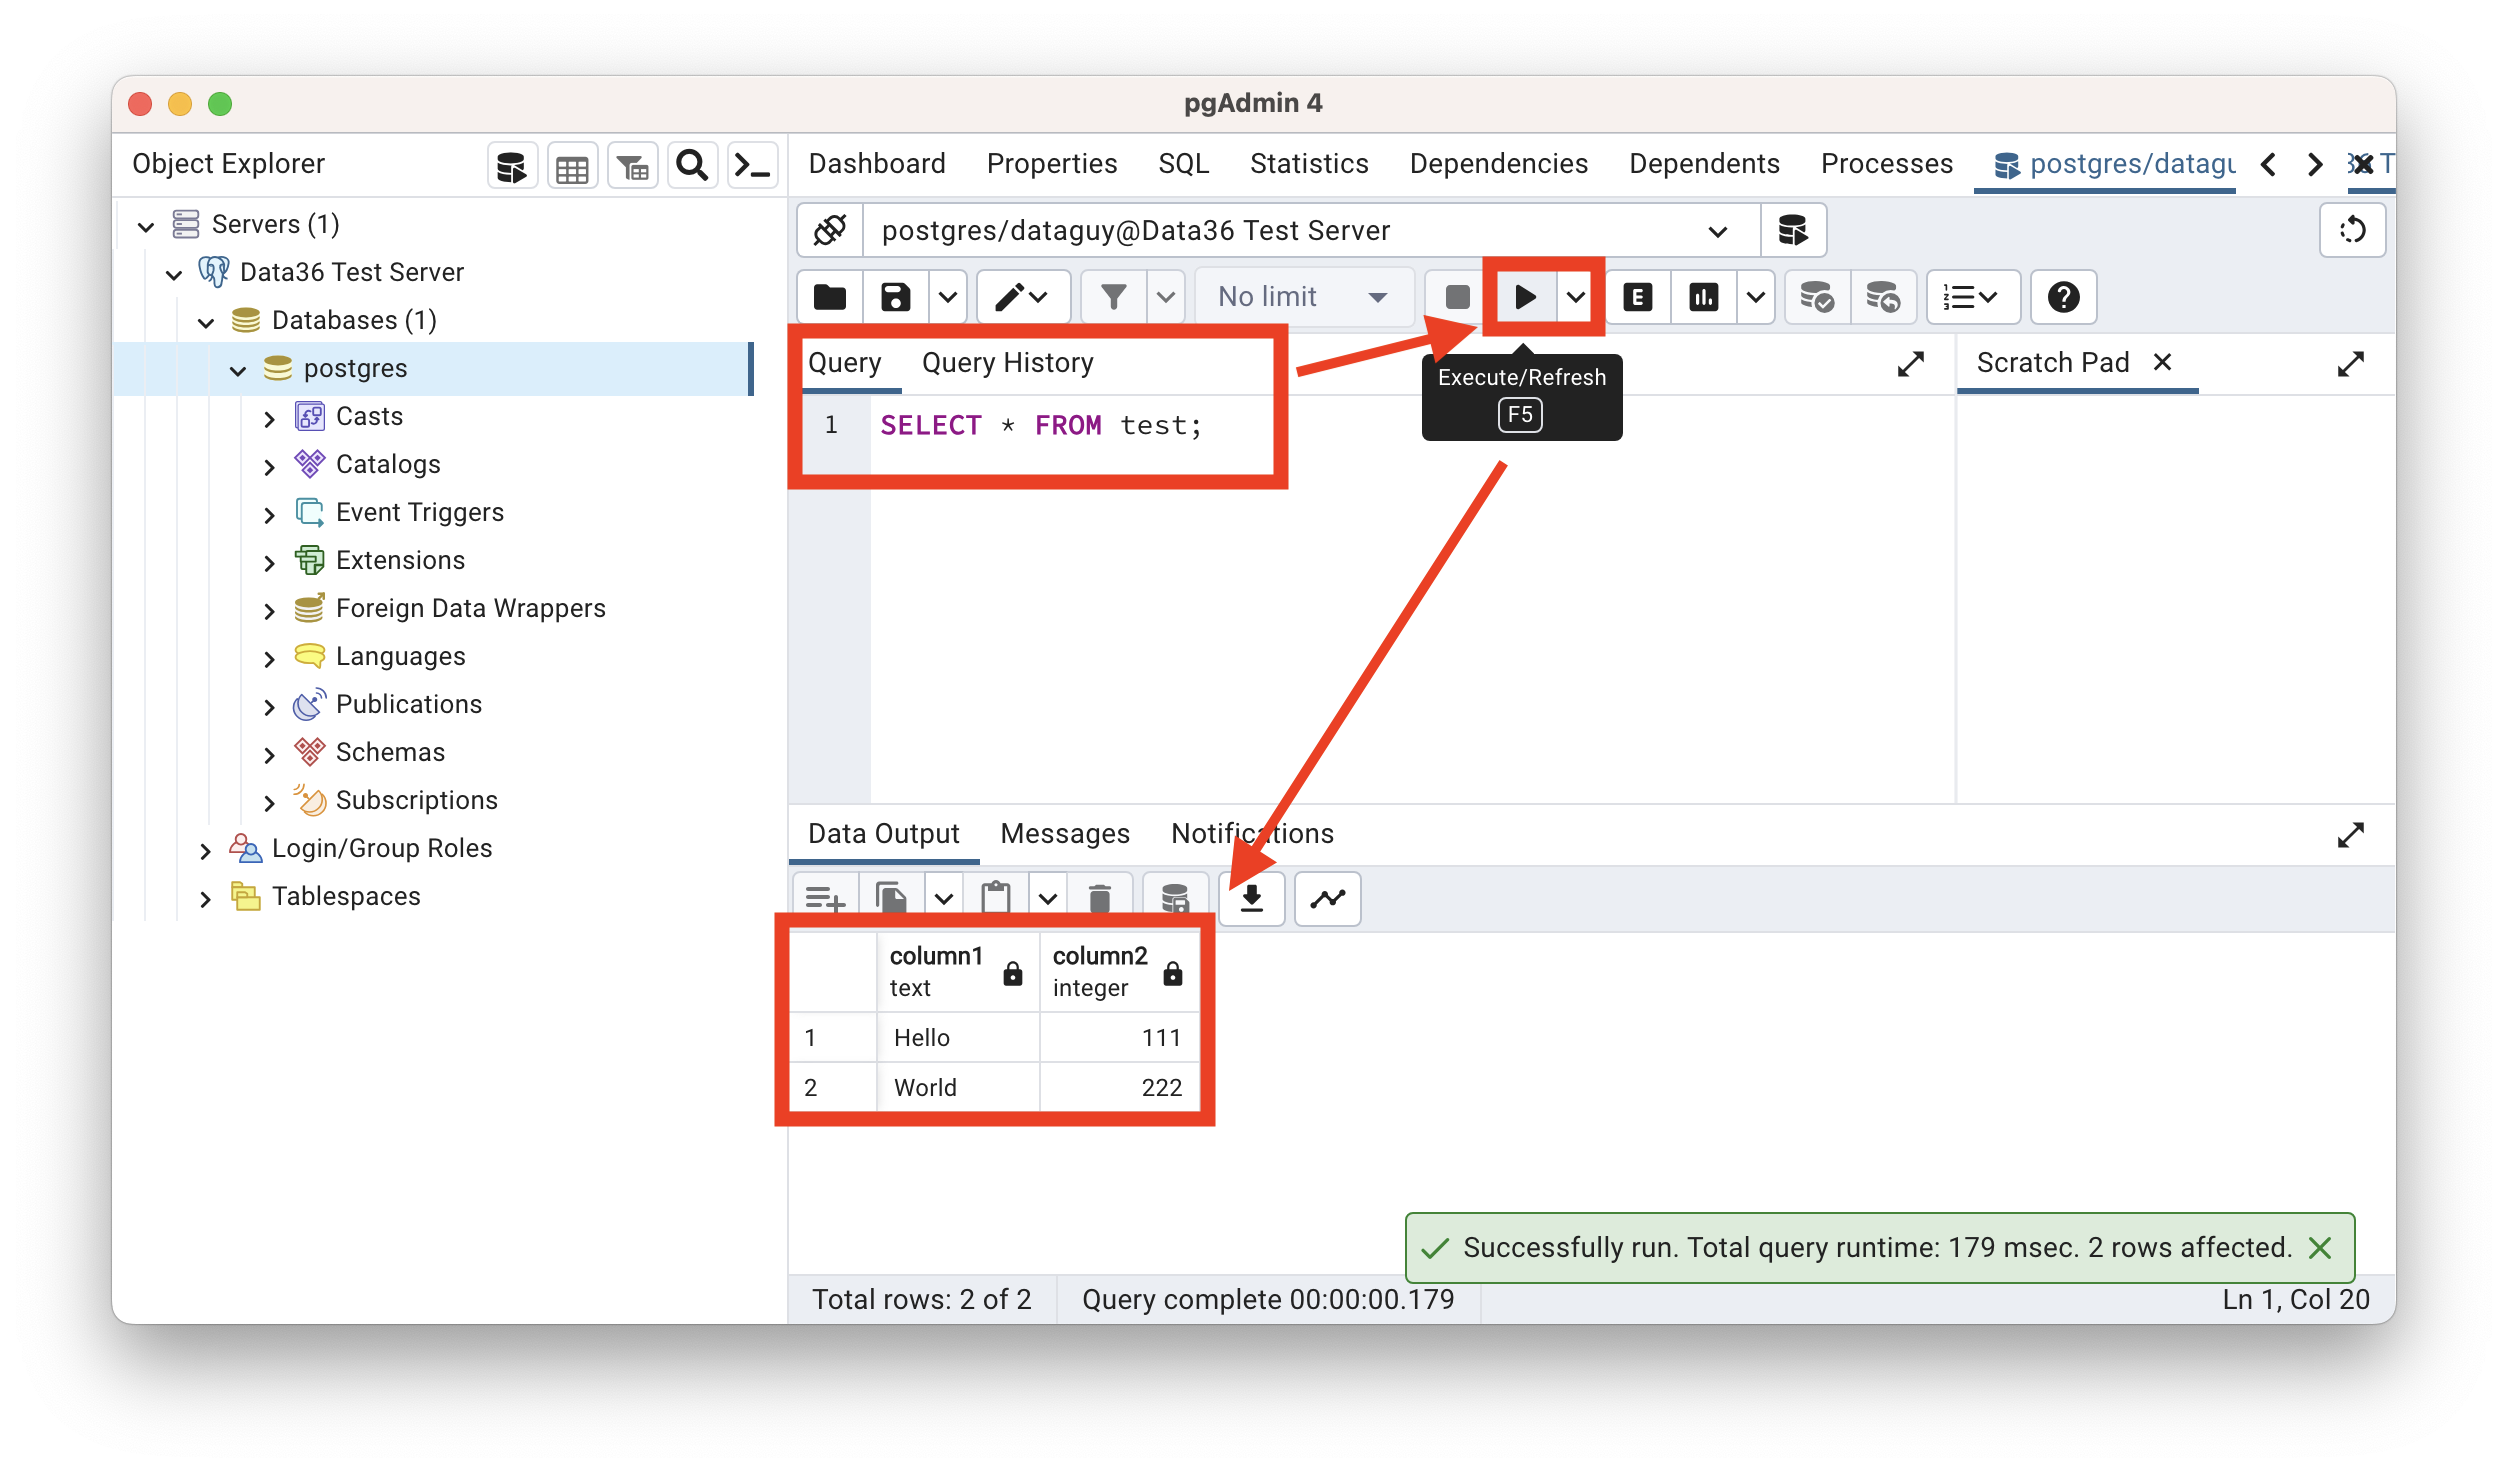
Notice that on my screenshot you can see the very same result that we got in the Terminal SQL!
Yay, you have SQL!
Now, at this point let me mention, that pgadmin4 is nice and free and built be the awesome postgreSQL team… but… to be honest, I don’t really use it in real life, because it’s a bit unstable — and generally speaking, there are better SQL manager tools. Here’s my current favorite free and open-source SQL manager: DBGate (I’ll show you in detail in my online courses.)
Only one small step left…
Step 6: Install R and RStudio!
UPDATE in 2023: When I first published this article, I figured that I would write some R tutorials for this blog as well. However, in 2020, I realized that if you learn Python for data science, you really won’t need R… at all. A few years later, in 2023, I decided to completely remove the installation of R from this tutorial! Here’s why:
All in all, I felt that R causes more confusion than it does good. So don’t worry about R, learn Python instead! (That was the R part of the tutorial — easy, right? ;-))
CONCLUSION
Nice job there!
You have created your own remote data server and you have installed Python, SQL and bash on it! This is a fantastic first step for you towards becoming a Data Scientist!
As I’ve mentioned several times during this article, I’ve been creating quite a few articles to show you how to use Python, SQL and bash. All of these start from the very basics. Feel free to start with any of these you prefer:
- SQL for Data Analysis tutorial series
- Python for Data Science tutorial series
- Bash for Analytics tutorial series
MORE:
- If you want to learn more about how to become a data scientist, take my 50-minute video course: How to Become a Data Scientist. (It’s free!)
- Also check out my 6-week online course: The Junior Data Scientist’s First Month video course.
Cheers,
Tomi Mester
Cheers,
Tomi Mester
Sources and further reading
Bash/Command Line:
Data Science At The Command Line: http://datascienceatthecommandline.com
R:
https://support.rstudio.com/hc/en-us/articles/200552306-Getting-Started
SQL:
https://www.cyberciti.biz/faq/howto-add-postgresql-user-account/
https://help.ubuntu.com/community/PostgreSQL
http://stackoverflow.com/questions/1287067/unable-to-connect-postgresql-to-remote-database-using-pgadmin