
In this tutorial, you’ll learn how to run a Python script. And it’s quite essential. When working on data science projects, you’ll write Python code all the time… You know that already. But when you start to automate these tasks (either it’s data cleaning, data loading, analytics, machine learning algorithms or anything else) you’ll rely heavily on scripting.
See, in most of my Python for data science tutorials we were writing code in Jupyter Notebooks. We’ve run Python functions, methods, commands and other operations one by one, manually. That’s coding.
But, in data projects, you don’t want to run everything manually. You want to automate the execution of your Python codes. You want to write scripts!
When I first learned how a script works…
Before we get into this, let me share one of my personal experiences regarding learning data science…
Back in the day, when I was an intern and I had never ever written any data scripts yet, I couldn’t imagine at all how they work. I wrote commands and code snippets in the command line or in Jupyter… Sure. I did that a lot. But I didn’t know how to “interchain” and automate these.
Back then, scripting seemed like some kind of magic to me. Or more like something so technical and difficult that I would never be able to learn it. Luckily, I was wrong — and everything changed at the very moment when a senior data scientist showed me one of his scripts. It turned out that the whole concept is extremely simple. And I couldn’t believe that I was so afraid of it.
I see this all the time… when I show beginners in my courses and workshops what a Python script (or an SQL or a bash script) really is, they are always as surprised as I was for the first time. It’s quite often the AHA-moment for them — and the tipping point in the learning curve when they say: “okay, now I get it.”
Hopefully by the end of this article, you’ll think the same.
Programming or scripting?
As you know, Python is not only for data science and not only for scripting… It’s basically a fully-featured programming language. But in this article, I’ll focus on the data science aspect.
Python-based data projects in practice can be broken down into small steps. For example:
- Importing
numpyandpandas. - Loading raw data from a
.csvfile into a pandas DataFrame. - Loading raw data from a Python dictionary into another pandas DataFrame.
- Merging the two dataframes.
- Sorting the values.
- Filling empty values.
- and so on…
As I said, I could execute these tasks manually (just as we did in pandas tutorial 3). Or, I can put these commands into a Python script, where I tell my computer that: I don’t want to press enter from line to line anymore. Here’s the order of the tasks, please do that for me. After all, you are the computer, you do the repetitive stuff… And I’ll go watch Netflix. (If only…)
That’s scripting…
The word “script” is very descriptive. A Python script is indeed very similar to a script of a movie. You write down very accurately what you want your computer to do and it will do it. In that metaphor, you are the screenwriter and the director, Python is the actor and your computer is the producer.
Note: It’s good to know that scripting is not exactly the same as programming. In the everyday practical sense we use the word *programming* more for functional things like the development of a web app or a mobile application. And *scripting* is more like an automation of a process — which is useful for exactly the things I mentioned above: mostly for doing data science related things. In the technical sense, the difference between programming and scripting is in the so-called “compilation step”… But since it’s not important for you right now, I don’t want to talk about that here. If interested, check out this excellent Stackoverflow thread: Scripting language vs. programming language.
How to create a Python Script
Okay, we’ve clarified the concept. Let’s put things into practice.
I’ll go with the code we used in my pandas 3 tutorial. But you can use any code that you’ve written before in Jupyter.
For your convenience, here’s my Jupyter Notebook.
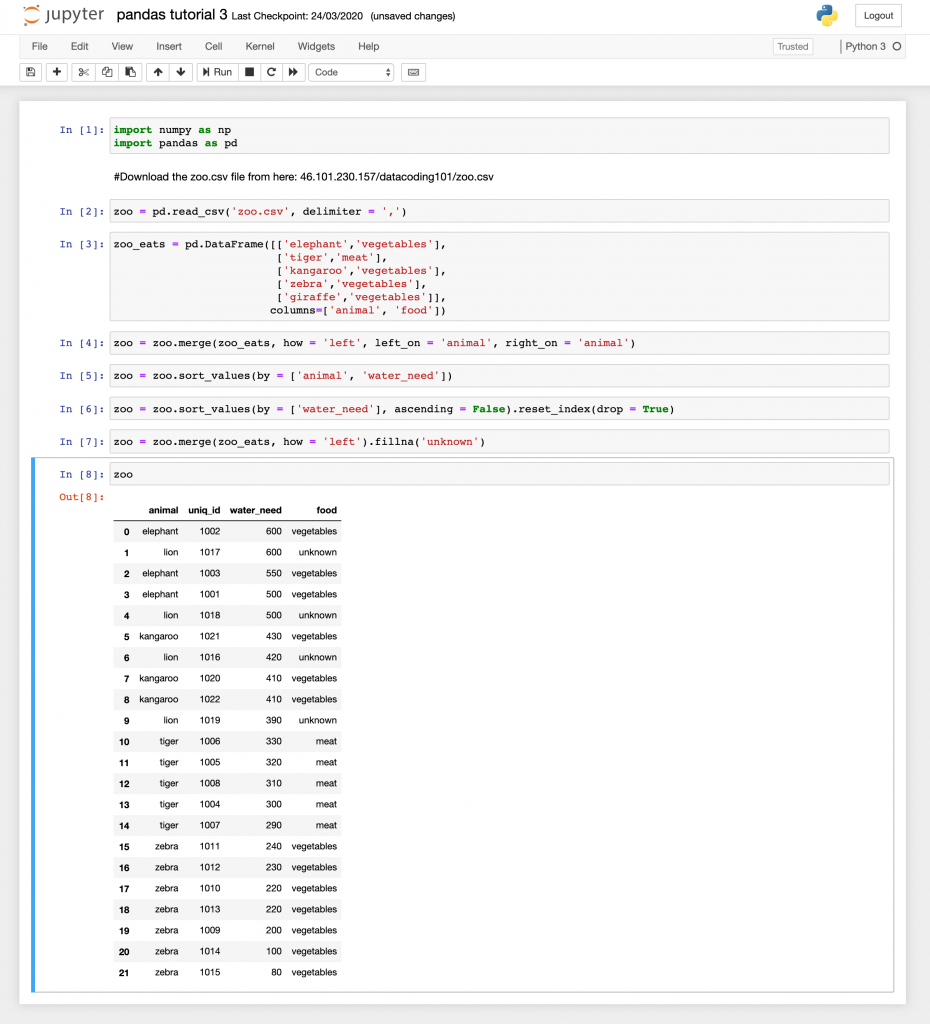
How do you turn this Jupyter Notebook Python code into a Python script?
Ready for the magic?
3… 2… 1…
You have to copy all the lines from the Jupyter Notebook and put them into a text editor — then save the file with a .py extension.
See? I said that it only seems magic. Writing a Python script, in reality, is so easy that a first-time Python coder wouldn’t believe it.
Anyway, there are a few smaller pitfalls that you should watch out for, so I’ll lead you through the whole process step by step.
Let’s create a Python Script – step by step
STEP #1 – Open a text editor!
If you are on a remote server, open your favorite text editor. Which is mcedit … or at least it should be. 😉 (More info about mcedit in my server installation guide.)
Anyway, type:
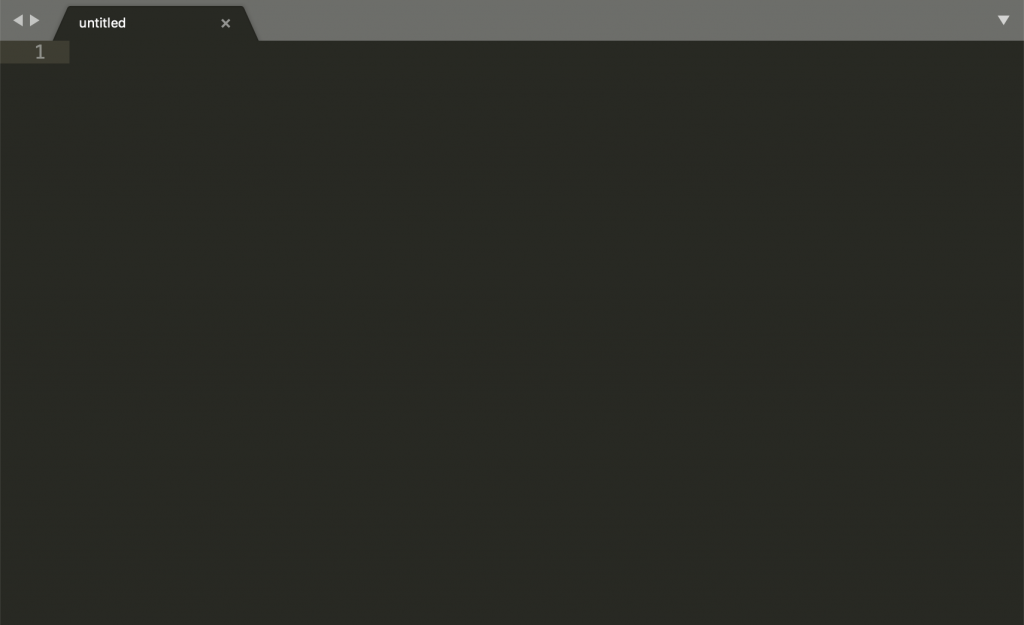
mcedit
And this old-school editor will open up:

By the way, you can use any text editor you prefer (vim, nano, etc.).
But if you want something more advanced than mcedit, I specifically recommend Sublime Text 3!
Note: In real projects, I use Sublime Text 3, but to keep things simple, in this tutorial, I’ll go with mcedit.
STEP #2 – Copy-paste your code!
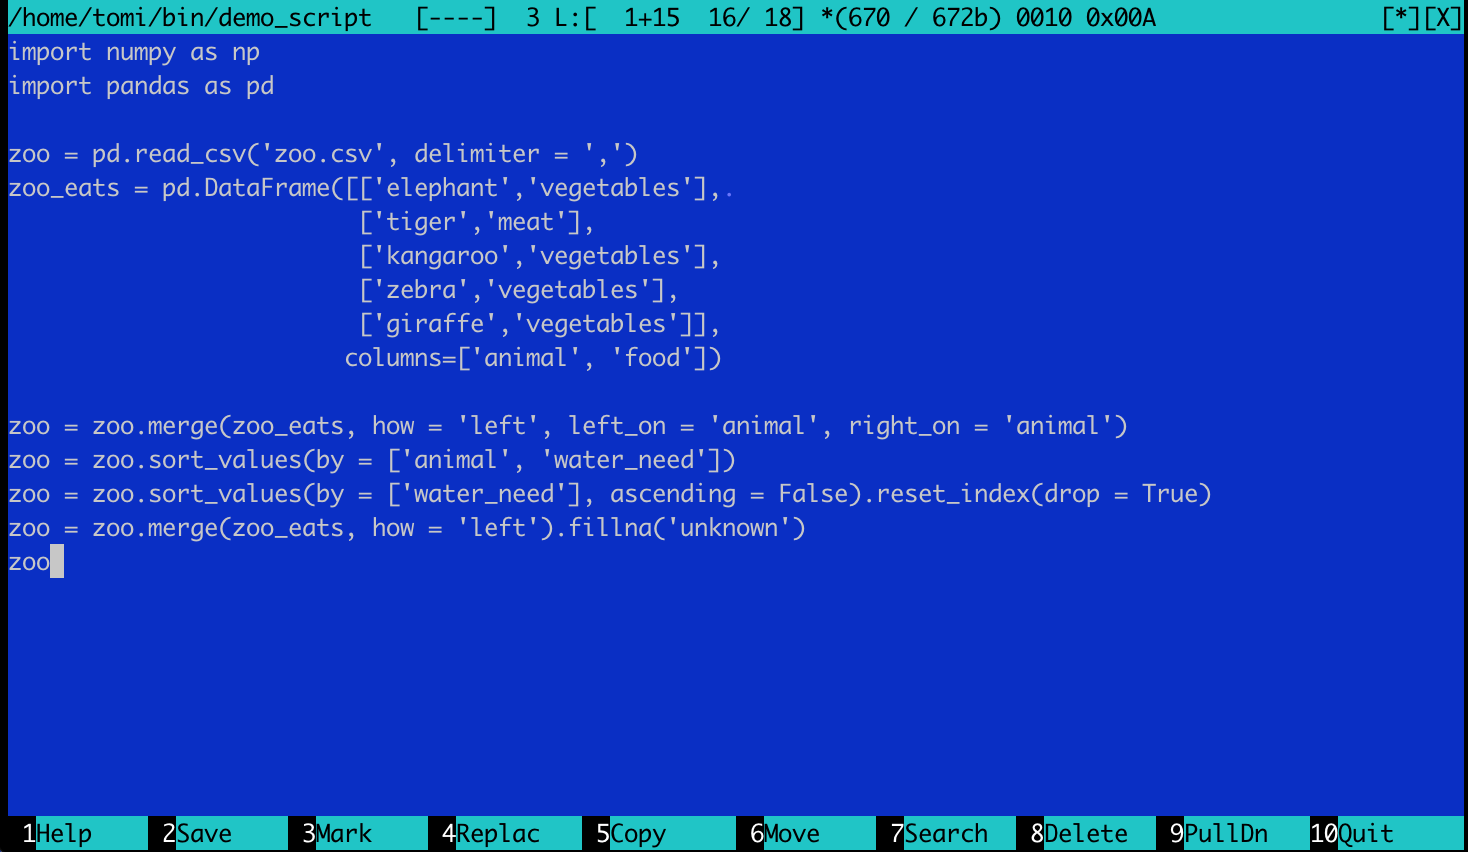
Copy-paste all your code from your Jupyter Notebook into your text editor:
STEP #3 – Save the file as a .py file!
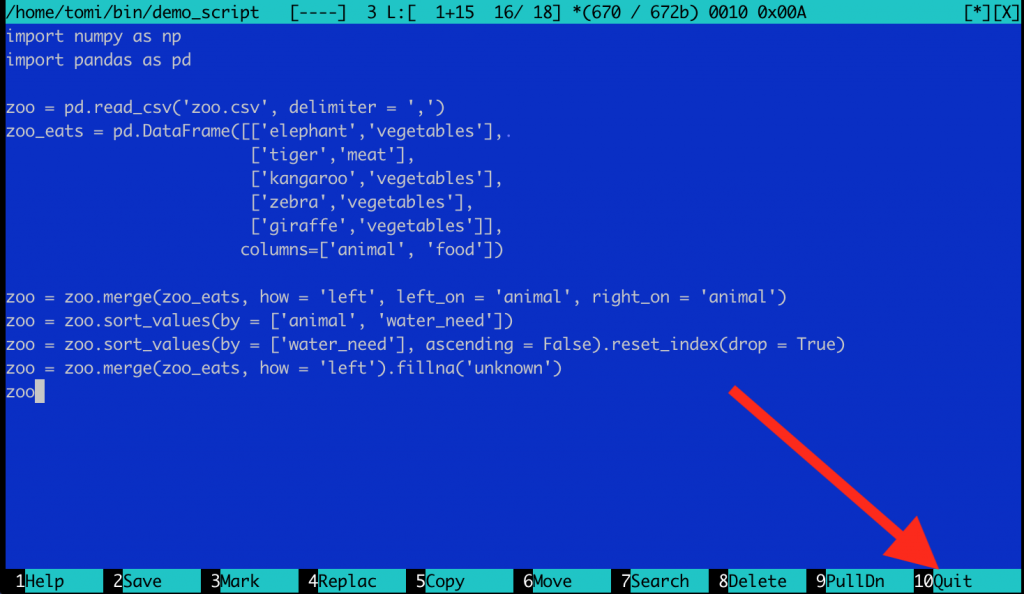
Click the 10-Quit button in the bottom right corner (or hit Esc+0 on your keyboard).
mcedit will ask whether you want to save the file? Click: Yes!
Then it will ask you to name your new text file. Python scripts have their own extensions: .py. So whatever filename you choose, use the .py extension at the end.
I’ll go with demoscript.py.
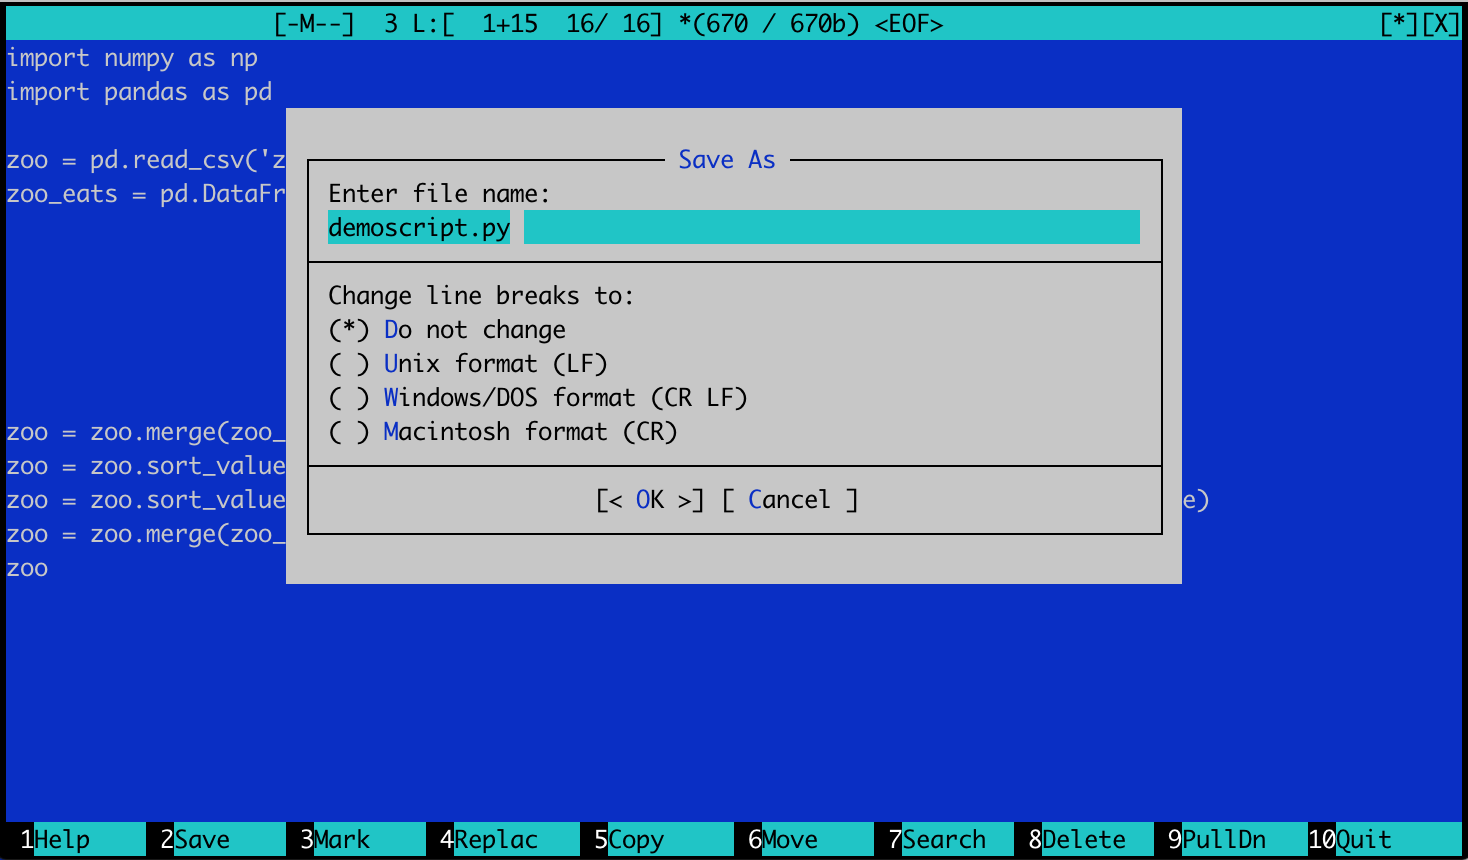
Hit okay — and boom, your text file is now a Python script!
STEP #4 – Reopen the text file!
Let’s get back to editing your file by typing:
mcedit demoscript.py
I just wanted to show you this, because now your code looks much more Python-like with all the colors:
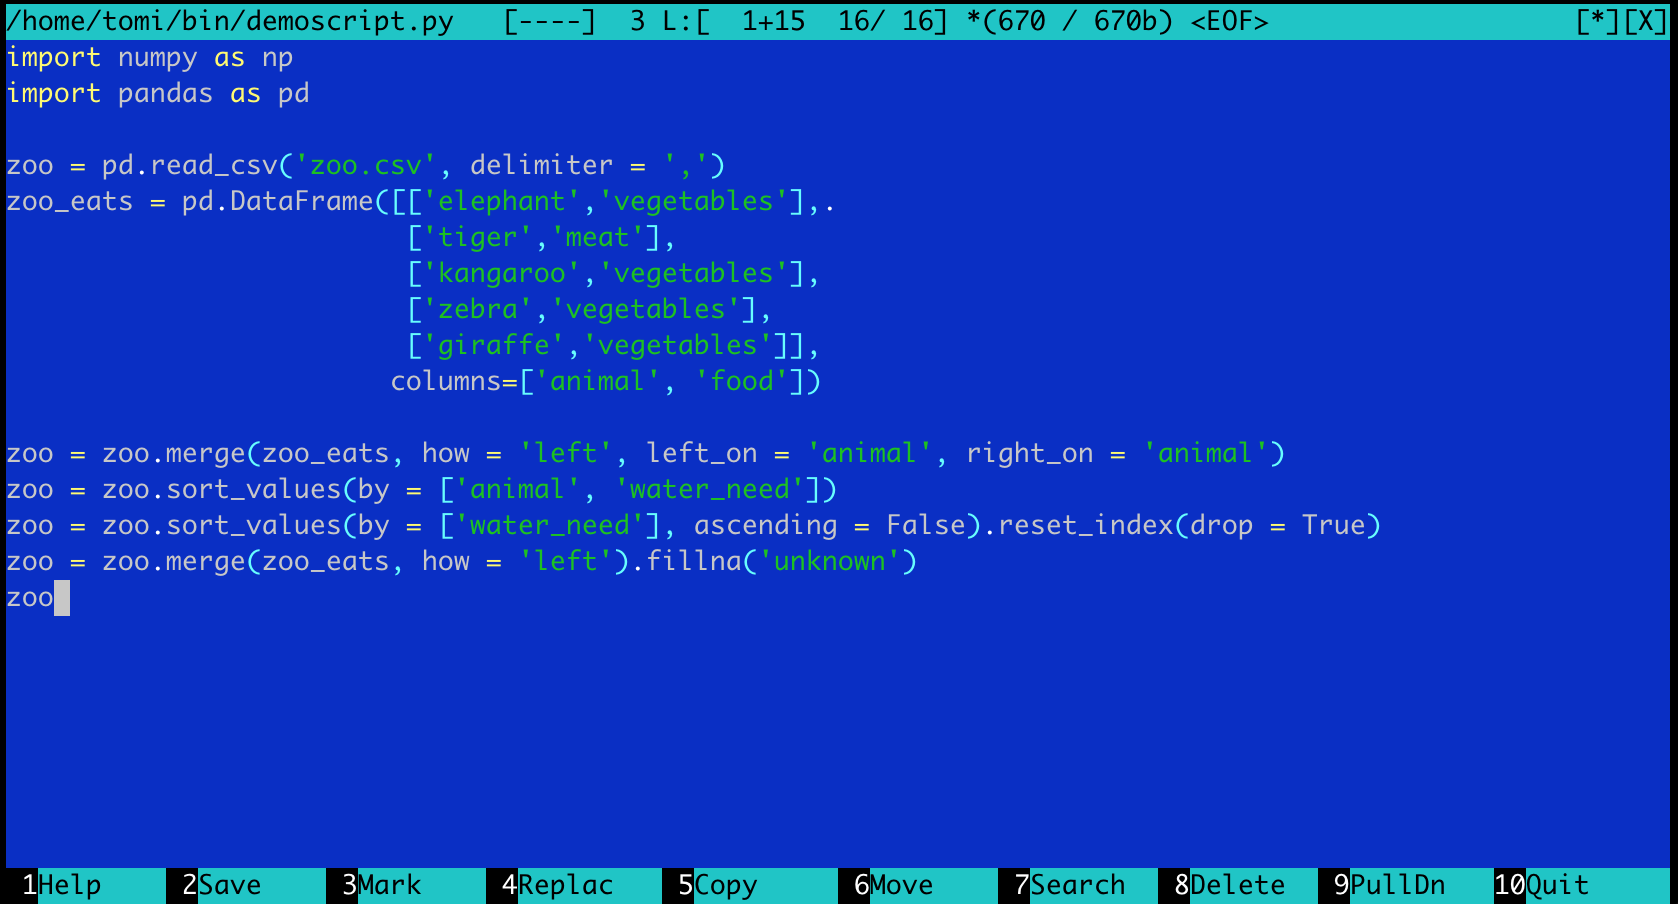
That’s because you’ve added the .py extension, so mcedit recognized your text file as Python script. Awesome.
STEP #5 – Add the shebang!
Wait. Wait… What is a *shebang*? — you might ask.
Shebang is one line of code that you should put at the very beginning of your script. Its job to tell your operating system that you have an executable Python3 file.
The shebang line for Python3 scripts looks like this:
#!/usr/bin/env python3

People quite often forget to add the shebang… especially for Python scripts. To be fair, your script will work properly without it 99 out of 100 times.
Regardless, I prefer to add it for multiple reasons:
- For that 1 time out of 100. Believe me, it’s extremely annoying when you work on a complex project, your script doesn’t run properly and after 5 hours of debugging it turns out that you missed the shebang. Just put it there.
- If you are working in an environment where there are multiple versions of Python available, the shebang will make it clear which interpreter should execute your script.
- When one of your colleagues opens your script, she’ll immediately see which language you used for your script.
Anyway, put the shebang there, it won’t hurt anyone.
(OPTIONAL) STEP #6 – Making python scripts executable – how?
Okay, after the shebang, save your file again and try to run your script by typing:
python3 demoscript.py
In some cases (depending on your server configuration), it might happen that you get a permission error. Something like this:
demoscript.py: Permission denied
In Ubuntu operating systems, just because you created a script doesn’t mean you have the permissions to run them. Safe and secure, just as we like it… 🙂
As Python is an interpreted language, in most cases, this permission error won’t come up. If you don’t see this issue, just skip forward to STEP #7.
If you do have a permission error, good news: it doesn’t take much coding to grant yourself the right permissions. Type this to the command line:
sudo chmod 777 demoscript.py

(It will ask for your password. Type it!)
Note: this is the least restrictive permission you can grant. For practicing, it’s fine. In real life projects, to avoid security issues, discuss with your sysadmin what you should use.
STEP #7 – Run your Python script!
And here comes the last step (in theory, at least).
Just run your script by typing:
python3 demoscript.py

Cool! No error messages. This means that your Python script has run and you are done… Except that you can’t see any output on your screen.
STEP #8 – Why don’t I see anything!?
If you ran a different script than me, you might see an output on your screen.
But in this particular case (and most of the times when you convert a pandas Jupyter Notebook project into a Python script) you won’t see anything printed to your screen. Too bad!
But why’s that?
Because the last line of your code was this:
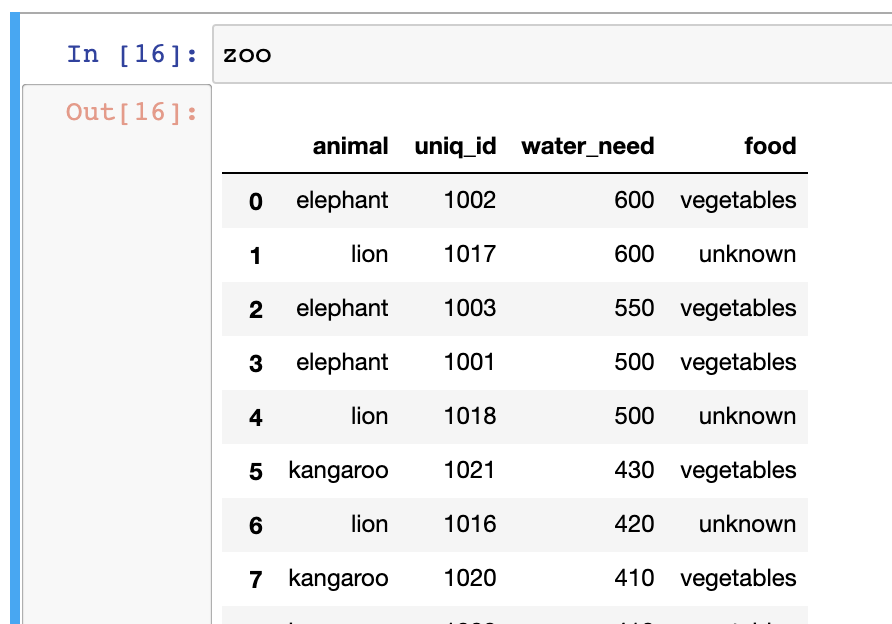
Simply typing the name of your pandas dataframe printed your dataframe to your Jupyter notebook. But it won’t print your dataframe to your Terminal screen. Honestly, I don’t know the logic behind that (I was looking for it but I couldn’t find it in any documentation or forums) — but this is how it is.
Point is: when you are running a Python script and you want to print its output to your screen, you’ll have to use the print() function.
So go back to your script and change the last line to this:
print(zoo)
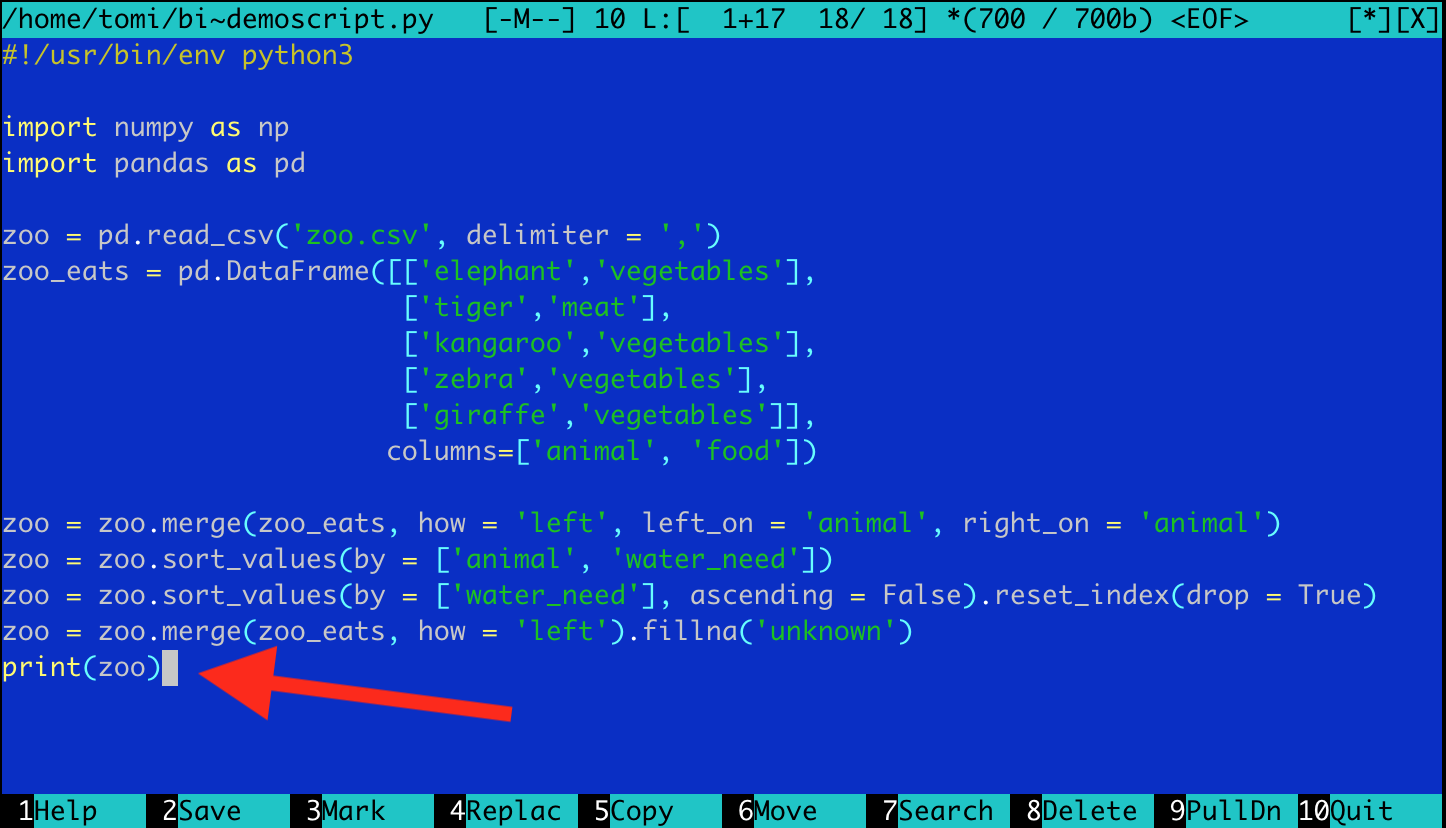
Click 10-Quit and Save.
Re-run your script by typing:
python3 demoscript.py
STEP #9 – You are done! You’ve created a Python script.
Victory!
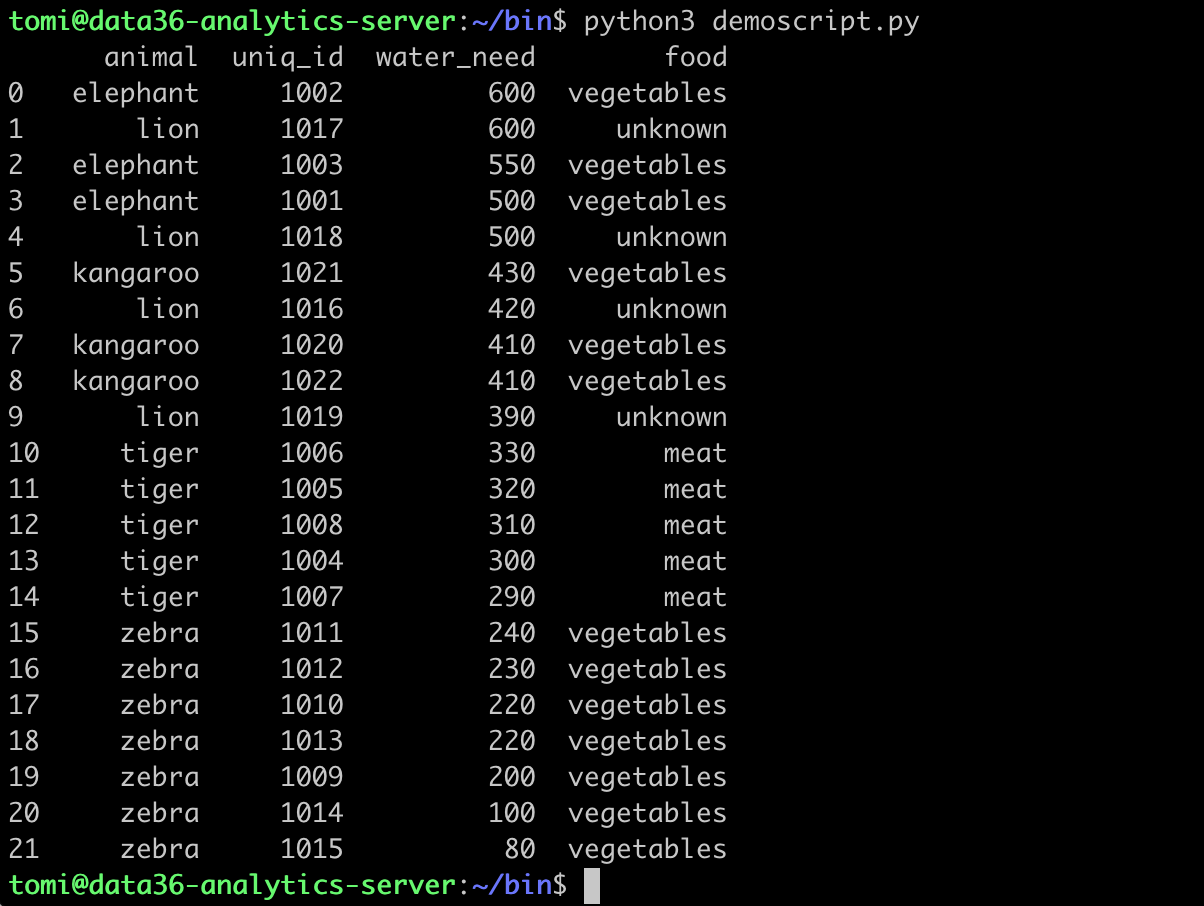
You created your Python script and it works, too.
Great stuff!
Of course, this was just a small demo and you could optimize this process further. But we do that anyway in my 6-week course, so if you’re interested, check that out here: the Junior Data Scientist’s First Month.
The optimal Python scripting workflow: Prototyping first, scripting second.
Before we wrap this up, I wanted to add one more thought.
Now that you know how scripting in Python works, you’ll still want to use Jupyter Notebook. Yes, automations and processes are great. But testing and fine tuning them are important initial steps. And for that, Jupyter Notebook is just the perfect tool.
So when I write Python code/scripts for my data science projects, I do it this way:
- I prototype my Python project in Jupyter Notebook. I create the code and I figure out what steps I need until I get my intended results.
- Then I clean up the mess (e.g. I remove unnecessary code snippets and unused imported packages) and I sort my Python tasks into execution order. (When you work in Jupyter, the visual order of your cells is not necessarily the order of how you executed them. That can cause headaches.)
- I add comments, so I know what line does what.
- I move everything into a text editor (Sublime Text or
mcedit) and create a Python script that can be automated if that’s needed.
That’s it.
Conclusion
Writing and running Python scripts is not magic. If you know how to write Python code, you’ll definitely be able to learn scripting, too. In fact, if you came this far in this tutorial, you’ve already done that. So congrats! Now, go ahead, and write your own Python scripts! Enjoy!
- If you want to learn more about how to become a data scientist, take my 50-minute video course: How to Become a Data Scientist. (It’s free!)
- Also check out my 6-week online course: The Junior Data Scientist’s First Month video course.
Cheers,
Tomi Mester
Cheers,
Tomi Mester