
I’ve written about the importance of scripting in data science. But I’ve realized that I’ve never introduced my favorite script editor. It’s Sublime Text 3! In this article, I’ll show you:
- What is Sublime Text 3?
- What are its best features for data scientists?
Aaaand: - How can you use it on a remote server?
Note: After writing and re-reading this article, I’ve realized that I speak very highly of Sublime Text 3… So just in case, let me add here: I praise it because I love it. I’m not affiliated with the Sublime Text team in any way.
What is Sublime Text 3?
Sublime Text 3 is a text editor for coding. It’s like TextEdit (on Mac) or Notepad (on Windows). You can type text in it and you can save that in different file formats. Except that Sublime Text 3 is specialized for coding.
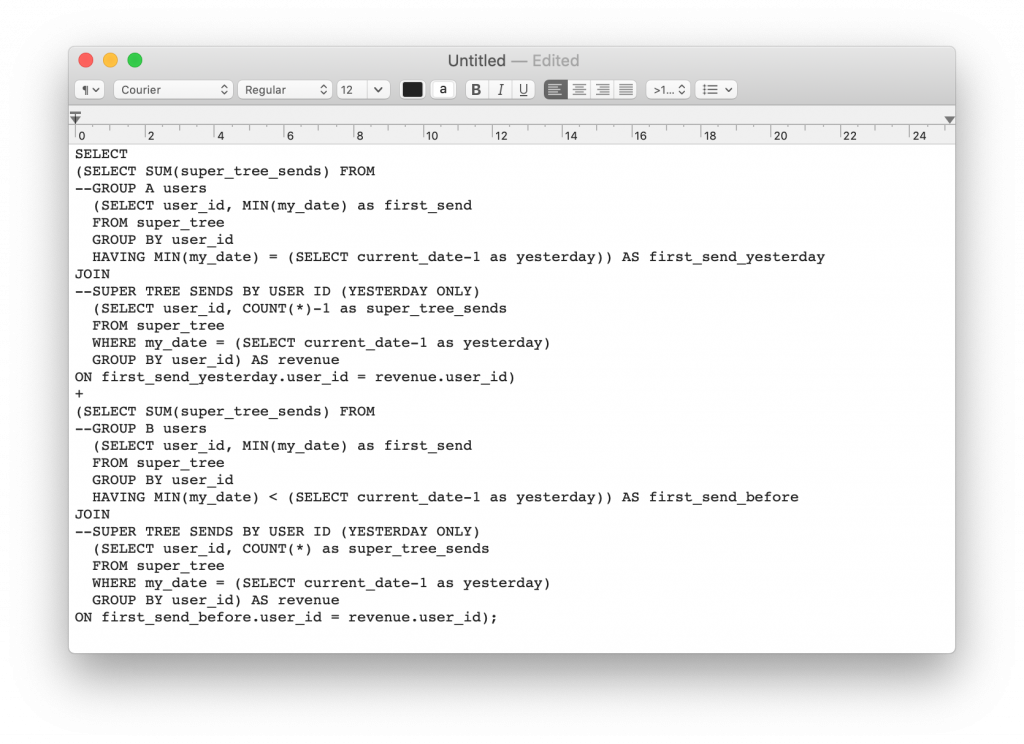
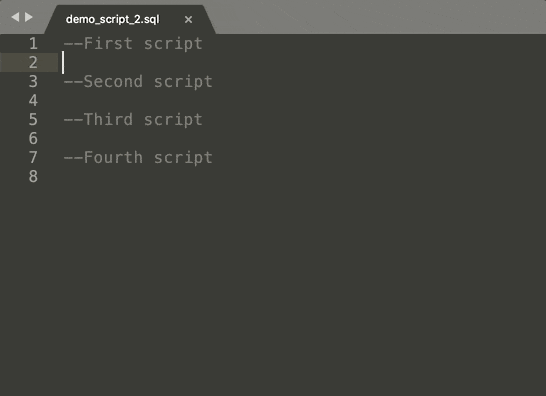
SQL script in TextEdit:
The same SQL script in Sublime Text 3:
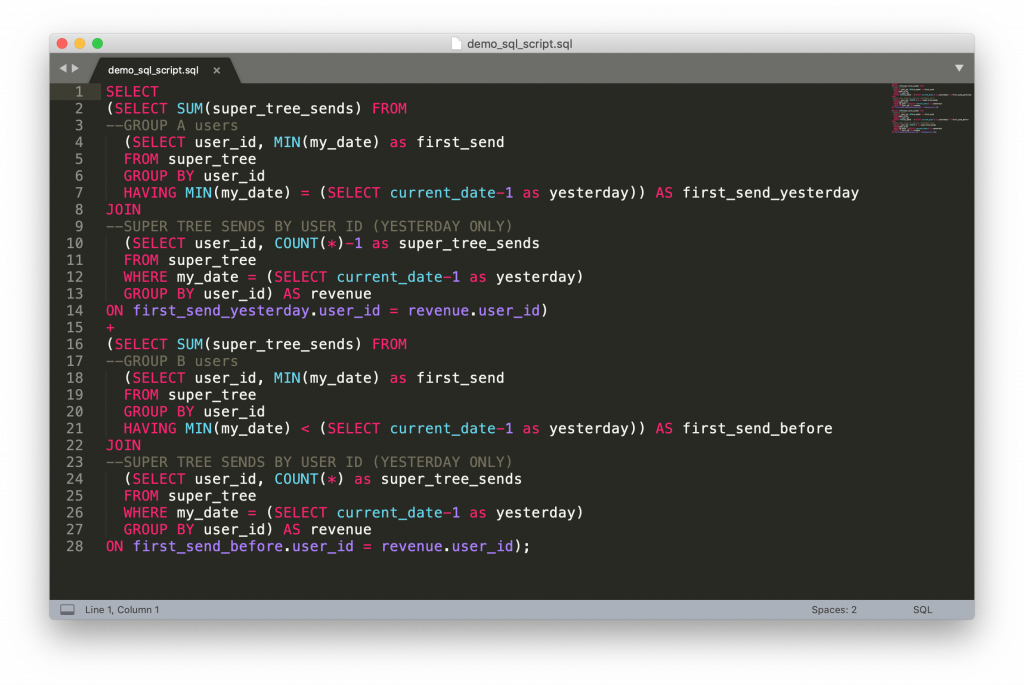
The most obvious differences are:
- Sublime Text colors your code according to the syntax you use
- It recognizes every major language that you will use as a data scientist: SQL, Python, bash, R, etc.
- It shows the number of the lines in your script
- It gives you a script overview on the right side
- …
And that’s just the beginning; there is so much more in Sublime Text 3…
Sublime Text 3 vs. vim, nano, etc.
I have to add:
Sublime is not the one and only text editor for coding.
Many data scientists use vim or nano — or my favorite: mcedit.
These are all good tools for editing scripts and code. You can use them from the command line and mcedit even has a nice, visual, point-and-click type of interface — similar to Sublime Text.
The same SQL script in mcedit:
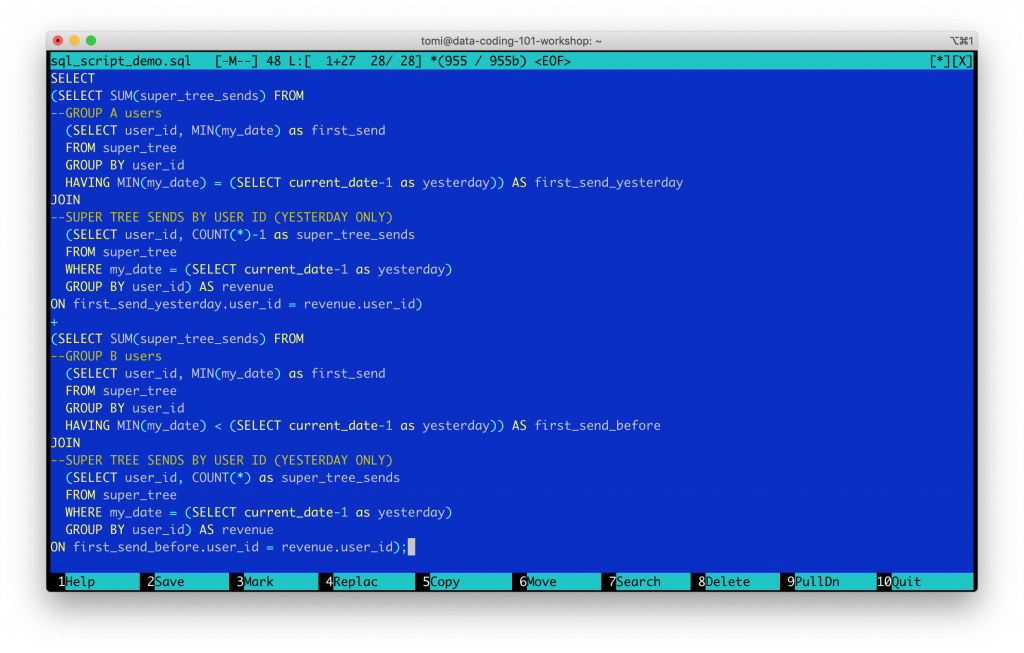
But while many data scientists love these old-school script editors, in my experience, they are not user-friendly enough. You can get used to them, sure. For instance, I’ve used mcedit for years… But once you try Sublime Text 3, there is no going back. It’s much faster, much smoother and much more efficient than anything else you’ve used before.
Sublime Text 3: a few key features that will make your coding life easier and happier
There are hour-long online courses about how to get the most out of Sublime Text 3. In this article, I’ll list only a few of my favorite features that I use in my data science projects day-to-day — you know, just to whet your appetite. 😉 (And then if you want to go deeper, you can find on Youtube some more in-depth tutorials anyway.)
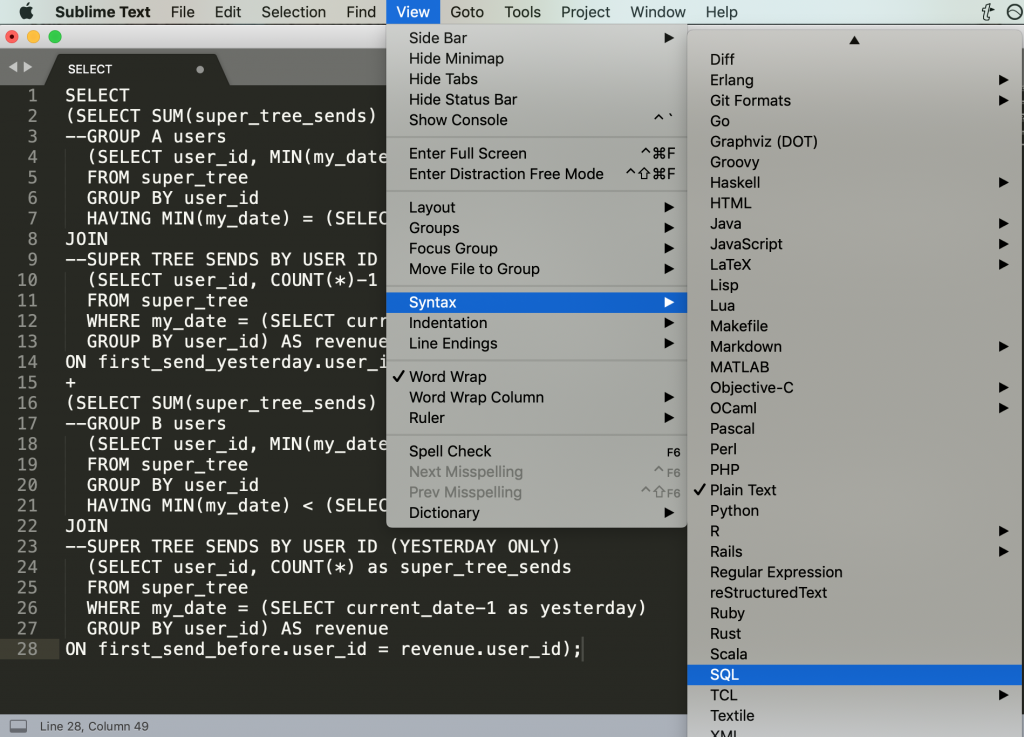
Syntax highlighting
The most obvious key feature is syntax highlighting. When you type (or copy-paste) your code, Sublime won’t automatically recognize which language you use. E.g. here I’ve copy-pasted the SQL script I showed you before.

But you can turn this into a beautifully coloured SQL script by either selecting your preferred language manually:
Or by simply saving the script with the right file extension. (In this example, in an .sql format.)
And boom:

Multi-cursor and multi-edit
Even in the most cleverly written data science script, sometimes you have to be repetitive. But typing the same keyword over and over again or copy-pasting all the time is boring and slow.
One of the coolest features in Sublime Text 3 is multi-cursor. By holding the CMD key on Mac — or the CTRL key on Windows/Linux — you can place multiple cursors on your screen. And when you start to type some text, it magically shows up at every cursor.
Like this:
Multi-select + multi-cursor + multi-edit
Multi-cursor can be used to change the pre-existing parts of your script, too!
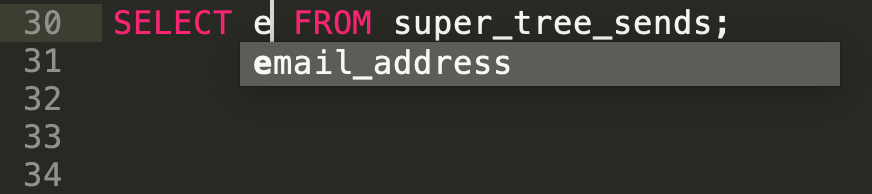
Let’s say that in your SQL script, you want to change the user_id keyword to email_address. (“Ah, typical, the data infrastructure team changed the column names in our SQL database, again! Now I’ll have to go and fix all my scripts…”)
Not a problem!
First off, there is the usual find-and-replace-all feature, in Sublime Text, too.
Just hit: CMD + ALT + F (Mac) or CTRL + H (Windows/Linux)
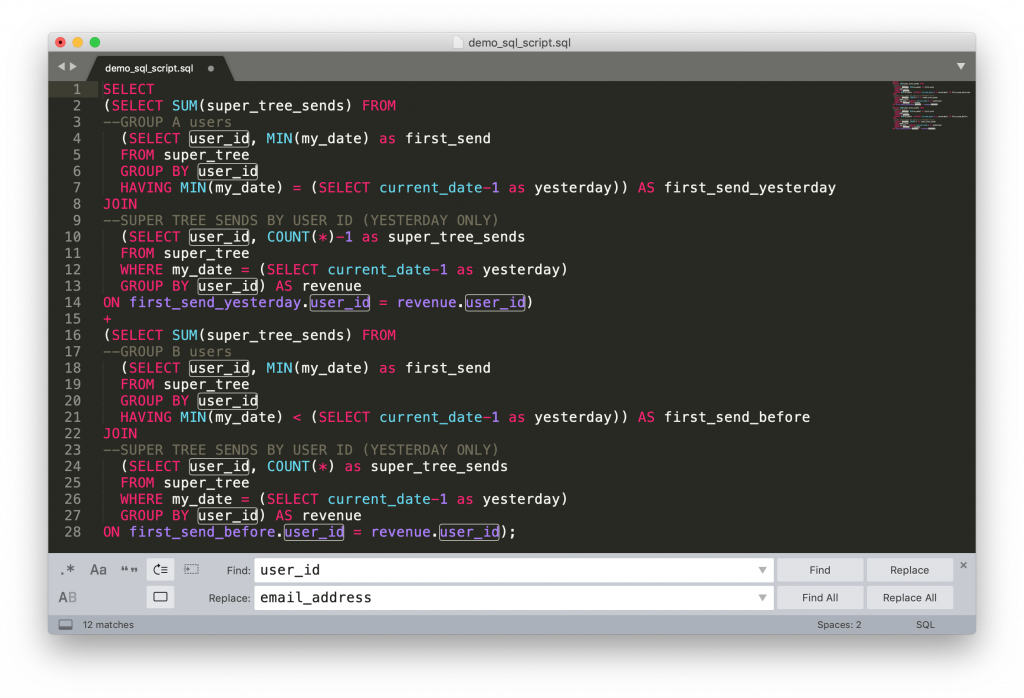
And you can find and replace…
But there is an even more visual (and flexible) solution to get the same thing done.
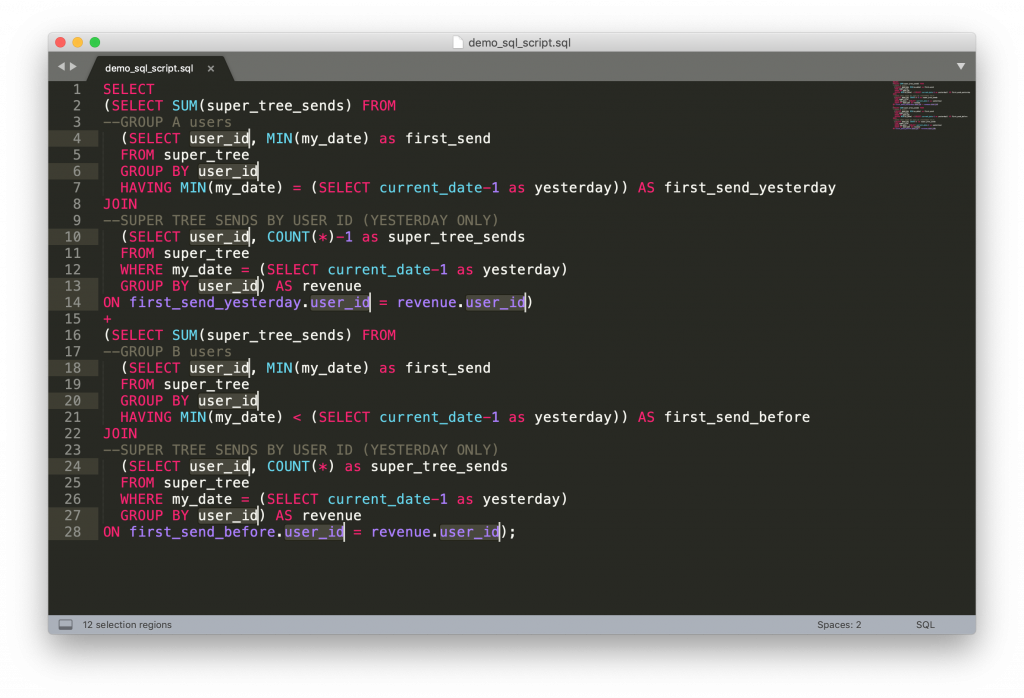
1. Select one occurrence of the text/pattern you want to change. All other occurrences will be highlighted automatically:

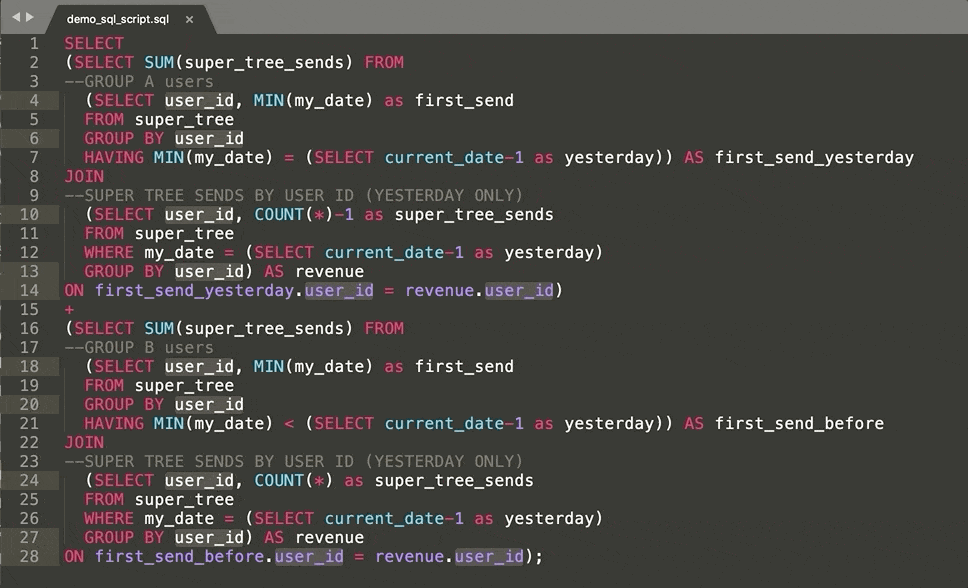
2. Now, hit CTRL + CMD + G on a Mac — or ALT + F3 on Windows/Linux. And with that, all keyword instances will be not just highlighted but selected for editing, too. So you’ll see a cursor after each selection.
3. And at this point, whatever you type in will edit every selected keyword:
Pretty cool, huh?
Note: Find all the selection and multi-cursor hotkeys in this Github repo and in the original Sublime Text tutorial.
Auto-complete
Another lovely feature is auto-completion.
Note: You have this in many other data science tools, for instance Jupyter Notebook or in Terminal, too.
When you start to type a keyword, it automatically shows the keywords that you used that start with the same characters. E.g.:
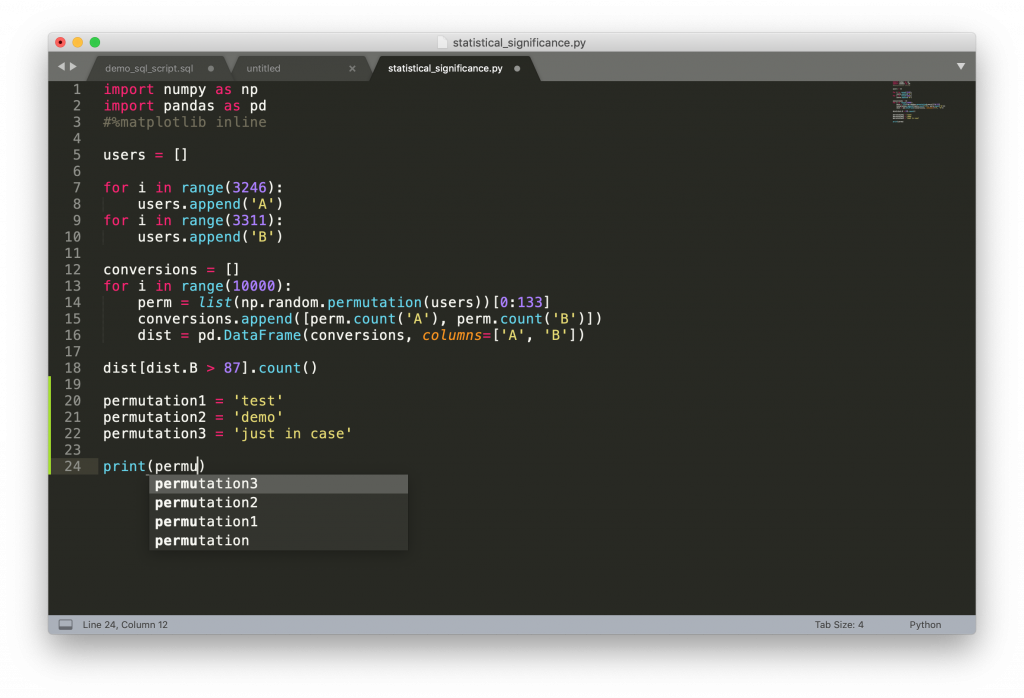
Just hit the TAB key and it will automatically extend to it, so you can spare some characters and time. This can be especially handy for Python scripts when you work with many, many variables.

Customization
Sublime Text 3 is 100% customizable, too. You can set your preferred character size, color scheme, drag speed, etc. You can turn on and off auto-indentations, smart-indentations, auto-completion… basically, you can customize everything.
It’s very flexible — but on the flipside, the customization works via a JSON-like editor. So to fine-tune your environment settings, you have to code. E.g. this is how I set the default font size in my Sublime Text editor to 16 pixels.

Anyways. It might look complicated but if you try it out, you’ll get used to it quickly… and I love the flexibility it provides.
Okay, these were my favorite five key features of Sublime Text that make my coding tasks so much easier and smoother. (Again: if you want to see more, go to Youtube, there are tons of cool tutorials on this topic.)
Using Sublime Text 3 on a remote server
One of the top questions I get from my course participants is: how they can use Sublime Text 3 on a remote server.
It might look impossible at first sight. It’s a desktop application, right? But don’t worry, it’s definitely possible — thanks to randy3k (and many others) who created an awesome open-source solution for this.
In the original Github repository there is a brief description of how to set things up. But I’ve seen that for more beginner data scientists, it’s not 100% clear how to go through it. So in the rest of this article, I’ll give you a bit more in-depth, step-by-step process for how to set things up — so you can use Sublime Text3 on your remote server, too.
Note: I’ll assume that you use the very same server setup that I use in all Data36 tutorials and video courses. If you don’t, go through this remote server for data science tutorial first.
RemoteSubl – the concept of using Sublime on a remote server
We will use the RemoteSubl package to connect our Sublime Text 3 editor to our remote data server. The concept is simple:
- You’ll open a regular
sshconnection to your remote server - You’ll use that connection — and a specific port — to send scripts back and forth between your remote server and local Sublime Text 3.
- You’ll edit your scripts in Sublime Text 3 on your computer.
- When you save the script in Sublime, it will send the updated version back to your remote server.
I know, it sounds complicated. So here’s a more visual explanation of the concept.
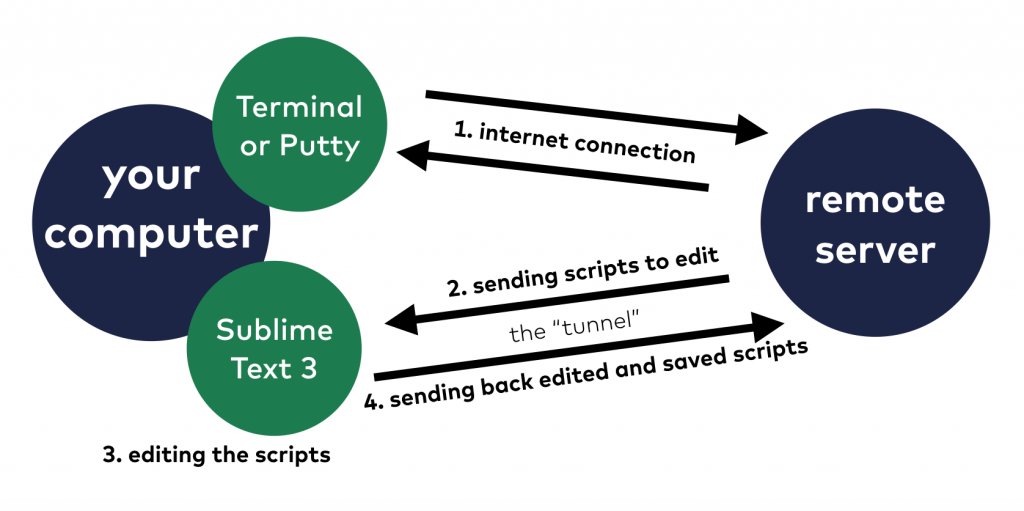
This is called tunnelling, by the way.
And by the end of this tutorial, when you set up everything properly, these four steps will happen seamlessly and automatically anyway.
The setup process
To set things up, you will need to install a few things to your remote server and to your computer, as well.
I assume here that you already have these:
- A remote data server with Python, SQL and bash.
- And Sublime Text 3 on your computer.
If you don’t, get these first.
Next, we will go through the instructions of the RemoteSubl github repository. And, as promised, I’ll dig a little deeper into a few parts. Here are the steps:
- Installing Package Control to Sublime Text 3. (On your local computer.)
- Installing the RemoteSubl package. (On your local computer.)
- Installing RemoteSubl to your remote server.
- Editing your first script with Sublime Text3 on your remote server.
STEP #1: Installing Package Control to Sublime Text 3
There are tons of extensions and additions for Sublime Text 3. These don’t come with the original setup of the program but you can easily add them later by using the Package Control feature.
If you have never used it before, you’ll have to install Package Control first.
For that, go to Top Menu >> Tools >> Command Palette!
A search bar will pop right up!
Start to type “package“…
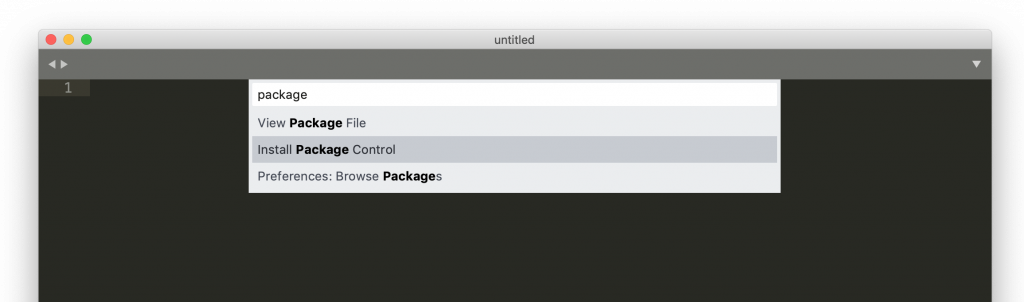
And choose Install Package Control!
You’ll get a quick notification that it has been installed.
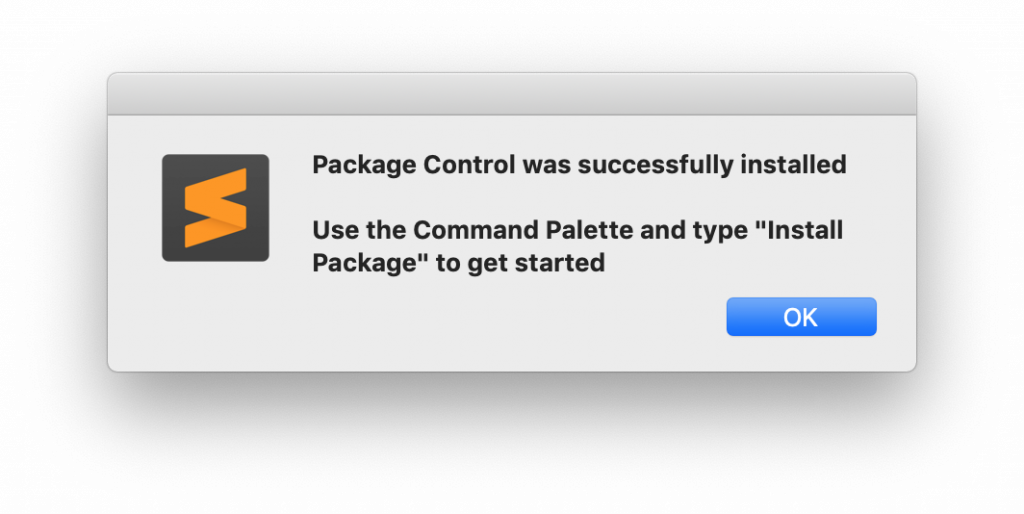
Great! Now you can add new packages to Sublime.
STEP #2: Installing the RemoteSubl package
Go back to:
Top Menu >> Tools >> Command Palette
And now start to type “install“.
Choose: Package Control: Install Package!
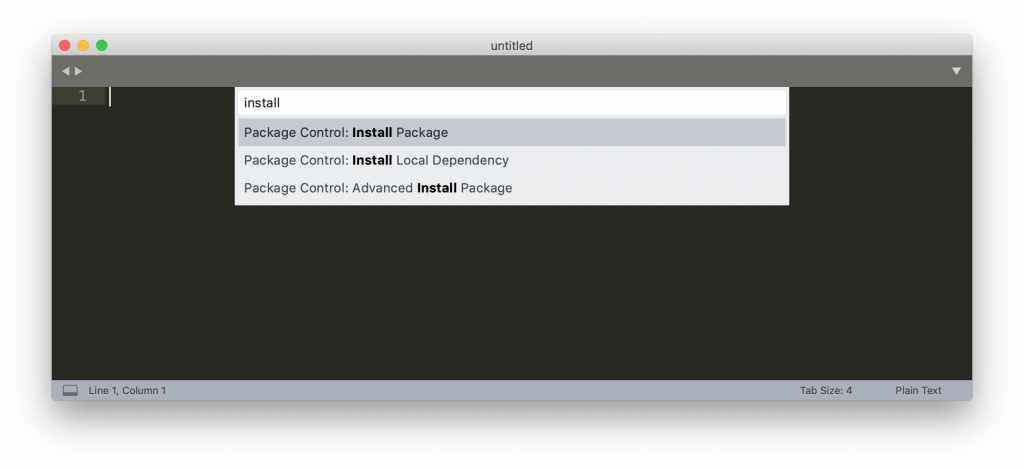
Here, lots and lots of available Sublime packages and extensions will be listed.
Type: RemoteSubl. Then click and install it!
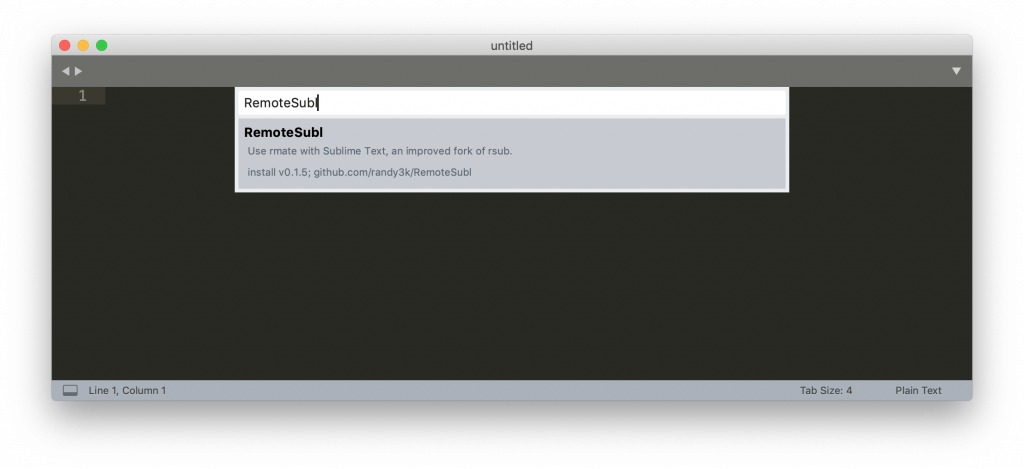
You’ll see only a tiny success message in the bottom left corner… and only for a few seconds.

But if you don’t get any error messages that’s good: you have installed RemoteSubl to your Sublime Text 3.
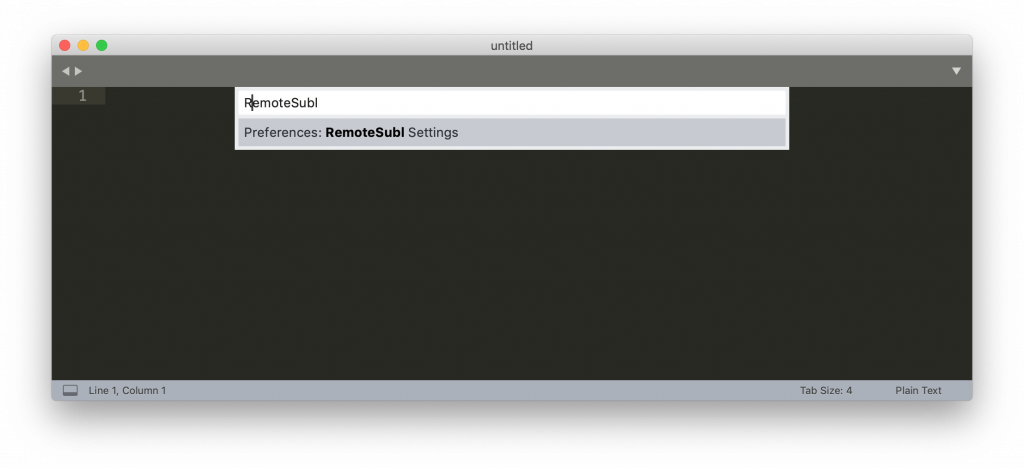
Note: If you want to, you can even double-check whether your RemoteSubl package is indeed successfully installed. Go back to Top Menu >> Tools >> Command Palette, then type “RemoteSubl”… If you see this “Preferences: RemoteSubl Settings”, the installation was successful! (You don’t have to click it.)
STEP #3: Installing RemoteSubl to your remote server
Okay, everything is set on your local computer. Now, install RemoteSubl to your remote server, too.
For that, log in to your server — depending on your operating system:
- Use Terminal/iTerm2 and the
sshcommand (if you are on a Mac)!
or - Use Putty (if you are on Windows)!
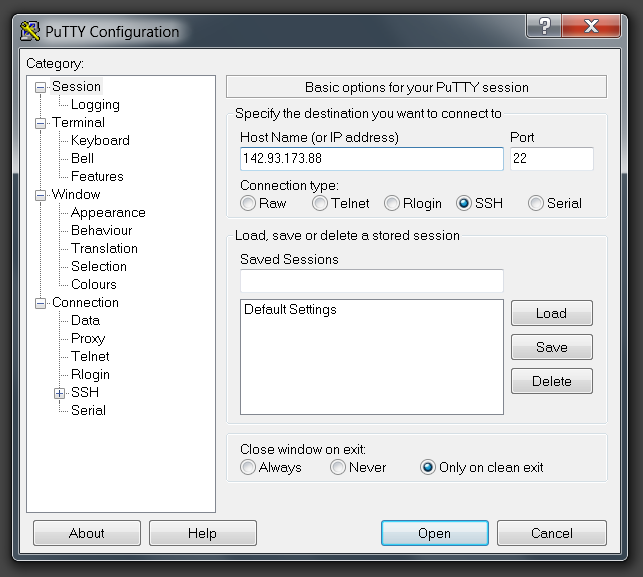
Note 1: Use your normal user and not the root user. E.g. I can log in with my user called dataguy — using the ssh dataguy@142.93.173.88 command on my Mac.
Note 2: If you have no idea how to login to your data server, you might want to go through this article again.
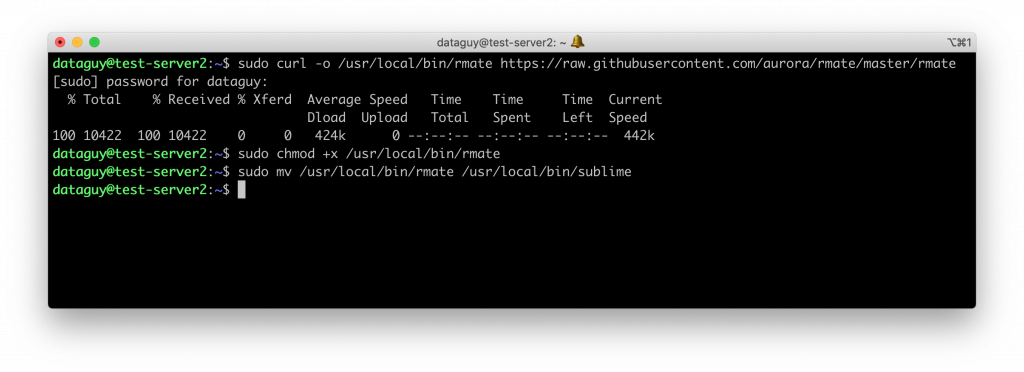
Once you are logged in to your server, run these 3 commands one by one:
sudo curl -o /usr/local/bin/rmate https://raw.githubusercontent.com/aurora/rmate/master/rmate
sudo chmod +x /usr/local/bin/rmate
sudo mv /usr/local/bin/rmate /usr/local/bin/sublime
(Note: the first two lines is actually only one line of code! Only your browser breaks it into 2 lines! See the screenshot below.)
Note: This is somewhat different from what you’ll see in the instructions of the RemoteSubl github repository. Why? Some of my students ran into permission issues — so I figured that I’d give you a more “bulletproof” solution here. 🙂 That’s why all the sudo commands at the beginning of the lines. Plus, in my version, you will be able to call Sublime Text from the command line with the sublime command and not with the rsubl command. The sublime keyword is easier to remember, right? 😉
Okay, all set, it’s time to try out your new remote server script editor!
STEP #4: Editing your first script with Sublime Text3 on your remote server.
Okeydoke!
You’ll have to log out from your data server — and then log back in by adding some special parameters.
This will be different for Mac/Ubuntu users and for Windows users.
If you are on a Mac or Ubuntu…
When you log back into your server, add an extra option to your ssh command.
Instead of the usual…
ssh [your_user_name]@[your_servers_ip_address]
…use…
ssh -R 52698:localhost:52698 [your_user_name]@[your_servers_ip_address]
E.g. for me, it will be:
ssh -R 52698:localhost:52698 tomi@142.93.173.88
This extra -R 52698:localhost:52698 option opened a tunnel using the 52698 port. This tunnel will be used for transferring files between your server and Sublime Text 3.
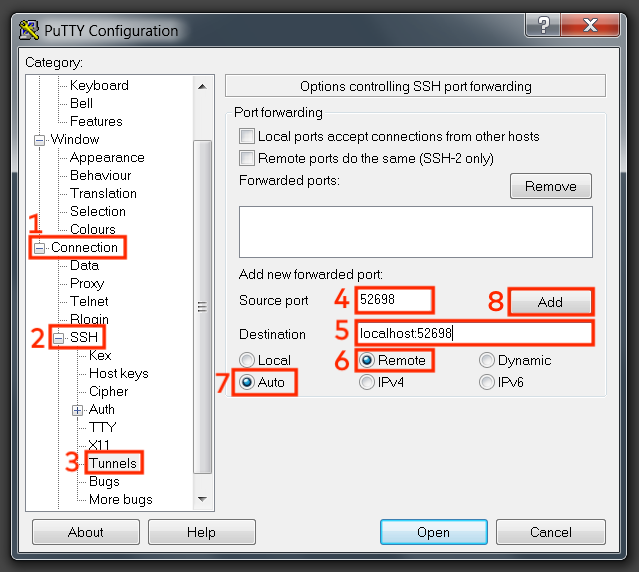
If you are using Windows…
… open Putty and type your connection details, as usual.
But before you actually connect to your remote server, on the sidebar, go to the Connection >> SSH >> Tunnels menu. And here:
- Type
52698to the Source port field! - Type
localhost:52698to the Destination field! - In the next line, set
LocaltoRemote. - And leave the next line on
Auto. - And eventually, click
Add.
Here’s a more visual guide:
After clicking the Add button, you should see this:

If yes, go back to the Session menu on the side bar, Save your configuration and Open the connection.
This additional setting opened a tunnel using the 52698 port. This tunnel will be used for transferring files between your server and Sublime Text 3.
For all Mac/Linux/Windows users…
Once you are logged in to your server, you can try out your freshly installed sublime command. Important: Make sure that the Sublime Text 3 application is running on your local computer!
Just type:
sublime test.csv
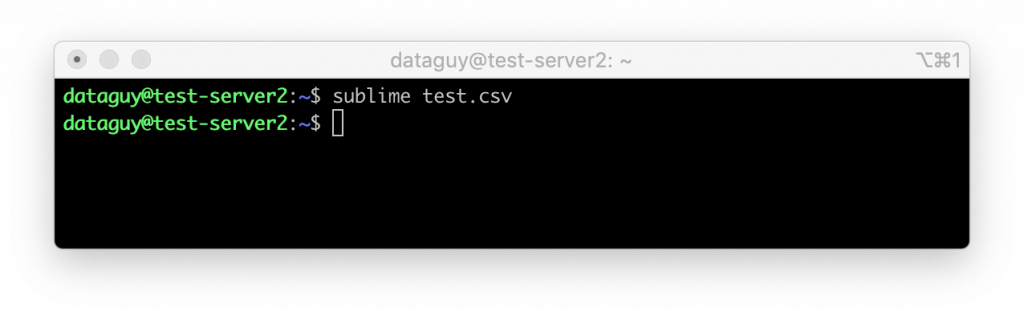
And magic happens, Sublime Text 3 on your computer opens the test.csv file from your remote server:
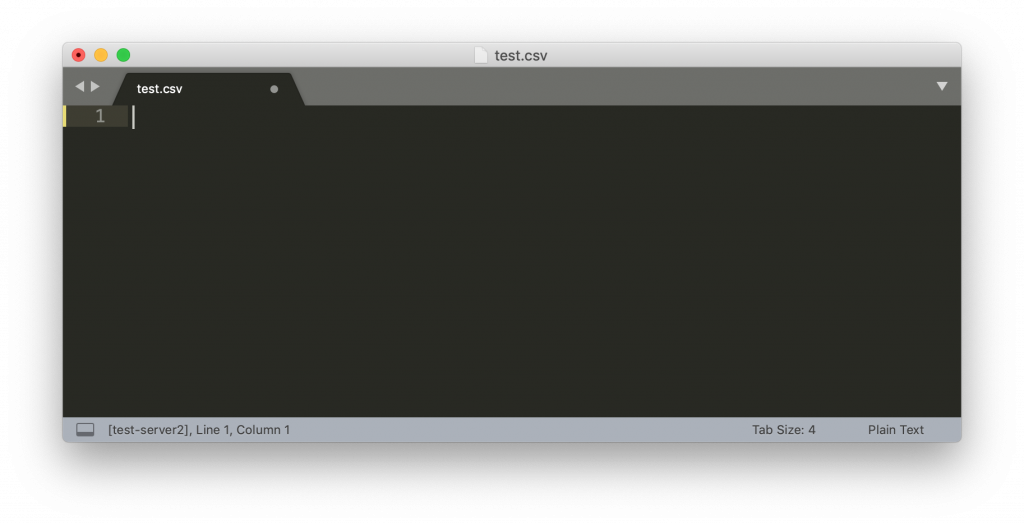
I type in: "Hello, this is a test!" — and then save my file.
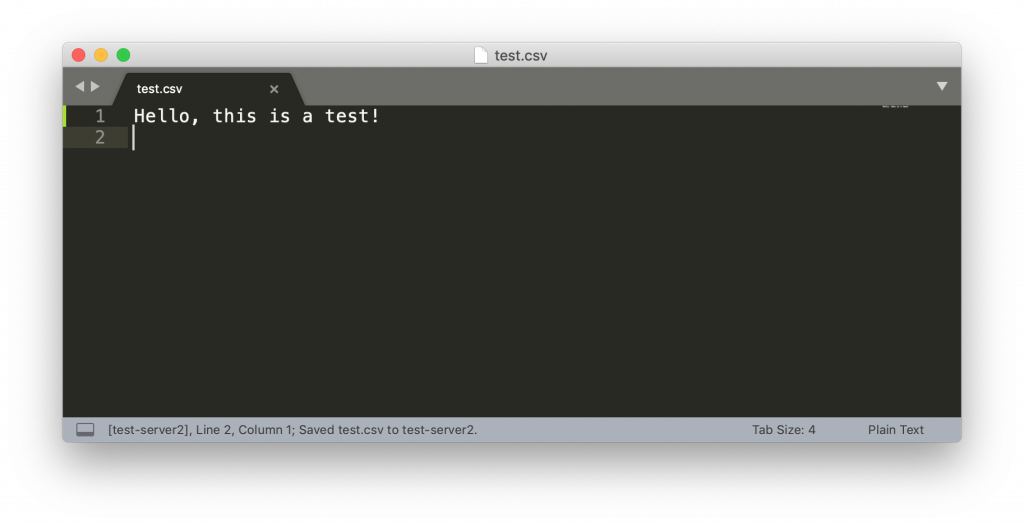
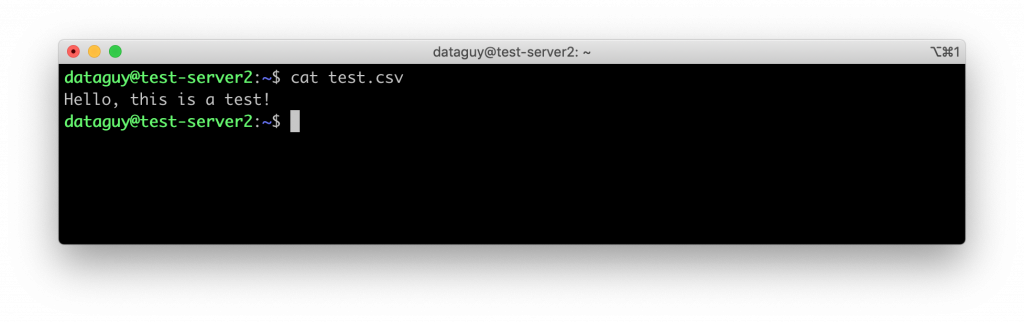
And then I go back to my Terminal and cat test.csv. And this is what I get:
Ta-da, from now on, you can use Sublime Text 3 on your remote server!
And of course the same way, you can easily edit not just .csv files but .py, .sql and .sh scripts, too.
Disclaimers
When using Sublime Text 3 via the RemoteSubl package on your remote server, watch out for two important things:
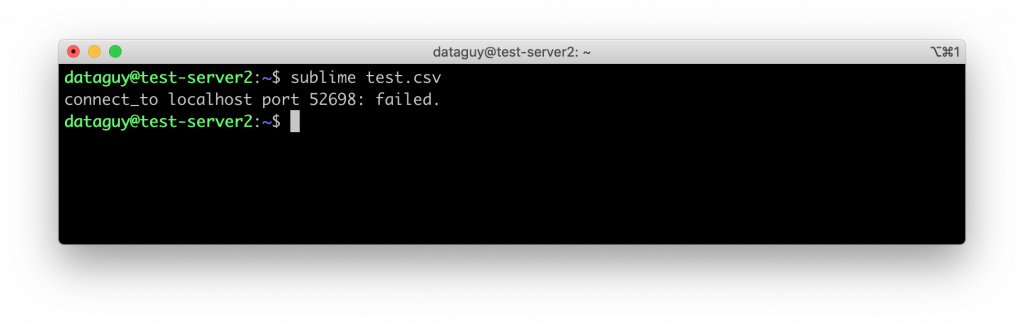
1. In order to open anything with the sublime command from the command line, the Sublime Text 3 application has to be opened on your local computer. Otherwise, you’ll get this error message: connect_to localhost port 52698: failed.
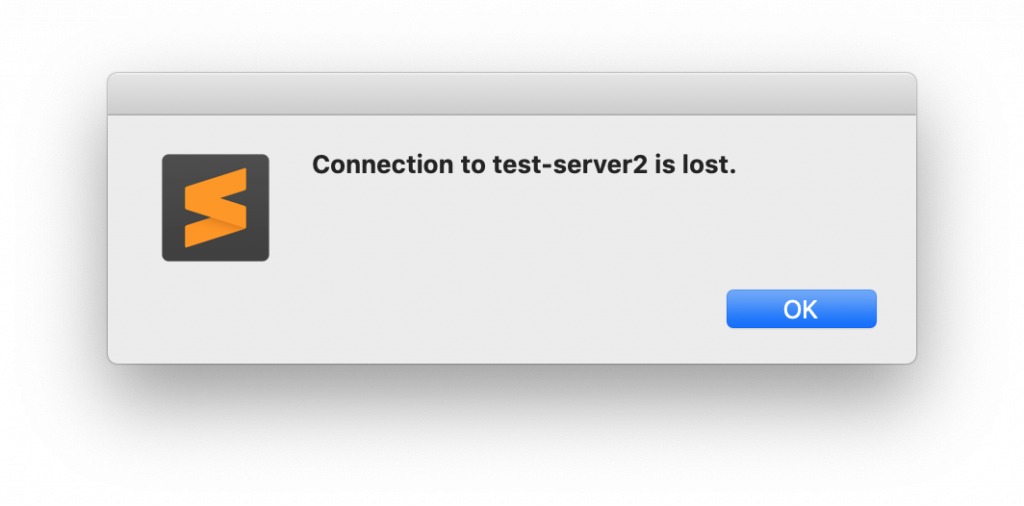
2. This method works only as long as the connection (the “tunnel”) between your server and local computer is open. If you close the connection and you didn’t save your script, Sublime Text 3 will return an error message and your script can’t be saved any more.
Conclusion
Sublime Text 3 is an awesome script editor! Give it a try — and I promise, you won’t regret it. Now you know how to use it with a remote server, too, so you can take advantage of it in every kind of data project.
- If you want to learn more about how to become a data scientist, take my 50-minute video course: How to Become a Data Scientist. (It’s free!)
- Also check out my 6-week online course: The Junior Data Scientist’s First Month video course.
Cheers,
Tomi Mester
Cheers,
Tomi Mester