
Here are two typical errors that students ran into during the server setup. If you encounter one of these problems, no worries: there is a solution! Here they are:
- Jupyter Notebook runs in Terminal but doesn’t open in the browser
- SQL Workbench / pgadmin4 can’t connect
1) Jupyter Notebook runs in Terminal but doesn’t open in the browser
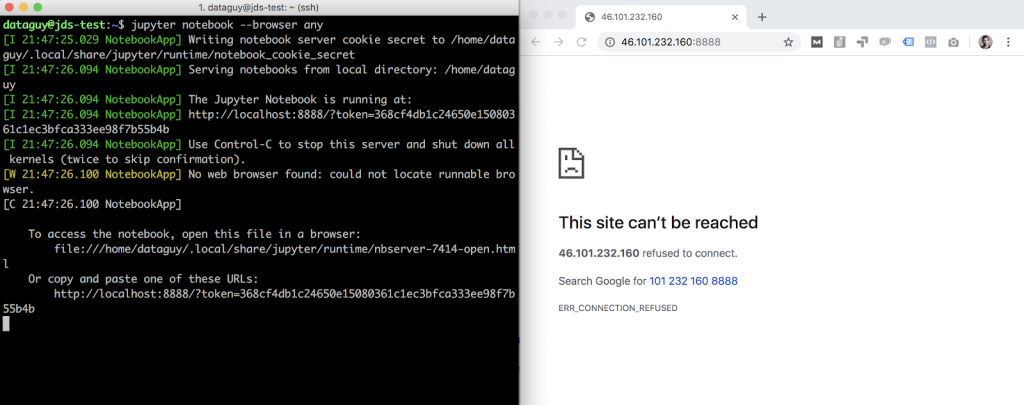
If you see this, there is a 99% chance that the problem is with your Jupyter config file.
Remember? You generated a config file for Jupyter on your server by running this command:
jupyter notebook --generate-config
To debug the issue, we want to take a look at that file to figure out what’s missing.
You can do that by running this one line in Terminal:
cat /home/[your_username]/.jupyter/jupyter_notebook_config.py
(The [your_username] part should be replaced with your username, so in my case it will be:
cat /home/dataguy/.jupyter/jupyter_notebook_config.py)
What do you see?
The last six lines should be:

The important part is the last two lines. (The lines starting with # are ignored anyway.)
When you went through the tutorial, you had to add these two lines to the config file by running these two commands:
echo "c.NotebookApp.ip = '*'" >> /home/[your_username]/.jupyter/jupyter_notebook_config.py
echo "c.NotebookApp.allow_remote_access = True" >> /home/[your_username]/.jupyter/jupyter_notebook_config.py
If they are not there at all and you see this on your screen…

That means that you either forgot to run the commands above, or mistyped something in them.
(Most likely you forgot to change the [your_username] part to your actual username.
E.g. instead of this:echo "c.NotebookApp.ip = '*'" >> /home/[your_username]/.jupyter/jupyter_notebook_config.py
…for me it should be this:echo "c.NotebookApp.ip = '*'" >> /home/dataguy/.jupyter/jupyter_notebook_config.py)
If that’s the problem, simply run (or re-run) these two commands, double-check your config file, and you are good to go.
If the lines are there but you mistyped something in them:

OR if you see the expected last two lines multiple times (some of them mistyped):
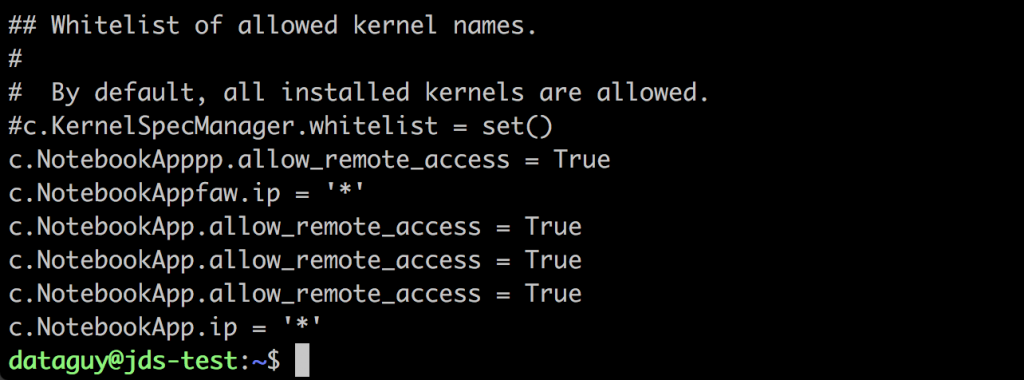
…well, first of all, don’t worry, this is one of the most typical mistakes! Other participants did this too.
Secondly, unfortunately, with your current knowledge, it’s really difficult to fix it yourself, so you can do two things:
1) Reach out to me (Tomi) via email and I will go ahead and fix the issue for you.
If you prefer this one, please create a new user for me on your server (make sure that you don’t store any confidential data there right now, though ;-)) by typing these two commands:
sudo adduser tomisudo usermod -aG sudo tomi
Once that’s done, send me an email, containing the username and password you created for me on your server and your server’s IP address. With that, I’ll be able to login and fix the issue for you — and then I’ll send you a follow-up email.
2) The alternative is something that students usually don’t like — regardless, I encourage you to go with this one because from a learning perspective that’s the most useful for you.
This is: destroy your current server and try to set up a new one from scratch. If you choose this option, put an extra emphasis on making sure that you avoid any typos and that you follow the tutorial very thoroughly.
Remember, a single mistyped character can cause an issue. But if you type in everything accurately, the server will work.
2) SQL Workbench / pgadmin4 can’t connect
If you see one of these error messages when you try to connect to your data server in SQL Workbench (or in pgadmin4)…
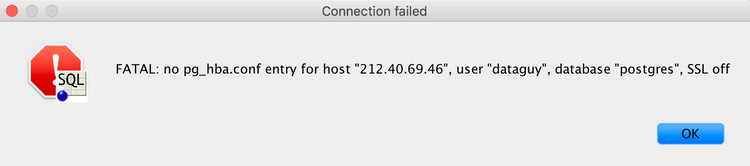
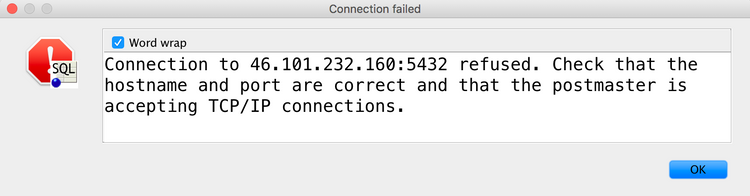
…well, first of all: no worries! We will fix it soon!
These errors mean that you:
- either forgot to run these lines from the tutorial:
echo "listen_addresses = '*'" >> /etc/postgresql/*/main/postgresql.confecho 'host all all 0.0.0.0/0 md5' >> /etc/postgresql/*/main/pg_hba.conf
- or, you ran them but made a typo.
STEP #1
Let’s figure out what’s wrong! First, go back to root user. Type this:
sudo -i -u root
And now type:
history
This prints all the commands you typed in so far as the root user… You’ll see something like this in the first few lines of your command history:
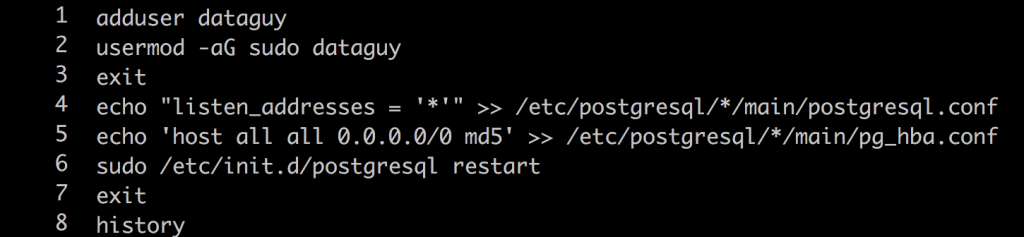
Again, you are looking for these two commands:
echo "listen_addresses = '*'" >> /etc/postgresql/*/main/postgresql.confecho 'host all all 0.0.0.0/0 md5' >> /etc/postgresql/*/main/pg_hba.conf
STEP #2
If either one is missing, just rerun it!
If both are missing, rerun both!
If you see them and you found that you made a typo in one (or both) of them, then… well, first of all, don’t worry, this is one of the most typical mistakes; other participants made it too.
Secondly, unfortunately, with your current knowledge, it’s really difficult to fix it yourself, so you can do two things:
1) Reach out to me (Tomi) via email and I will go ahead and fix the issue for you.
If you prefer this one, please create a new user for me on your server (make sure that you don’t store any confidential data there right now, though ;-)) by typing these two commands:
sudo adduser tomisudo usermod -aG sudo tomi
Once that’s done, send me an email, containing the username and password you created for me on your server and your server’s IP address. With that, I’ll be able to login and fix the issue for you — and then I’ll send you a follow-up email.
2) The alternative is something that students usually don’t like — regardless, I encourage you to go with this one because from a learning perspective that’s the most useful for you.
This is: destroy your current server and try to set up a new one from scratch. If you choose this option, put an extra emphasis on making sure that you avoid any typos and that you follow the tutorial very thoroughly.
Remember, a single mistyped character can cause an issue. But if you type in everything accurately, the server will work.
PS. If these weren’t your issue, send me an email and I’ll help you!